If you have ever heard a builder or designer mention a "wet area renovation" and nodded along while quietly wondering what it actually means, you are not alone. The term is used frequently in renovation planning, yet it is often confused with wet rooms, full bathroom remodels, or general refurbishment work. Understanding what does wet area renovation mean gives you the clarity to plan your project accurately, budget realistically, and avoid costly decisions based on the wrong assumptions. This guide breaks down the definition, the process, the differences, and the practical implications for your home.
Table of Contents
- Key takeaways
- What is wet area renovation, exactly?
- The wet area renovation process, step by step
- Wet area renovation vs wet rooms and full remodels
- Benefits of wet area renovation
- Common challenges and expert planning tips
- My take on wet area renovations
- Plan your wet area renovation with House A-Z
- FAQ
Key takeaways
| Point | Details |
|---|---|
| Wet area renovation defined | It targets only water-prone surfaces like showers, tubs, and adjacent walls rather than the whole room. |
| Waterproofing is non-negotiable | Proper tanking membranes prevent leaks and structural damage that can cost far more to fix later. |
| Not the same as a wet room | Wet rooms waterproof the entire floor area; wet area renovations focus on specific zones only. |
| Costs and timelines vary | Targeted renovations can complete in days; full remodels take weeks and carry higher budgets. |
| Plan for contingency | Set aside 10 to 20 per cent of your budget for hidden issues uncovered during demolition. |
What is wet area renovation, exactly?
A wet area renovation is a targeted project that focuses specifically on the surfaces and structures most exposed to water in your home. Rather than redesigning an entire bathroom, kitchen, or laundry room from scratch, it zeroes in on the zones where water contact is constant: shower enclosures, bath surrounds, the floor directly beneath and around these fixtures, and the walls immediately adjacent to them.
This distinction matters more than most homeowners realise. A wet area renovation does not necessarily touch your cabinetry, ceiling, or the dry zones of the room. It is surgical in scope. Typical spaces where wet area renovations occur include:
- Bathrooms: shower recesses, bathtub surrounds, floor tiles within the shower or bath zone
- Kitchens: the splash zone around sinks and dishwashers, particularly in wet kitchens designed for heavy cooking and washing
- Laundry rooms: floors and wall areas surrounding washing machines, tubs, and utility sinks
The defining technical requirement of any wet area renovation is waterproofing. Without it, you have a cosmetic upgrade, not a genuine renovation. Two common waterproofing methods appear in most wet area projects. The first is tanking, which involves applying a liquid membrane directly to the substrate before tiles or finishes are laid. The second uses sheet membranes bonded to the surface, particularly around seams and penetrations where water entry is most likely.
Pro Tip: Do not confuse damp-proofing with waterproofing. Damp-proofing manages moisture vapour and is used in foundations or below-grade walls. Waterproofing resists full water pressure and is the only appropriate method for shower recesses, bath zones, and laundry areas.
Because wet area work involves plumbing access points, substrate preparation, and membrane installation, it typically requires qualified tradespeople. DIY enthusiasts can handle finishing work such as tiling in some circumstances, but the waterproofing stage should never be treated as a weekend project unless you have professional-level experience.
The wet area renovation process, step by step
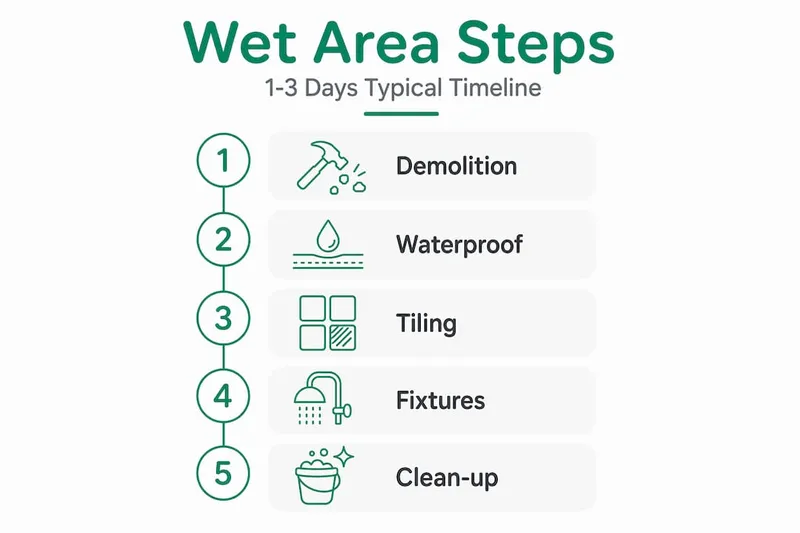
Understanding the wet area renovation process from start to finish helps you manage timelines, communicate clearly with contractors, and spot when something is being skipped. Here is what a standard project looks like:
- Assessment and scoping: A qualified tradesperson inspects the existing wet zone for water damage, substrate condition, plumbing layout, and waterproofing failures. This stage determines whether you have a straightforward renovation or underlying structural issues to address first.
- Design and planning: You select new tile formats, fixture positions, drainage placement, and surface finishes. Retaining your existing plumbing layout at this stage is one of the most effective cost-saving practices you can make. Moving supply or drainage lines adds weeks and significant expense.
- Demolition: Old tiles, grout, and worn substrates are removed. This is where hidden problems appear, including rot, mould behind tiles, or cracked concrete. Budget for surprises here.
- Plumbing and electrical rough-in: Any required plumbing adjustments, new waste outlets, or electrical connections for heated floors or extraction fans are completed before surfaces are closed up.
- Waterproofing (tanking): The substrate is prepared and the membrane is applied. Testing water tightness before tiling is critical. A flood test, where the drain is plugged and the area is filled with water for 24 hours, confirms the membrane is intact before any finish material goes on top.
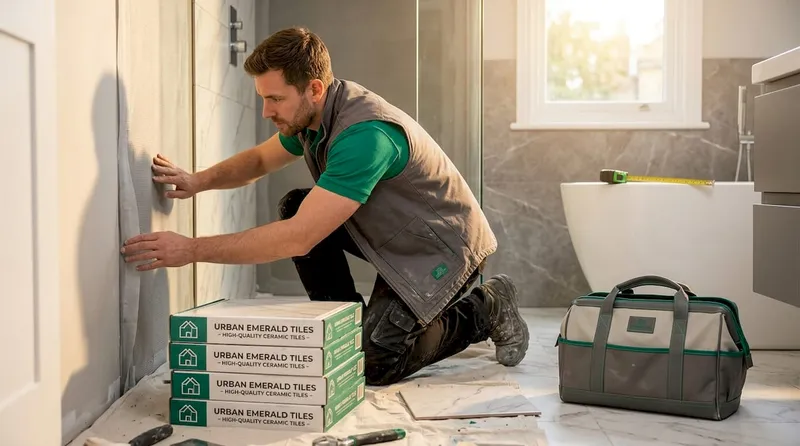
- Tiling and surfacing: Tiles, stone, or specialist wet-area panels are laid onto the cured membrane. Correct floor slope directing water toward the drain is built into the bed at this stage. Even a slight slope in the wrong direction causes pooling and eventual waterproofing failure.
- Finishing and fixture installation: Shower screens, tapware, fixtures, and grout sealing complete the project.
A focused wet area remodel with minimal structural changes can be completed in as little as one to three days, compared to several weeks for a full bathroom renovation. Cost ranges vary widely based on materials, labour rates, and complexity, but targeted projects are generally more budget-friendly than full remodels.
Pro Tip: Never allow tiling to begin until the waterproofing membrane has fully cured and passed a water tightness test. Skipping this step is the single most common cause of wet area renovation failure, often resulting in expensive structural repairs within two to three years.
Wet area renovation vs wet rooms and full remodels
These three terms describe different scopes of work, and mixing them up leads to budget miscalculations and unrealistic expectations.
| Approach | Scope | Approximate timeline | Relative cost | Best suited for |
|---|---|---|---|---|
| Wet area renovation | Water-exposed surfaces only | 1 to 5 days | Lower | Targeted refresh, budget-conscious projects |
| Full bathroom remodel | Entire room including layout | 3 to 6 weeks | Higher | Complete redesign or layout change |
| Wet room | Entire floor and walls waterproofed | 2 to 4 weeks | Moderate to high | Accessibility needs, open-plan shower design |
The wet room definition describes a bathroom where the entire floor area is waterproofed, meaning the shower operates without a tray or enclosure and water drains from any point on the floor. It is a more intensive construction project that requires fully waterproofing walls and floors throughout the room, not just in one zone.
A full bathroom remodel goes further still, potentially touching the layout, cabinetry, ceiling, lighting, and all fixtures across the room.
So which approach suits you?
- Wet area renovation: Your existing layout works, your plumbing is sound, and you need to replace worn or failing wet surfaces. You want results without weeks of disruption.
- Wet room: You want open, accessible shower space without a threshold, or you have a family member with mobility considerations. You are prepared for a more involved project.
- Full remodel: You want to reconfigure the room entirely or the existing infrastructure is beyond targeted repair.
One practical middle ground worth knowing: curbless showers deliver many of the accessibility and aesthetic benefits of a wet room without requiring the entire bathroom floor to be waterproofed. This option sits within the scope of a wet area renovation and costs considerably less than a full wet room conversion.
Benefits of wet area renovation
Choosing a wet area renovation over more extensive work carries several genuine advantages, beyond simply costing less.
- Reduced water damage risk: Replacing failed or ageing waterproofing membranes protects the structural substrate beneath your tiles. Undetected leaks behind shower walls are one of the most expensive home repairs a property owner can face.
- Improved hygiene and easier cleaning: Renovating water-prone surfaces replaces grout lines that harbour mould, cracked tiles that trap bacteria, and sealants that have broken down over time. Modern large-format tiles and grout-free wall panels dramatically reduce cleaning effort.
- Accessibility gains without full construction: Adding a curbless shower or a low-profile drain within the wet zone improves bathroom accessibility for elderly family members or anyone with limited mobility, without requiring a whole-room rebuild.
- Minimal disruption: Because the scope is contained, you are not living without a functioning bathroom for weeks. Many wet area renovations leave at least partial access to the room throughout the project.
- Property value: Buyers and valuers notice updated wet areas. A clean, well-waterproofed shower zone signals that the home has been maintained properly, which matters during inspections and appraisals.
- Material durability: Modern wet area materials, including porcelain tiles, solid surface panels, and vinyl wet-area sheeting, are specifically engineered for prolonged moisture exposure and outperform older ceramic or painted surfaces significantly.
Common challenges and expert planning tips
Even well-planned wet area renovations encounter complications. The most frequent is discovering damage during demolition that was invisible beforehand: rotted timber framing behind shower walls, cracked concrete substrates, or old plumbing fittings that are no longer up to code.
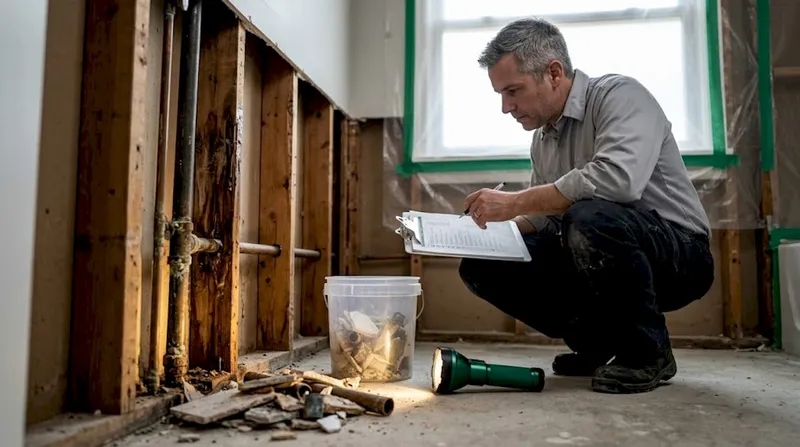
Labour costs dominate the overall budget in most wet area projects, so surprises during demolition translate directly to cost increases. Allocate a contingency of 10 to 20 per cent of your project budget before work starts. This is not pessimism; it is standard practice for any renovation involving demolition of surfaces that conceal plumbing and structure.
A few practical guidelines to carry into your planning:
- Hire the right waterproofing contractor: Selecting a qualified contractor with specific experience in wet area membrane installation is worth paying a premium for. Poor workmanship at this stage invalidates everything else.
- Clarify wet and dry zones during design: Planning wet and dry zones within your bathroom or laundry before work starts reduces the risk of water migration into areas that are not waterproofed.
- Do not rush the membrane cure time: Manufacturers specify minimum cure times before tiling can begin. Compressing this timeline to save a day is one of the most expensive shortcuts a project can take.
- Know where your DIY limits are: Tile selection, fixture choices, and finishing touches are reasonable DIY contributions. Waterproofing membrane application and any plumbing rough-in work should involve licensed tradespeople in almost all cases.
Pro Tip: Ask your waterproofing contractor to document the flood test with photographs and a written record. This protects you if a warranty dispute arises later and gives you evidence of due diligence during the project.
My take on wet area renovations
I have seen a lot of bathroom projects go sideways, and almost every failure traces back to one of two things: either the homeowner did not understand what they were actually approving, or the waterproofing was treated as an afterthought.
What I have found is that homeowners hear "wet area renovation" and assume it means something close to a cosmetic refresh. New tiles, maybe a new showerhead. The reality is that underneath those tiles, there is a membrane system that either works or does not. If it does not, you are looking at mould, rot, and potentially structural damage within a few years regardless of how beautiful the surface looks.
My honest advice: spend your contingency budget if you do not use it on surprises, spend it on better membrane specification and a proper flood test. The aesthetics can be modest and still look great. The waterproofing cannot be modest.
I also think curbless showers are one of the most underrated decisions you can make during a wet area renovation. They are not just accessible. They are easier to clean, they make small bathrooms feel larger, and they cost less than converting to a full wet room. If you are already opening up the wet zone, it is worth the conversation with your contractor.
Finally, I believe the clearest signal of a well-planned renovation is a project where the wet and dry zones are defined on paper before anything is demolished. That single step prevents more problems than any amount of quality materials can fix after the fact.
— Azai
FAQ
What does wet area renovation mean?
A wet area renovation is a targeted project that replaces or repairs only the water-exposed surfaces in a room, such as shower recesses, bath surrounds, and adjacent walls and floors, rather than remodelling the entire space.
How long does a wet area renovation take?
A focused wet area renovation with no structural changes can be completed in as little as one to three days. More complex projects involving plumbing adjustments or significant substrate repairs may take up to one to two weeks.
What is the difference between a wet area renovation and a wet room?
A wet area renovation addresses specific water-prone zones within a room. A wet room, by contrast, waterproofs the entire floor and wall surfaces throughout the bathroom, allowing the shower to operate without a tray or enclosure.
Is waterproofing really necessary for a wet area renovation?
Yes. Waterproofing is the most critical technical component of any wet area renovation. Without a properly installed and tested membrane, water infiltrates the substrate and causes mould, rot, and structural damage that costs far more to repair than the original renovation.
Can I do a wet area renovation myself?
Some finishing tasks such as tiling are within reach for confident DIY enthusiasts. However, waterproofing membrane installation and any plumbing work should be carried out by licensed tradespeople, as errors at these stages are difficult and expensive to correct once surfaces are closed up.