The fastest way to quiet a noisy room is to seal every air gap, upgrade the door, and add mass or damping to whichever wall, floor or window is letting the most sound through. Do those three things together and you can realistically shift a wall assembly from an STC (Sound Transmission Class) of around 33 up to 50 or higher, according to D and G Flooring's soundproofing guide. You don't need a contractor to start.
The highest-return moves, in order:
- Fit a door sweep and weatherstripping (adds a noticeable improvement in STC) [lowes.com]
- Run acoustic sealant round skirting boards, outlets and window frames
- Add a window insert or hang heavy, lined curtains
- Lay a thick rug with a dense pad over hard flooring
A door sweep and sealant kit costs under £50, making it a low-cost soundproofing step. A mid-range upgrade with mass-loaded vinyl or extra drywall runs into the hundreds. Full wall decoupling with a contractor can reach several thousand pounds per room, per the staged cost breakdown from D and G Flooring. Start cheap, measure the difference, then decide if you need to go further.
Key Takeaways
Sealing gaps, upgrading the door, and adding mass or damping to the weakest surface are the most effective and cost-efficient ways to reduce room noise.
| Point | Details |
|---|---|
| Start with sealing and doors | Acoustic caulk and a door sweep can add 5–8 STC points for under £50. |
| Know the difference | Acoustic panels absorb sound inside a room (NRC); they don't block sound between rooms (STC). |
| Decoupling matters most for bass | Resilient channel or double-stud walls add 6–10+ STC points and are the only real fix for low-frequency noise. |
| Stage the project | Move from sealing to MLV/Green Glue to full decoupling as budget and disruption tolerance allow. |
| Test as you go | Walk the room with steady noise playing after each stage to confirm real improvement. |
Table of Contents
- How sound travels and how to find your weak point
- Cheap fixes for renters that actually work
- What actually works on walls
- Fixing floors and ceilings
- Doors and windows: your fastest real gains
- Which materials actually block or absorb sound?
- A staged DIY plan you can actually follow
- When to call in a professional
- Planning and budgeting before you start
- Mistakes that waste your money
- The gap between soundproofing advice and soundproofing results
- Sources
- FAQ
How sound travels and how to find your weak point
Sound reaches you two ways. Airborne noise, like a barking dog or a television, travels as pressure waves through air and gaps. Impact noise, like footsteps or a dropped dumbbell, travels through the structure itself as vibration. Effective soundproofing rests on four principles: mass (thicker, heavier barriers block more sound), decoupling (separating structural layers so vibration can't cross directly), damping (absorbing vibrational energy, often with a viscoelastic compound), and absorption (softening reflected sound inside the room). D and G Flooring notes that combining all four is what actually pushes STC ratings up rather than any single fix alone.
Before spending a penny, find where noise is actually getting in. Weak points usually rank in this order:
- Hollow-core doors and the gaps around them
- Unsealed skirting boards, outlets and pipe penetrations
- Single-glazed or poorly sealed windows
- Shared floors and ceilings
- Ductwork and vents that run between rooms
Run a quick diagnostic: play a steady tone or white noise from a phone speaker in the noisy room, then walk the perimeter of the adjoining space with your hand near skirting boards, outlets and the door frame. Close the door and note how much the sound drops. A big drop means the door is your priority; barely any change points to gaps, windows, or a shared wall or ceiling as the real culprit.
Cheap fixes for renters that actually work
You don't need permission from a landlord to seal a gap or hang a curtain, and none of the steps below involve cutting into a wall. Work through them in this order for the best pound-for-pound return.
- Seal every gap with acoustic caulk around skirting boards, light switches and pipe penetrations. This is unglamorous but essential. Diy points out that even a well-built wall loses much of its performance if gaps are left open, so this step protects the value of everything you do next.
- Fit a door sweep and weatherstripping. This alone typically adds 5–8 STC points to a door, according to Lowe's soundproofing guide, and takes under 20 minutes with a screwdriver.
- Add outlet gaskets behind switch plates on shared walls. They cost a few pounds for a multipack.
- Hang heavy, lined curtains over windows, ideally floor-to-ceiling and wider than the frame so they overlap the wall. Combine this with thoughtful window treatment choices if you're also trying to manage light and privacy.
- Fit a removable window insert or acrylic secondary glazing panel that clips into the frame without drilling. These typically deliver a noticeable STC improvement over single glazing alone and lift out entirely when you move.
- Lay a thick rug with a rebond pad underneath on hard flooring, plus a runner in hallways.
Because a 10 dB reduction in noise is perceived by most people as roughly halving the loudness, according to MDM Music Studios, even these modest, fully reversible upgrades can feel like a dramatic change day to day. Budget under £100 for gap sealing and a door sweep, £50 to £150 for a decent window insert, and £50 to £200 for a good rug and pad, depending on room size.
What actually works on walls
A wall's soundproofing potential comes down to mass, damping and decoupling working together, and each one solves a different part of the problem. Adding mass alone (a second layer of drywall) helps with mid and high frequencies but does little for the thump of bass or footsteps. Decoupling, which physically separates the two wall faces so vibration can't travel straight across, is what actually tackles low-frequency noise. It's the step most basic DIY guides skip because it's more involved.
Common wall treatments, roughly in order of effort:
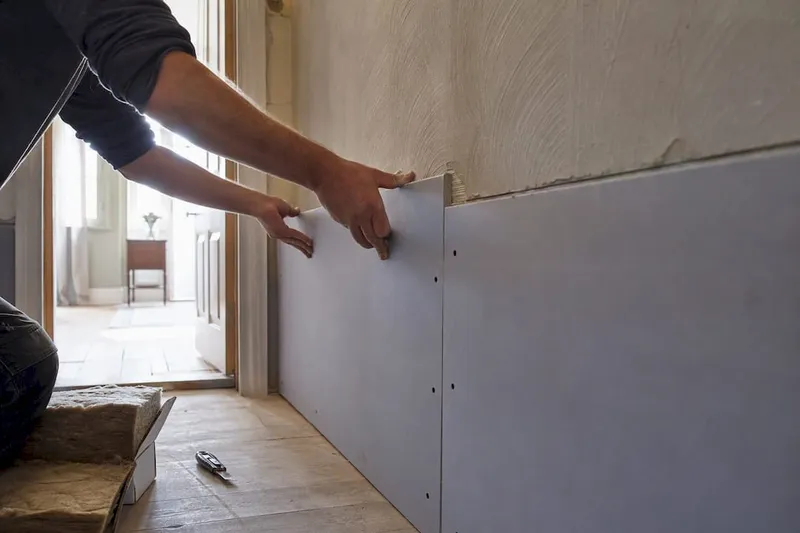
- Extra layer of 5/8-inch drywall over the existing wall for added mass
- Green Glue or a similar viscoelastic damping compound sandwiched between two layers of drywall
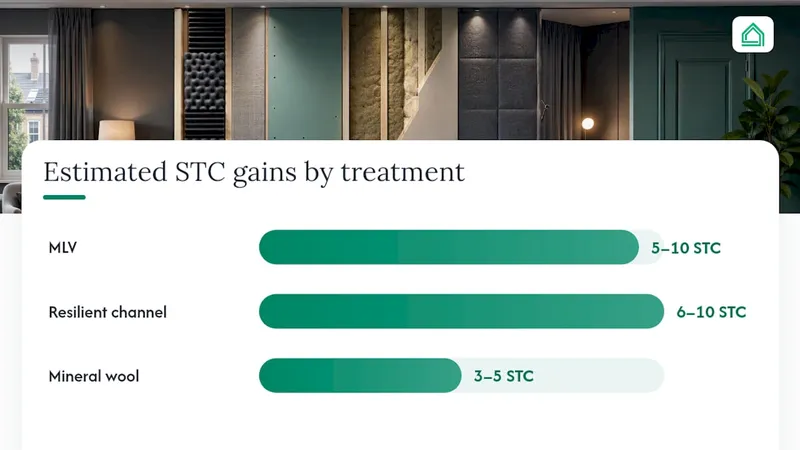
- Mass-loaded vinyl (MLV), a dense, thin membrane that adds roughly 5–10 STC points when installed correctly, according to DIY Projects for Home's soundproofing guide, and works well where you can't afford to lose much floor space
- Resilient channel, which decouples drywall from the studs and typically adds 6–10 STC points per HardHatCalc's wall soundproofing calculator
- Staggered-stud or double-stud walls, which decouple more thoroughly but require rebuilding the wall cavity
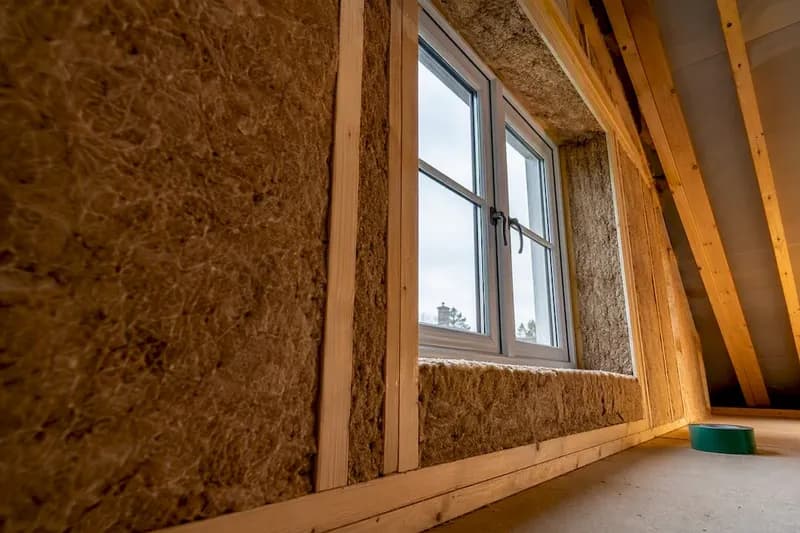
- Mineral wool insulation, such as Rockwool Safe'n'Sound, packed into the cavity, adding around 3–5 STC points over an empty cavity while also improving fire resistance, according to Rockwool's acoustic wall assemblies guide
Two mistakes ruin these upgrades. Screwing resilient channel down too tightly, or letting a screw hit the stud behind it, "short circuits" the decoupling and cancels most of the benefit. MLV that isn't continuous, with taped and sealed seams, loses much of its effectiveness through the gaps, a point HardHatCalc stresses for any MLV installation.
| Wall treatment | Effectiveness | Disruption | Best for |
|---|---|---|---|
| Extra drywall layer | Moderate (mass only) | Low, DIY-friendly | Mid/high-frequency airborne noise |
| MLV behind drywall | 5–10 STC points | Moderate | Space-limited rooms |
| Green Glue + drywall | High (mass + damping) | Moderate | General airborne noise reduction |
| Resilient channel | 6–10 STC points | High, needs stud access | Low-frequency and structural noise |
| Mineral wool cavity fill | 3–5 STC points | Moderate | Combining with any of the above |
Fixing floors and ceilings
Floors and ceilings need different tactics depending on whether you're stopping footsteps travelling down or voices travelling up.
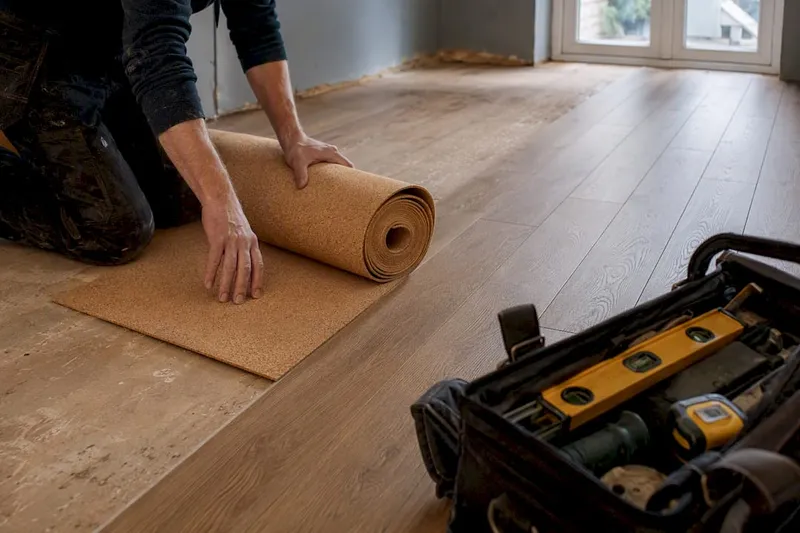
For floors, a cork or rubber acoustic underlay under laminate or engineered wood cuts impact noise significantly, and it's worth checking how flooring choices affect the flow and feel of a room before committing. A dense carpet with a thick rebond pad does the same job for a fraction of the cost and effort. For serious projects, a floating subfloor, essentially a decoupled layer sitting on isolation pads, gives the biggest gain but is a proper renovation job.
Ceilings mirror walls: resilient channel or hat channel isolates the ceiling drywall from the joists above, and Green Glue sandwiched between two layers of drywall adds damping on top of that. If you have a drop ceiling, dedicated acoustic ceiling tiles are a quick, tool-light swap.
Worth knowing: floors and ceilings are usually rated by Impact Insulation Class (IIC) rather than STC, because footfall behaves differently from a voice through a wall. A high STC wall assembly won't necessarily stop impact noise, which is why rugs, thicker pads and simply moving furniture off bare floor remain some of the best value quick wins going.
Doors and windows: your fastest real gains
Doors and windows leak more sound per square metre than almost anything else in a room, which is exactly why fixing them delivers such a fast, noticeable result.
For doors: swap a hollow-core door for a solid-core one if you own the property, since hollow doors are little more than thin skins over air. Fit an automatic door bottom that drops a seal into place when the door closes, add perimeter acoustic gaskets around the frame, and finish with an acoustic threshold. Industry guidance on noise-reducing interior door options points to full acoustic door assemblies, factory-sealed units with dense cores, as the step up when a retrofit door still isn't quiet enough.
For windows: heavy, lined curtains are the cheapest fix and surprisingly effective for a soft furnishing. Interior storm inserts or laminated/double glazing go further, and window position itself affects how much external noise a room picks up in the first place, something worth weighing if you're planning window placement during a renovation. Seal every gap around the frame with acoustic sealant.

Renters can get most of this benefit without permanent changes: removable weatherstripping, clip-in acrylic inserts, and door draught seals that peel off cleanly at move-out.
Which materials actually block or absorb sound?
Two ratings matter here, and confusing them is the single most common soundproofing mistake. STC (Sound Transmission Class) measures how much airborne sound a material blocks. NRC (Noise Reduction Coefficient) measures how much sound a material absorbs inside the room. Acoustic foam and decorative panels improve NRC, meaning they cut echo and make a room sound better to be in, but The Design Confidential is blunt about their limits: they do almost nothing to stop sound crossing a wall or window.
Here's what each major material actually does:
- Mass-loaded vinyl (MLV): a dense, flexible membrane that blocks sound through added mass; best where you can't spare wall depth, adding roughly 5–7 STC points per layer when seams are sealed, per DIY Projects for Home
- Green Glue: a viscoelastic damping compound applied between two rigid layers, converting sound energy to heat rather than letting it pass through
- QuietRock (sound-damping gypsum): dense gypsum board with a built-in damping polymer, giving higher STC in one board than several standard layers, which PABCO Gypsum markets as a space-saving alternative to building up multiple drywall layers
- Mineral wool (Rockwool Safe'n'Sound): a cavity-fill insulation that adds STC and fire resistance simultaneously, per Rockwool's technical guide
- Acoustic panels and foam: improve NRC and internal sound quality but do not meaningfully raise STC
| Goal | Best material choice |
|---|---|
| Limited wall depth | MLV or QuietRock |
| Renter-friendly, no structural work | Acoustic panels, rugs, curtains |
| Budget-conscious cavity fill | Mineral wool (Rockwool Safe'n'Sound) |
| Echo and room "liveliness" | Acoustic foam or panels |
| Low-frequency structural noise | Resilient channel or double-stud, not panels alone |
A staged DIY plan you can actually follow
Trying to do everything at once is how soundproofing projects stall. Break it into three stages instead.
- Stage 1 (a weekend, under £150): seal every gap with acoustic caulk, fit a door sweep and weatherstripping, hang heavy curtains, and lay a thick rug with a pad. Tools: caulk gun, screwdriver, tape measure.
- Stage 2 (one to three weekends, a few hundred pounds): install MLV behind a new layer of drywall, or use Green Glue between two drywall layers, and add a window insert. This is handyman-level work; a drywall installation specialist can handle it quickly if you'd rather not.
- Stage 3 (contractor territory, several thousand pounds per room): resilient channel or double-stud walls, a floating subfloor, and full ceiling decoupling. Structural work like this may need a permit depending on your local building codes, so check before you start.
Test progress the same way you diagnosed the problem: play steady noise in the source room and walk the perimeter of the target room after each stage. If you can barely hear the difference, per the staged-investment logic from D and G Flooring, you've probably still got an unsealed gap rather than a material problem.
When to call in a professional
DIY covers most household noise problems, but some situations genuinely need an expert. Call a professional when:
- Low-frequency noise (bass, machinery, traffic rumble) is the dominant complaint, since this usually needs proper decoupling
- You're targeting a specific STC rating, such as STC 55 or higher, for a home studio or clinical space
- The fix requires structural changes: new stud walls, floating floors, or rerouting HVAC ductwork that's carrying sound between rooms
- Multiple flanking paths are involved and you can't isolate the source yourself
When you get quotes, ask each contractor: what insulation type they're specifying, what STC improvement they expect from the finished assembly, how they'll prevent flanking through outlets and ducts, and whether the work carries a warranty. Costs vary enormously by region and scope, but expect materials and labour for a full decoupled wall or ceiling to run into the thousands per room rather than hundreds, in line with the higher end of D and G Flooring's cost estimates. Get at least two quotes and compare what's actually included, not just the bottom line.
Planning and budgeting before you start
Before buying anything, list every likely cost: materials, waste disposal, labour if you're hiring help, any required permits, and a simple noise test at the end to confirm it worked.
A short planning checklist keeps the project on track:
- Diagnose the dominant noise path using the perimeter test
- Prioritise the cheapest fix for that specific weak point first
- Stage the work rather than trying to do it all at once
- Decide DIY versus hire based on whether decoupling is required
- Re-test after each stage before spending more
Pro Tip: Keep a single running list of every option you're considering, its expected STC gain, and its cost per square metre, so you can compare them side by side rather than guessing. A planning tool like House A-Z can hold your budget, contractor quotes and project timeline in one place, which makes it far easier to see which upgrade is genuinely worth the spend.
If you'd rather have professional eyes on the plan from the start, House A-Z's contractor matching connects you with people who can quote accurately on the work.
Mistakes that waste your money
The most common error is buying acoustic foam expecting it to block sound between rooms. It won't; it only improves how a room sounds internally. Leaving even one gap unsealed, short-circuiting resilient channel with a stray screw, or overstuffing a cavity with insulation (which can reduce rather than improve performance) will all undercut an otherwise good upgrade.
Maintenance is simple: check door sweeps and window seals each season, and if you ever cut into a treated wall for wiring or shelving, reseal it properly afterwards. Often a small follow-up fix beats redoing an entire wall.
The gap between soundproofing advice and soundproofing results
Most soundproofing content sells the dramatic fix: rip out the wall, build a room within a room, spend thousands. That advice isn't wrong, but it's the wrong starting point for most people. The evidence points somewhere more useful: sealing and a decent door sweep close much of the gap between a noisy room and a tolerable one, often for less than the cost of a single acoustic panel.
What conventional advice underplays is how much of a wall's performance a single unsealed gap can undo. You can spend real money on mass-loaded vinyl and mineral wool and still hear everything through an unsealed outlet or a gappy door frame. Sealing isn't the exciting part of the project, but it protects every pound you spend afterwards.
If there's one thing I'd tell anyone starting this project, it's to resist the urge to buy acoustic panels first. They fix how a room sounds, not what gets through its walls. Diagnose your actual weak point, fix that specific thing, then decide whether you need to go further. Most people find they don't.
Sources
For hands-on installation steps, Lowe's soundproofing guide and Diy cover sealing and door fixes in detail. For product specifications, check Rockwool's technical guide for mineral wool assemblies and PABCO Gypsum's QuietRock page for sound-damping drywall. For cost estimating, HardHatCalc's wall soundproofing calculator helps model expected STC gains against your budget.
- How to soundproof a room
- How to Make a Room Soundproof: Step-by-Step Guide - D and G Flooring
- Acoustic wall assemblies technical guide (Rockwool)
- How to Soundproof a Wall: 2026 DIY Guide - DIY Projects for Home
FAQ
How can I soundproof a room cheaply?
Seal gaps with acoustic caulk, fit a door sweep, hang heavy curtains, and lay a thick rug with a rebond pad. These steps together typically cost under £150 and can add several STC points, per Lowe's soundproofing guide.
How do I soundproof a room from neighbours?
Focus on the shared wall or ceiling: add mineral wool insulation in the cavity, apply Green Glue between two drywall layers, and seal every outlet and seam, since gaps undermine even a well-built assembly.
What is the most effective way to soundproof a room?
Combine mass, decoupling, damping and absorption rather than relying on one method, which is what pushes a wall from around STC 33 to 50 or higher, according to D and G Flooring.
What is the cheapest way to block sound in a room?
Acoustic caulk around gaps and a door sweep are the cheapest genuinely effective options, adding roughly 5–8 STC points to a door for well under £50.