Most homeowners assume a renovation is simply a matter of hiring a tradesperson and picking out paint colours. Then the first invoice arrives, a delivery is delayed, and suddenly the project feels completely out of hand. Understanding what is a renovation checklist, and how to build one properly, is the single most reliable way to stay in control from day one. This guide walks you through every component of an effective renovation checklist, from setting your budget and prioritising tasks to coordinating contractors and signing off on the finished work.
Table of Contents
- Key takeaways
- What is a renovation checklist?
- Prioritising tasks and building your checklist
- Budgeting and contingencies in your checklist
- Timeline and contractor coordination
- Final inspection and post-renovation closeout
- My take on renovation checklists
- How House A-Z supports your renovation plan
- FAQ
Key takeaways
| Point | Details |
|---|---|
| Define your checklist early | A renovation checklist organises tasks, budgets, and timelines before any work begins. |
| Separate needs from wants | Prioritising functional requirements over aesthetic preferences protects your budget and timeline. |
| Budget for the unexpected | Always set aside a 10 to 20% contingency fund on top of your core renovation budget. |
| Use written contracts | Documented agreements covering scope and change orders protect you from overruns and delays. |
| Close out thoroughly | A final inspection checklist covering function tests and warranty collection prevents costly oversights. |
What is a renovation checklist?
A renovation checklist is a structured document that captures every task, decision, and milestone involved in a home renovation project. Think of it as your project control centre. It records what needs to be done, who is responsible, when it must happen, and how much it should cost. Without one, even experienced renovators find themselves reacting to problems rather than preventing them.
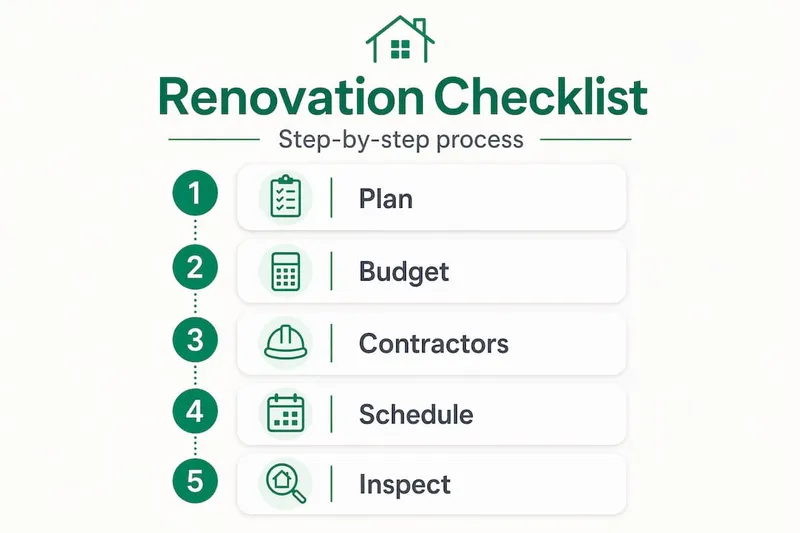
The typical renovation checklist covers several distinct phases:
- Planning and scoping: Defining the project goals, room-by-room requirements, and design direction
- Budgeting: Listing estimated costs, actual quotes, contingency allowances, and payment schedules
- Permits and approvals: Tracking which local authority consents are required and when they are granted
- Contractor hiring: Noting which trades are needed (builder, electrician, plumber, plasterer), shortlisted candidates, and selected contractors
- Timeline and milestones: Mapping out each phase from demolition through to final finishes
- Inspections: Scheduling mid-project and final quality checks at agreed stages
- Closeout tasks: Collecting warranties, receipts, and sign-off documentation
Different projects call for different formats. The table below illustrates how a checklist adapts to project scale.
| Project type | Checklist complexity | Key focus areas |
|---|---|---|
| Single room refresh | Simple, one page | Design choices, one or two trades, short timeline |
| Full kitchen or bathroom | Moderate, multi-section | MEP rough-in, tiling, fixtures, appliances, permits |
| Whole-house renovation | Detailed, phased | All trades, structural work, staging, extended timeline |
| Extension or conversion | High complexity | Planning permission, structural engineer, multiple phases |
The format matters less than the habit. Whether you use a spreadsheet, a dedicated app, or a printed template, the goal is the same: nothing gets forgotten and nothing catches you off guard.
Prioritising tasks and building your checklist
Before you write a single item on your checklist, you need two lists running side by side: a needs list and a wants list. Needs are the non-negotiables. A leaking roof, faulty wiring, or a broken boiler must be addressed regardless of budget. Wants are the upgrades that improve comfort or aesthetics but can be deferred if funds are tight.
Identifying lifestyle needs before making aesthetic choices prevents maintenance issues and keeps your design functional. If you have young children, durable flooring takes priority over statement wallpaper. If you work from home, soundproofing a study ranks above a kitchen island.
Once you have your two lists, follow this process to build your personalised checklist:
- List every item you want addressed in the renovation, without filtering at this stage.
- Categorise each item as a need, a want, or a nice-to-have.
- Assign a rough cost to each item using online benchmarks or early contractor conversations.
- Rank by priority within each category, placing structural and safety work at the top.
- Map items to phases so that work happens in a logical sequence (structural before cosmetic, rough-in before tiling).
- Review and cut once quotes arrive, removing or deferring items that push you over budget.
One often-overlooked step is the design anchor. Choosing key appliances first and designing the space around them avoids costly compromises later. In a kitchen, for example, selecting your range cooker before finalising cabinetry dimensions means the two will actually fit together properly.
Pro Tip: Revisit your checklist every time a new quote lands. Quotes are a reality check. They tell you which wants are affordable and which need to be cut. Treat the quoting phase as a learning process that refines your list, not just a step to tick off.

Budgeting and contingencies in your checklist
Getting the budget right is where most renovation checklists either succeed or fail. The checklist is not just a task list. It is also your financial ledger, tracking estimated costs against actual quotes and flagging where you are drifting over.
A solid budgeting section in your checklist should include:
- Estimated cost for each line item, based on research or early conversations
- Quoted cost once you have received formal proposals
- Variance column to flag differences between estimate and quote
- Contingency allocation set aside separately from the working budget
- Payment milestones agreed with each contractor
On contingency: industry standards recommend budgeting 10 to 20% above your core project cost to cover surprises during demolition or inspections. For gut renovations or older properties, lean toward the higher end. Unexpected discoveries such as asbestos, hidden damp, or structural issues often emerge after demolition, and flexible budgeting is the only reliable defence.
| Budget category | Recommended allocation |
|---|---|
| Core renovation works | 70-75% of total budget |
| Fixtures, fittings, and finishes | 10-15% of total budget |
| Professional fees (architect, surveyor) | 5-10% of total budget |
| Contingency fund | 10-20% of total budget |
There is also a widely used rule worth knowing: renovation costs should not exceed 30% of your home's current market value if you want to protect your return on investment. Spending beyond that threshold rarely translates into proportional added value when you sell.
Pro Tip: Beyond your contingency fund, keep a separate cash reserve for change orders. Minor remodels typically need 10 to 15% set aside, while gut renovations warrant 15% or more. Change orders happen on almost every project. Having cash ready means you can approve necessary changes without stalling the work.
Getting multiple quotes is not just about finding the lowest price. It helps you understand the realistic cost range for each element and adjust your wish list accordingly before you commit.
Timeline and contractor coordination
A renovation checklist without a timeline is an incomplete tool. Scheduling gives your checklist a spine, turning a list of tasks into an ordered plan with accountability built in.
A typical full home renovation runs between 9 and 20 weeks, broken into four phases: planning and permits (one to two months), demolition (one to two weeks), construction (four to twelve weeks), and final finishes (two to four weeks). Your checklist should reflect this structure, with each phase containing its own milestones and sign-off points.
When integrating contractors into your checklist, focus on these areas:
- Scheduling dependencies: Note which trades must finish before others can start. Electricians and plumbers complete rough-in work before walls are plastered. Tilers follow plumbers. Painters follow plasterers.
- Lead times for materials: Long-lead items such as bespoke cabinetry, imported tiles, or specialist windows need to be ordered weeks or months in advance. Record order dates and expected delivery dates in the checklist.
- Site access and living arrangements: Living off-site during construction reduces disruption and helps trades work without interruption, particularly during noisy or dusty phases.
- Written agreements: Contracts covering scope, payment, and change orders are your primary protection against budget overruns and timeline slips. Record the contract date, agreed payment schedule, and any change orders directly in your checklist.
Document every agreed change in writing, even minor ones. Verbal agreements are easily misremembered once a project is under pressure. Your checklist becomes the single source of truth for what was agreed and when.
Final inspection and post-renovation closeout
The final phase of your renovation checklist is the one most people rush. After weeks of disruption, the temptation to declare the project done and move on is understandable. Resist it. A thorough closeout protects your investment and gives you recourse if problems emerge later.
Work through these steps before signing off:
- Carry out a full walk-through of every room and space affected by the renovation, noting any defects, unfinished items, or damage.
- Test all functions: switches, sockets, taps, drainage, heating controls, appliances, and any newly installed systems.
- Check finish quality: look for paint runs, grout inconsistencies, poorly fitted trims, and any surfaces that do not meet the agreed standard.
- Compile a snagging list of items requiring correction and agree a completion date with your contractor before releasing the final payment.
- Collect all warranties and guarantees for materials, appliances, and workmanship, and store them in a single folder alongside your receipts and contracts.
- Document the finished work with photographs for insurance purposes and future reference.
Final walk-throughs and documentation are crucial closing steps that protect your ability to make warranty claims and resolve disputes. Do not skip them because the project feels finished. It is only truly finished once every item on the closeout checklist is ticked off.
You can also use this final section of your checklist to note future maintenance tasks, such as resealing grout annually or servicing a new boiler, so you have a ready reference for upkeep going forward. A good home tile renovation guide can help you identify the specific care requirements for new surfaces before the tradespeople leave site.
My take on renovation checklists
I have seen dozens of renovation projects unfold, and the pattern is almost always the same. The ones that go smoothly are not the ones with the biggest budgets or the most experienced contractors. They are the ones where the homeowner showed up with a clear, well-organised checklist and treated it as a living document throughout the project.
What surprises people is how much the checklist does for your confidence. When a contractor tells you something will cost more than agreed, you have a record to refer back to. When a delivery is late, you can see immediately which downstream tasks are affected. The checklist removes the guesswork.
The mistake I see most often is treating the checklist as a one-time exercise completed before work starts and then never updated. Renovation projects shift constantly. Quotes come in higher than expected. Materials get discontinued. A wall turns out to be load-bearing. Your checklist needs to absorb all of that and keep reflecting reality.
My honest advice: build your checklist before you speak to a single contractor. Use it to structure every conversation, every quote, and every agreement. Then update it every week without fail. The homeowners who do this finish their projects on time, within budget, and without the regret that comes from decisions made in a hurry.
— Azai
FAQ
What does a renovation checklist include?
A renovation checklist covers planning, budgeting, contractor hiring, scheduling milestones, permits, inspections, and final closeout tasks. It acts as a single reference document for every decision and agreement made during the project.
How much contingency should I budget for a renovation?
Industry guidance recommends setting aside 10 to 20% of your total renovation budget as a contingency fund. For gut renovations or older properties, 20% is a more prudent allowance given the likelihood of unexpected discoveries after demolition.
When should I start building my renovation checklist?
Start your checklist before you contact any contractors or make any design decisions. Building it early means every conversation, quote, and agreement is captured in one place from the outset.
How do I prioritise items on my renovation checklist?
Separate your list into needs (structural, safety, and functional repairs) and wants (aesthetic upgrades). Address needs first, then allocate remaining budget to wants in order of importance to your daily lifestyle.
Do I need written contracts with every contractor?
Yes. Written contracts covering the agreed scope, payment schedule, and change order procedures are your primary protection against budget overruns and delays. Record contract details directly in your renovation checklist for easy reference.