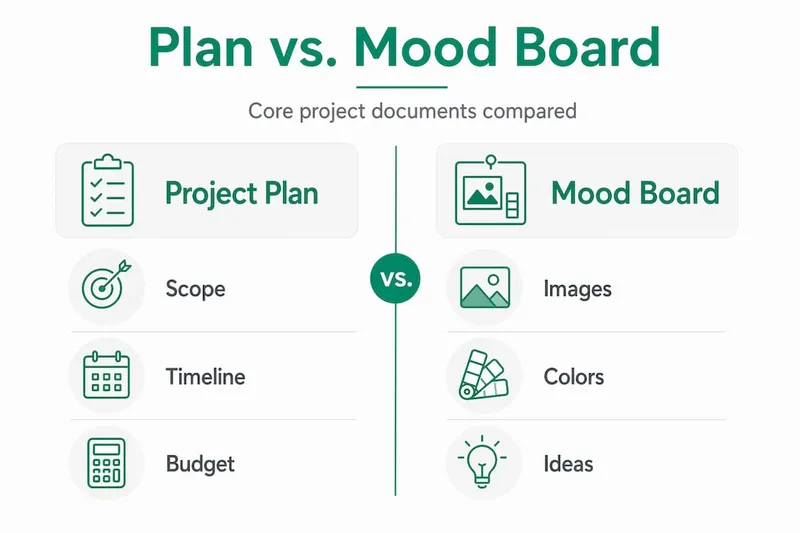
A renovation project plan is not a mood board, a Pinterest collection, or a rough list of ideas scribbled on the back of a receipt. It is a structured, living document that defines your objectives, scope, schedule, budget, and decision controls for the entire project. Most homeowners start renovating with enthusiasm and a vague sense of what they want, then find themselves three months in, over budget, arguing with a contractor about something nobody wrote down. Understanding what a renovation project plan actually is, and how to build one, is the difference between a project you control and one that controls you.
Table of Contents
- Key takeaways
- What is a renovation project plan and what must it include
- Building a realistic renovation timeline
- Budgeting and managing financial risk
- Documentation and communication
- Putting your plan to work on site
- My perspective on why renovations go wrong
- How House A-Z helps you plan your renovation
- FAQ
Key takeaways
| Point | Details |
|---|---|
| A plan is a control document | A renovation project plan tracks scope, budget, schedule, and decisions, not just a list of tasks. |
| Sequencing prevents rework | Completing tasks in the correct order, such as plumbing before drywall, avoids thousands in costly mistakes. |
| Budget contingency is non-negotiable | Set aside at least 20% contingency, or 25% for older homes, to absorb hidden costs and surprises. |
| Written records protect you | A decisions log and formal change orders prevent disputes and scope creep throughout the project. |
| Start with your vision | Defining why you are renovating and what you want guides every subsequent decision and trade-off. |
What is a renovation project plan and what must it include
A renovation project plan is a single reference document that every party on the project, including you, your contractor, and any specialist trades, uses to stay aligned. Most renovation plans skip the project overview entirely and jump straight to a task list, which means the context, priorities, and constraints are never written down. That is where confusion begins.
A complete plan contains six core components:
- Project overview and objectives. A short written statement of what you are renovating, why, and what a successful outcome looks like. This sounds obvious, but it forces you to make explicit choices early.
- Scope definition. A clear description of what is included in the project and, critically, what is excluded. Scope exclusions prevent contractors from assuming work is covered when it is not.
- Schedule with task dependencies. Not just a list of phases, but a sequence that shows which tasks depend on others. Milestone plans and task schedules together provide both daily execution guidance and high-level review points.
- Budget tracker. Three columns matter here: estimated cost, committed cost (what you have agreed to pay), and actual cost (what has been invoiced or paid). This structure lets you spot overruns early.
- Decisions log. A running record of every significant choice made during the project, including who approved it and when.
- Change control process. A simple procedure for handling any modification to the agreed scope or schedule, so changes are assessed and approved before work proceeds.
Pro Tip: Write your scope exclusions as carefully as your inclusions. If you are renovating a kitchen but not touching the adjacent utility room, say so explicitly in the plan. Ambiguity in scope is the most common trigger for contractor disputes.
Here is a quick comparison of what a renovation project plan is versus what it is not:
| What it is | What it is not |
|---|---|
| A structured control document | A mood board or inspiration collection |
| A living file updated throughout the project | A one-time document written and forgotten |
| A record of decisions and approvals | A verbal agreement between you and a contractor |
| A budget tracker with three cost columns | A single lump-sum estimate |
Building a realistic renovation timeline
One of the most underestimated parts of essential renovation planning is sequencing. Getting the order wrong does not just cause inconvenience. It causes rework, and rework costs money.
A step-by-step renovation timeline for a typical residential project in 2026 looks like this:
- Goal setting (1 to 2 weeks). Define what you want to achieve and why. The American Institute of Architects recommends starting with your vision before touching any numbers.
- Budget development (2 to 4 weeks). Research local costs, set your contingency, and establish your spending limit.
- Design and specification (4 to 8 weeks). Finalise layouts, materials, fixtures, and finishes. This phase takes longer than most homeowners expect.
- Permits and approvals (2 to 8 weeks, depending on your local authority). Do not start demolition until permits are confirmed.
- Contractor selection and contracts (2 to 4 weeks). Interview, check references, and sign written contracts.
- Materials ordering (2 to 6 weeks lead time for many items). Order long-lead items like custom cabinetry or specialist tiles before demolition begins.
- Construction (varies widely, from 4 weeks for a bathroom to 12 months for a full house renovation).
- Inspections and snagging (1 to 2 weeks). Walk through the completed work methodically before making final payments.
Why does sequence matter so much? In a kitchen renovation, for example, plumbing rough-in must precede drywall. If you board over walls before the plumber has finished, you are paying to cut them open again. The same logic applies to electrical first fix, underfloor heating, and structural work. Each trade has a natural position in the sequence, and disrupting that order creates a cascade of delays and additional costs.
Pro Tip: Lock your task sequence before demolition starts. Write it into your renovation project plan and share it with every contractor on site. When trades know the order, they can coordinate their own schedules and you avoid the chaos of two contractors arriving on the same day for jobs that cannot happen simultaneously.

Budgeting and managing financial risk
Budgeting is where most renovation projects quietly begin to fail. The initial estimate looks reasonable, then a structural surprise appears behind a wall, a permit takes twice as long as expected, or a chosen tile is discontinued and the replacement costs more.
A recommended contingency is 20% of your total estimated project cost. For homes built before 1980, that figure rises to 25%, because older properties carry a higher likelihood of hidden issues such as outdated wiring, asbestos, or water damage behind surfaces.
Common hidden costs that your renovation checklist should account for:
- Structural repairs uncovered during demolition
- Permit fees and building control inspections
- Temporary accommodation or storage if you cannot live in the property
- Waste removal and skip hire
- Price increases on materials between estimate and order
Distinguishing must-haves from nice-to-haves early in your budget planning gives you a clear priority list when costs rise. If your budget comes under pressure, you know immediately which items can be deferred or substituted without compromising the core outcome.
Your budget tracker within the plan should show three figures for every line item: the original estimate, the committed amount once you have signed a contract or placed an order, and the actual amount once invoiced. This three-column approach, recommended in project budgeting guidance, means you are never surprised by the final bill. You can see variance building in real time and respond before it becomes critical.
Pro Tip: When budgeting for a refurbishment, include permit costs and your own time as line items. Both are real costs that affect your project, and leaving them out creates a false sense of how much headroom you have.
Documentation and communication
Verbal agreements are the single biggest source of renovation disputes. A contractor remembers the conversation one way, you remember it another, and there is nothing in writing to settle the matter. The solution is not distrust. It is documentation.
A decisions log is a simple running record with four fields: date, description of the decision, the choice made, and who approved it. Hundreds of decisions accumulate over weeks and months on even a modest renovation. Without a log, those decisions become sources of dispute later.
Formal change orders serve a different but equally important function. When scope changes during construction, whether because you want to add a window, change a layout, or upgrade a material, a written change order documents the cost and schedule impact before work proceeds. This prevents the situation where a contractor presents a surprise invoice at the end of the project for work you thought was included.
Best practices for managing changes and communications:
- Record every scope change in writing before the work starts
- Note the cost impact, the schedule impact, and who authorised the change
- Share updated versions of the plan with all relevant contractors when changes occur
- Use email or a shared platform rather than text messages for formal approvals
"A communication plan and decision log prevent lost verbal agreements and mixed messages, ensuring all trades work from the same specifications." — Stone Development Inc.
Pro Tip: If a contractor is resistant to written change orders, treat that as a warning sign. Professionals who do good work are comfortable with clear documentation because it protects them as much as it protects you.
Putting your plan to work on site
Having a renovation project plan is one thing. Using it consistently throughout the build is another. Many homeowners create a detailed plan, then set it aside once construction starts and revert to informal conversations and gut decisions.
Here is how to keep your plan active and working for you:
- Bring your completed plan, including your budget and scope document, to every contractor meeting before you sign anything. Structured planning workbooks transform scattered ideas into clear roadmaps that contractors can price accurately.
- Finalise all design decisions and material selections before demolition begins. Irreversible choices such as cabinet layouts, appliance specifications, and fixture locations must be locked early to prevent expensive downstream errors.
- Link milestone payments to project phases rather than calendar dates. Pay for completed, inspected work, not for time elapsed.
- Build buffer time into your schedule. Allow at least one to two weeks of float for permit delays, material delivery issues, or weather-related interruptions.
- Review your plan weekly during construction. Update actual costs, note any deviations from the schedule, and log decisions as they happen.
- Treat any mid-project scope change as a formal risk event. Assess the cost and schedule impact before agreeing to proceed.
Before demolition starts, run through this pre-construction checklist:
- All permits obtained and posted on site
- Final design drawings approved and distributed to all trades
- All long-lead materials ordered and delivery dates confirmed
- Contracts signed with all contractors, including payment schedules
- Decisions log started and shared
- Contingency budget confirmed and accessible
Pro Tip: The kitchen renovation workflow principle applies to any room: sequence your trades, confirm your materials, and do not start demolition until both are locked. Starting before you are ready is the most expensive mistake in home renovation.
My perspective on why renovations go wrong
I have seen renovations of every size and complexity, and the pattern is almost always the same when things go wrong. The homeowner had a vision, a rough budget, and a contractor they trusted. What they did not have was a written plan that everyone was working from.
The most common failure point is not the budget overrun itself. It is the moment when a decision gets made verbally on site, without anyone writing it down, and that decision has a cost attached to it that nobody acknowledged at the time. Three months later, the invoice arrives and the argument starts.
What I have learned is that a renovation project plan works best when you treat it as a control system, not a checklist. A checklist tells you what to do. A control system tells you where you stand at any given moment, what has changed, and what the implications are. That distinction matters enormously when you are managing £50,000 worth of work and a dozen different contractors.
The single piece of advice I give to every homeowner before they start is this: begin with your project vision and build every decision from that foundation. Define what success looks like in writing. Then use that definition to evaluate every trade-off, every change request, and every budget decision that follows. When you have that clarity, the plan almost writes itself.
Good planning reduces preventable problems significantly. It cannot eliminate every surprise, but it gives you the structure to respond to surprises without losing control of the project.
— Azai
FAQ
What is a renovation project plan?
A renovation project plan is a structured document that defines your project's objectives, scope, schedule, budget, and decision controls. It serves as the single reference point for you, your contractor, and all trades throughout the project.
What should I include in a renovation plan?
A complete renovation plan includes a project overview, scope definition (inclusions and exclusions), a sequenced schedule with task dependencies, a three-column budget tracker, a decisions log, and a formal change control process.
How much contingency should I add to my renovation budget?
A contingency of 20% of your total estimated cost is the standard recommendation. For homes built before 1980, increase this to 25% to account for a higher likelihood of hidden structural, electrical, or water damage issues.
Why does task sequencing matter in a renovation?
Completing tasks in the correct order prevents costly rework. In a kitchen renovation, for example, plumbing rough-in must be completed before walls are boarded. Getting the sequence wrong means cutting open finished surfaces and paying twice for the same work.
How do I prevent scope creep during a renovation?
Use a formal written change order for every modification to the agreed scope. Document the cost impact, the schedule impact, and the name of the person who authorised the change before any new work begins.