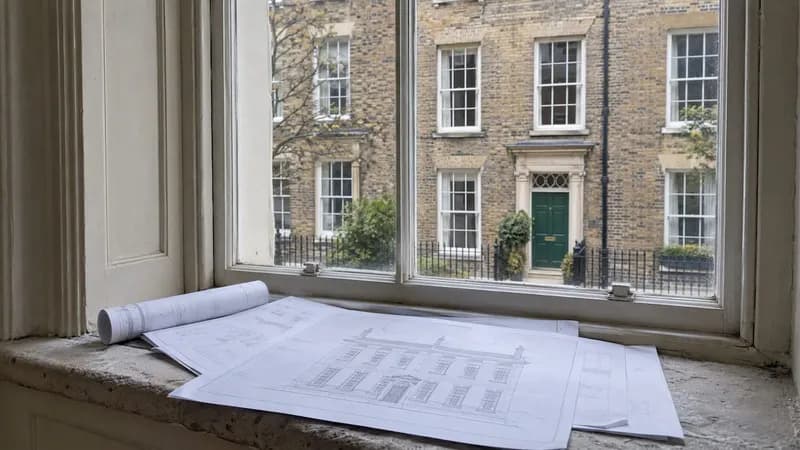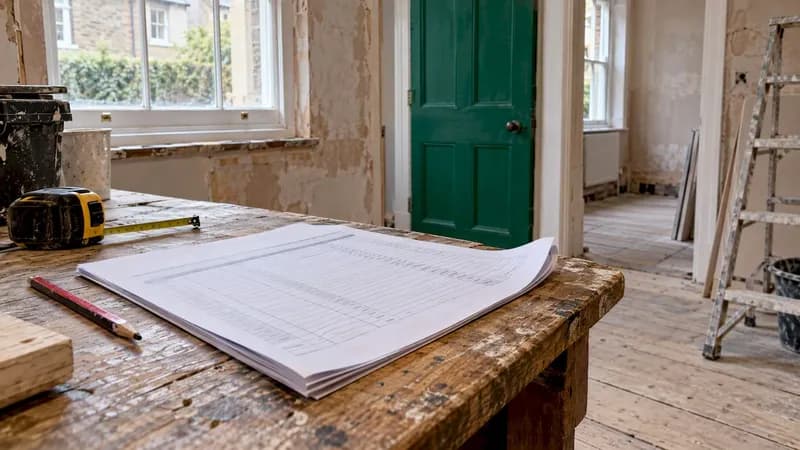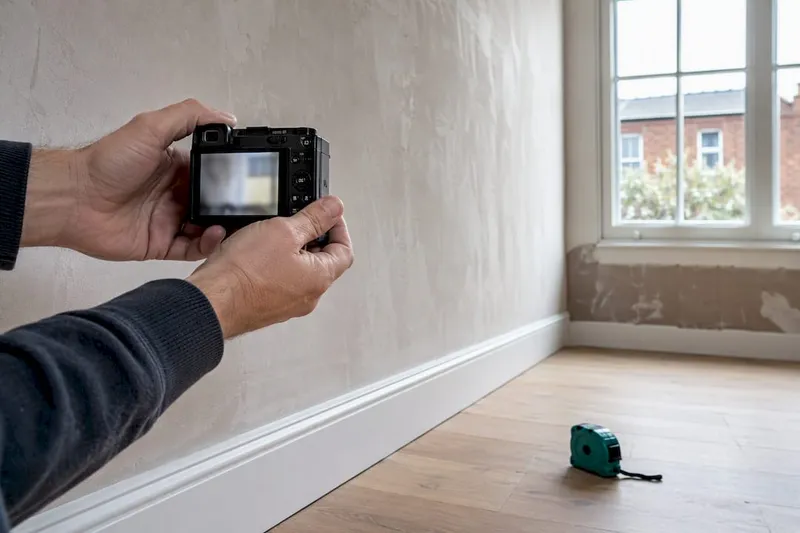
Start every renovation with a complete baseline photo pass, keep milestone captures with timestamped metadata, and deliver a handover package that pairs before and after evidence. This three-phase habit protects both homeowner and contractor when a dispute arises, and it speeds up approvals because inspectors and lenders can see exactly what changed, and when.
TL;DR:
- Baseline photos must be taken before demolition begins to record the property's original condition, as damage can become impossible to prove later.
- Consistent framing, angles, and lighting are essential for progress photos to be comparable and useful for tracking changes over time.
- Pairing before and after images for every punch list item and attaching them directly to checklists enhances the credibility of completion records.
- Organizing images with a structured naming system and folder hierarchy improves retrieval, especially as project complexity increases.
- Using proper tools like high-resolution phones, 360° cameras, and dedicated documentation apps ensures accurate, metadata-rich records suitable for disputes or claims.
Table of Contents
- Renovation photo documentation: what to shoot before work starts
- How do you photograph renovation progress consistently?
- Handover documentation: turning photos into a completion record
- How should you name and organise renovation photos?
- Which tools actually suit construction photo documentation?
- Using photos as evidence in disputes and insurance claims
- Room capture checklist: the sequence that saves time
- Legal and privacy considerations when photographing on-site
- How to annotate renovation photos for maximum documentation value
- Common mistakes in renovation photo documentation
- What structured tools add over a phone and a folder
- Try House A-Z for your renovation documentation
- Sources
- FAQ
Renovation photo documentation: what to shoot before work starts
Baseline photos are the foundation of any renovation photo documentation system, and they're the step most people skip because nothing has happened yet. That's exactly the problem. Once demolition begins, the "before" is gone forever, and any dispute about pre-existing cracks, damp, or damaged fixtures becomes a matter of memory rather than evidence.
Cover every room properly before the first tool comes out:
- Wide shots from at least three angles, ideally corner-to-corner, so the whole room reads as one space
- Medium shots and close-ups of anything already damaged, cracked, stained, or worn
- Context shots showing how the room connects to corridors, entrances, and utility points like stopcocks or fuse boards
- Labelled viewpoints with simple reference markers (painter's tape with a number works fine) so later photos can be matched to the same spot
- A 3D scan or photogrammetry pass when measurements matter, such as before a structural change or an insurance claim
Mobile photogrammetry can now produce a measurable model on an ordinary phone in under a minute, which is worth doing whenever you'll need as-built dimensions later rather than guessing from a tape measure months on. Contractor guidance consistently flags this baseline pass as the step most often skipped, and the one that causes the most regret.
How do you photograph renovation progress consistently?
Progress photos only earn their keep if they're consistent enough to compare. A folder of random snaps taken "whenever" tells you nothing useful six weeks later.
- Build a milestone checklist covering demolition, rough-in (electrical, plumbing, HVAC), pre-drywall, finishes, and final walkthrough.
- Lock photo evidence to each checklist item so a task can't be marked complete without a picture attached. Apps that enforce this change behaviour on site because crews stop marking things done prematurely.
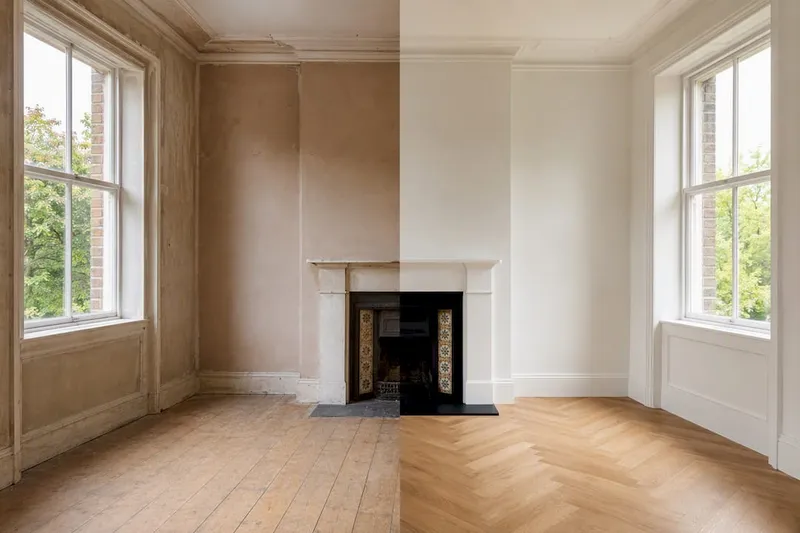
- Use the matched-angle technique: stand where you stood for the baseline shot, use the same framing, and overlay old against new (a "ghost" overlay app makes this trivial) to keep the sequence properly aligned.
- Set a sensible cadence: daily for active trades like framing or drywall, milestone-based for slower phases like curing concrete or waiting on custom joinery.
This phased approach, moving from baseline through progress to handover, is the practical structure most renovation contractor documentation systems are built around, and it's the difference between a photo library and an auditable timeline.
Handover documentation: turning photos into a completion record
The punch list is where photo documentation earns its money. Every open item needs a before shot, a completion shot, and a note confirming the fix, because that pairing is what convinces a client, an inspector, or an insurer that the work is genuinely done.
- Pair before and after images for every punch list entry, not just the headline rooms
- Attach the completion photo directly to its checklist line rather than dumping it in a general folder
- Export the package in a format the recipient can actually use: a branded PDF for clients, a ZIP of untouched originals for your own records, and a 3D walkthrough link where one exists
- Include material specifications and any measurement attachments so there's no ambiguity about what was installed, in what grade, and where
Southern Living's before and after features show how effective paired imagery is at making a transformation legible at a glance, and the same principle applies to a handover report, just with less styling and more proof.
How should you name and organise renovation photos?
A photo archive is only as useful as its filing system, and this is where most home renovation before and after collections fall apart within a month.
Structure folders by project → property → phase → room → viewpoint. So a bathroom demolition shot on a specific job lives four folders deep, never loose at the top level.
Name files with a fixed template: projectcode_room_phase_YYYYMMDD_viewpoint.jpg. For example, RVN02_bathroom_demo_20260314_northwall.jpg tells you everything at a glance, no folder-hunting required.
- Preserve EXIF and GPS data rather than stripping it during export; it's your proof of when and where a shot was taken
- Add a short caption and a tag or two (room, trade, defect type) at the point of capture, not weeks later
- Keep the untouched originals separate from any processed or annotated copies you send to clients
- Follow a two-place backup rule: one cloud copy, one local copy, and version your handover reports rather than overwriting the last one
Pro Tip: Rename files the same day you shoot them. Left for a week, "IMG_4471.jpg" becomes a mystery even to the person who took it.
Large curated collections such as Drummond House Plans' renovation archive show how much easier a project becomes to navigate once photos are organised by theme rather than dumped chronologically into one camera roll.
Which tools actually suit construction photo documentation?
Your phone is the default tool, and for most rooms it's enough, provided you use it properly.
- Shoot at the highest resolution your phone allows, brace against a wall or doorframe for stability, and turn on the grid and horizon lock so verticals stay straight across a whole sequence
- Use a 360° camera for full-room coverage in a single pass; Matterport's 360 camera range is built for exactly this, and it removes the risk of a missed angle that single frames always carry
- Choose photogrammetry or 3D scanning when you need a measurable model, not just a picture, such as before ordering custom cabinetry
- Lean on a dedicated documentation app for geo-tagging, automatic metadata, enforced checklists, and one-click exportable reports rather than managing all of this manually
Our tools and software roundup covers device-level workflows in more depth if you want to compare specific setups before committing to one.
Using photos as evidence in disputes and insurance claims
A photo only holds up as evidence if its provenance is intact, and that means resisting the urge to compress, crop, or "clean up" images before you archive them.
- Keep original files untouched in storage; save any editing or annotation for a separate export copy
- Log who took each photo, when, and why, ideally as a short dated note attached at the point of capture rather than reconstructed later from memory
- Include a scale reference, a tape measure or a known-size object, whenever dimensions could matter to a claim
- Deliver one consolidated export, either a chronological PDF or a zipped folder of originals, when an insurer or building control officer asks for records
Enterprise documentation platforms built for contractors, such as ACTABUILD, lean on exactly this discipline: pinned locations, tags, and timelines that reduce the "he said, she said" of a dispute to a dated, geotagged record.
Room capture checklist: the sequence that saves time
Following the same order every time removes the guesswork and speeds up capture, especially on a busy multi-trade site.
- Wide shot of the whole room from the doorway
- Medium shots covering each wall
- Close-ups of any finish detail worth recording
- Defect shots of anything damaged or incomplete
- Fixture shots of appliances, sanitaryware, or built-in items
- A measurement shot with a scale reference where dimensions matter
Assign responsibility clearly: the site lead or a nominated trade captures milestone shots, while the homeowner or project manager handles baseline and handover. Build the sequence into the daily site routine, ideally the first and last five minutes of the day, so it never gets skipped under pressure.
| Capture step | Who's responsible | When |
|---|---|---|
| Wide + medium shots | Site lead | Start and end of each milestone |
| Defect + fixture shots | Trade completing the work | Before covering or closing up |
| Measurement shots | Homeowner or PM | Whenever dimensions are needed |
| Handover pairing | Project manager | At final walkthrough |
Legal and privacy considerations when photographing on-site
Photographing your own property for renovation records is generally straightforward, but a few situations need more care. If the property is occupied by tenants, or if the renovation is happening in a shared building, get clear consent before photographing anyone's belongings or personal spaces, not just the structural work.
Neighbouring properties visible from windows or scaffolding are a common blind spot. Avoid capturing identifiable details of a neighbour's home, garden, or family without their knowledge, and crop or blur anything incidental that ends up in frame. This matters more with 360° cameras, which capture everything in view by default rather than a single framed shot.
If children or other household members appear in progress photos, especially ones destined for a shared handover report or contractor portfolio, ask before using those images beyond internal project files. The same goes for any photos a contractor wants to use in marketing; get written permission from the homeowner first, and be specific about where the images will appear.
Storage matters too. GPS metadata embedded in photos reveals a property's exact location, so if you're sharing files outside a secure project folder, such as emailing them to a supplier, consider whether stripping location data is appropriate for that particular use. Living in an occupied property during works raises its own set of concerns around privacy and access; our survival guide for living at home during renovation covers the practical side of that in more detail.
How to annotate renovation photos for maximum documentation value
A photo without context is half a record. The annotation is what turns a picture into evidence a stranger, an inspector, a loss adjuster, a future buyer, can actually understand without you standing there to explain it.
Add a short dated note to every significant photo at the point of capture, not from memory later. "Rough-in complete, plumber signed off, 14 March" tells a story a bare timestamp can't. Note the trade responsible, the specific work shown, and any deviation from the original plan, since deviations are exactly what disputes tend to hinge on later.
Use arrows, circles, or simple markup sparingly, and only to point at something genuinely easy to miss, like a hairline crack or a mismatched tile batch. Overuse of markup clutters a photo and makes the annotation look unreliable rather than precise.
Keep a consistent tagging vocabulary across the whole project: same room names, same trade labels, same milestone terms every time. A folder tagged "kitchen" one week and "kit" the next defeats the point of tagging at all. Where a measurement matters, annotate the actual figure directly on the image rather than leaving it in a separate note that could get separated from the photo during export.
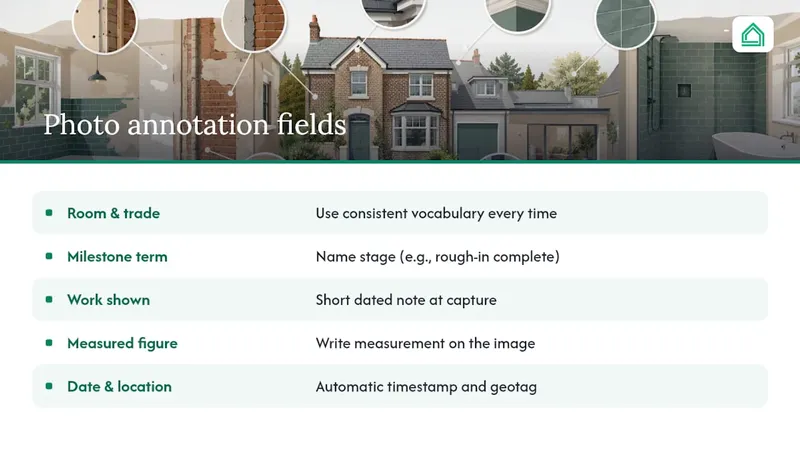
Finally, timestamp and geotag every annotated photo automatically rather than typing dates by hand; manual entry is where errors creep in, and a wrong date on a dispute-relevant photo can undermine the whole record.
Common mistakes in renovation photo documentation
The single biggest mistake is skipping the baseline pass because "nothing's happened yet." By the time there's damage to document, the pre-existing condition is unrecoverable, and that gap is exactly where disputes over responsibility tend to open up.
Inconsistent framing is the second most common failure. Photos taken from slightly different spots, at different times of day, with different lighting, are hard to compare properly even when the same work is shown. Matching angle and lighting across a sequence takes seconds and saves hours of confusion later.
Letting photos sit unorganised on a camera roll for weeks is another regular problem. Once fifty renovation photos are mixed in with holiday snaps and school run pictures, retrieving the right one becomes a genuine chore, and metadata that could have been added at capture gets forgotten entirely.
Stripping metadata before storage, often unintentionally through messaging apps that compress images and drop EXIF data, destroys exactly the timestamp and GPS proof that makes a photo defensible. Send originals through proper channels, not a WhatsApp thread, whenever the photo might matter later.
Finally, treating documentation as an afterthought rather than a site routine is the mistake that causes all the others. Teams that build capture into the daily start and end of work, rather than scrambling to reconstruct a record after a client complains, consistently produce cleaner, more useful archives.
What structured tools add over a phone and a folder
A phone and a folder work fine for a single small job, but they buckle once a project spans several rooms, several trades, and several months. The gap isn't the photos themselves, it's tying each one to the right milestone, room, and budget line without hours of manual sorting.
House A-Z's project folders and AI-assisted organisation are built for exactly that gap, keeping timelines, budgets, and photo evidence in one place rather than scattered across a camera roll and three different apps. One user reportedly avoided €20,000 in costly mistakes simply by having clearer visibility across the project. That's the value of structure, not the photos alone.
— Azai
Sources
- Renovation Contractor Photo Documentation 2026 — Full Guide
- Matterport cameras — 360 cameras
- Pixly
- Photo Documentation App – Capture, Tag, and Map Photos | SitePics
FAQ
How do you document a renovation project properly?
Take a full baseline photo pass before work starts, capture milestone progress with consistent angles and timestamps, then deliver a handover package pairing before and after images for every completed item.
How do you do photo documentation on a construction site?
Use a fixed capture order per room (wide, medium, close, defect, fixture, measurement), preserve timestamp and GPS metadata, and log each photo against a milestone checklist rather than saving images loosely.
What does photo documentation actually mean?
It means creating a timestamped, organised photographic record of a project's condition at each stage, from pre-existing state through progress to completion, so the work can be verified later.
How do I send renovation photos as documents for a report?
Export a branded PDF timeline or a zipped folder of original, unedited images rather than sending compressed photos through messaging apps, which strip the metadata that gives them evidential value.
How often should you take renovation progress photos?
Daily during active trades like framing, plumbing, or drywall, and at each defined milestone during slower phases such as curing or custom joinery lead times.