Start by locking your bathroom's scope and layout, then build a Gantt-style checklist that resolves every plumbing and long-lead decision before demolition begins. That single action, done before a single tile is ordered, is what separates remodels that finish on time from those that drag on for months. Your immediate deliverable is a one-page bathroom remodel project plan: a milestone Gantt or spreadsheet with at least three columns (milestone, start date, dependency) and a companion procurement list. Populate the first three milestones today: finalise the design, order long-lead fixtures, and book your trades. For sequencing guidance, the Checkatrade planning guide is a solid starting point, and Tom's Planner offers a ready-made Gantt chart template for bathroom remodelling you can copy and adapt immediately.
Key takeaways
A bathroom remodel project plan succeeds when layout, ventilation, and long-lead procurement are locked before demolition, and when the plan is updated weekly rather than filed away.
| Point | Details |
|---|---|
| Lock layout before demolition | Settling plumbing positions and ventilation strategy before work starts prevents the costliest mid-project changes. |
| Use a Gantt with buffer days | Build 2–3 buffer days around every inspection hold point; a 4–8 week schedule is realistic for a full remodel. |
| Hold 15–20% contingency separately | Keep contingency as a distinct budget line so you can see remaining headroom before approving any change order. |
| Inspect deliveries on arrival | Photograph and check every fixture and tile delivery before signing; replacing a damaged item mid-project adds weeks. |
| House A-Z consolidates the plan | House A-Z combines budget tracking, milestone Gantt, permit guidance, and shareable exports in one platform. |
Table of Contents
- What must your bathroom remodel project plan include?
- How do you sequence a bathroom renovation phase by phase?
- How do you build and protect your renovation budget?
- Which design decisions should you lock in before work starts?
- What permits and inspections do you need to schedule?
- How do you select and brief tradespeople effectively?
- What are the most common pitfalls and how do you avoid them?
- Which tools and templates help you manage the plan day to day?
- What ventilation specification belongs in your project plan?
- One thing most bathroom remodel guides get wrong
- House A-Z gives you a ready-made bathroom remodel project plan
- Sources
- FAQ
What must your bathroom remodel project plan include?
A phase-based checklist that captures every decision area is the backbone of any bathroom renovation project plan. The fields below are the minimum; copy them into a spreadsheet or print them as your working template.
Fill in today:
- Project scope: one sentence defining what is in and out (e.g., "full strip-out and refit, no structural changes")
- Must-haves vs wants: two columns, ranked, so trade-offs are pre-agreed before costs escalate
- Fixed constraints: soil pipe location, door swing, load-bearing walls, existing joist direction
- Room measurements: floor plan with dimensions, ceiling height, window and door positions
- Contact list: homeowner, main contractor, plumber, electrician, building control officer, supplier reps
Fill in within the first week:
- Milestone dates: design sign-off, permit application, demolition start, rough-in complete, tile start, handover
- Procurement list: every fixture and material with supplier, lead time, delivery date, and order reference
- Budget lines and contingency: itemised by category with a 15–20% contingency reserve held separately
- Permit and inspection notes: permit reference numbers, inspection dates, and hold points
- Snagging list placeholder: a blank column to populate at handover
Pro Tip: Add a "decision deadline" column next to each milestone. If a decision is not made by that date, the contractor has standing to pause work and charge for delays. Writing the deadline into the plan removes ambiguity before it becomes a dispute.
How do you sequence a bathroom renovation phase by phase?
The trade order for a bathroom remodel follows a strict logic: each phase creates the conditions the next phase needs. Skipping ahead or overlapping trades is the single most common cause of rework.
- Planning and design (Weeks 1–2): Finalise layout, specify all fixtures, obtain quotes, apply for any required permits. No demolition until design is signed off and long-lead items are ordered.
- Procurement of long-lead items (Weeks 2–3, overlapping with design): Order bespoke shower enclosures, wall-hung vanity units, and any tiles with long lead times. Inspect deliveries on arrival.
- Demolition (Week 3): Strip out existing fittings, remove tiles, expose substrate. Check for hidden water damage before proceeding.
- Rough-ins: plumbing, electrical, ventilation (Weeks 3–4): Relocate or extend pipework, run new circuits, install duct runs. This is the last point to make structural changes cheaply.
- Inspections (end of Week 4, allow 2–3 buffer days): Building control or local authority inspection of rough-in work. Do not cover walls until inspections pass.
- Waterproofing and backer board (Week 5): Apply tanking membrane or cement board. Allow full cure time before tiling (typically 24–48 hours per manufacturer's specification).
- Tiling (Week 5–6): Walls first, then floor. Measure and order glass or shower screen only after tile is set and final dimensions are confirmed.
- Finishes and fixtures (Week 6–7): Fit sanitaryware, vanity, mirrors, accessories, and lighting. Connect plumbing and electrical final fixes.
- Snagging and handover (Week 7–8): Walk through with contractor, document defects, agree remediation dates, release final retention payment only when snags are resolved.
The table below gives you a Gantt-ready summary you can paste directly into a spreadsheet or Tom's Planner.
| Milestone | Earliest start | Typical duration | Dependency |
|---|---|---|---|
| Design sign-off | Day 1 | 7–10 days | None |
| Permit application | Day 5 | 5 days (authority dependent) | Design sign-off |
| Long-lead procurement | Day 7 | Order placed; 2–6 weeks delivery | Design sign-off |
| Demolition | Day 7 | 1–2 days | Permit granted |
| Rough-in (plumbing/electrical/ventilation) | Day 9 | 3–5 days | Demolition complete |
| Rough-in inspection | Day 14 | 1 day + 2–3 buffer days | Rough-in complete |
| Waterproofing and backer | Day 25 | 1–2 days + 24–48 h cure | Inspection passed |
| Tiling | Day 21 | 3–5 days | Waterproofing cured |
| Finishes and fixtures | Day 28 | 3–5 days | Tiling complete |
| Snagging and handover | Day 35 | 1–2 days | Finishes complete |
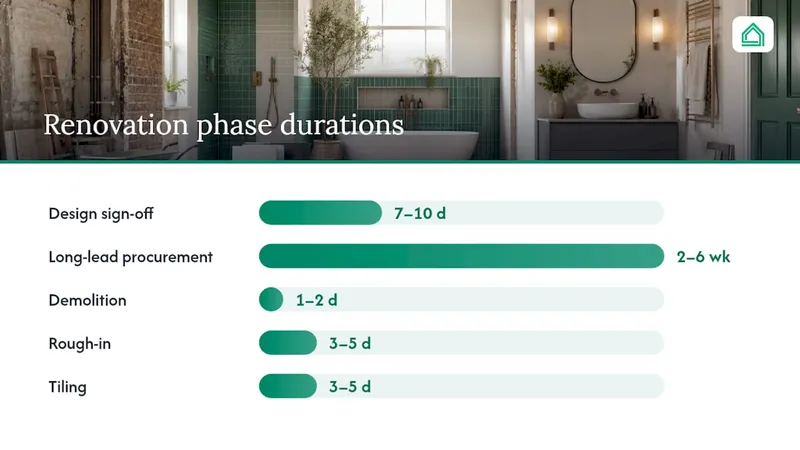
A full bathroom renovation typically runs 4–8 weeks from demolition to handover, depending on scope and inspection wait times. Build those buffer days in from the start rather than hoping inspectors arrive on schedule.
How do you build and protect your renovation budget?
Budget overruns are almost always a planning failure, not a pricing one. The categories below give you a starting framework; adjust percentages to your scope and location.
- Labour: typically the largest single line, covering demolition, plumbing, electrical, tiling, and finishing trades
- Tiles and flooring: material cost plus adhesive, grout, and wastage allowance (add 10–15% for cuts and breakages)
- Vanity, countertop, and storage: includes worktop fabrication if bespoke
- Plumbing fixtures: bath, shower enclosure, WC, basin, taps, and waste fittings
- Electrical: new circuits, extractor fan, lighting, heated towel rail wiring
- Waterproofing: tanking membrane, cement backer board, and sealing products
- Waste disposal: skip hire or contractor removal of demolition debris
- Professional fees: designer, structural engineer (if walls are affected), building control fees
A contingency reserve is a common and recommended practice for bathroom renovations to manage unexpected costs. Hold this as a separate line in your budget tracker, not folded into individual categories. That way, when hidden water damage or a delayed delivery forces a change, you can see exactly how much buffer remains before committing to a solution.
Track two figures for every line: committed (ordered or contracted) and available (remaining contingency). When committed spend approaches the base budget, pause and review before authorising any further changes. For a detailed breakdown of typical costs by region, the House A-Z bathroom renovation cost guide gives itemised price ranges you can use to sense-check your own quotes.
Procurement timing checklist:
- Order bespoke or long-lead items (shower enclosures, wall-hung units, specialist tiles) before demolition starts
- Confirm delivery dates in writing and add them to your Gantt as hard dependencies
- Inspect every delivery on arrival: check quantities, colours, sizes, and damage before signing
- Keep all delivery notes, order confirmations, and warranty documents in one folder (physical or digital)
- Identify a local stockist for standard tiles and fittings in case a replacement is needed quickly
Which design decisions should you lock in before work starts?
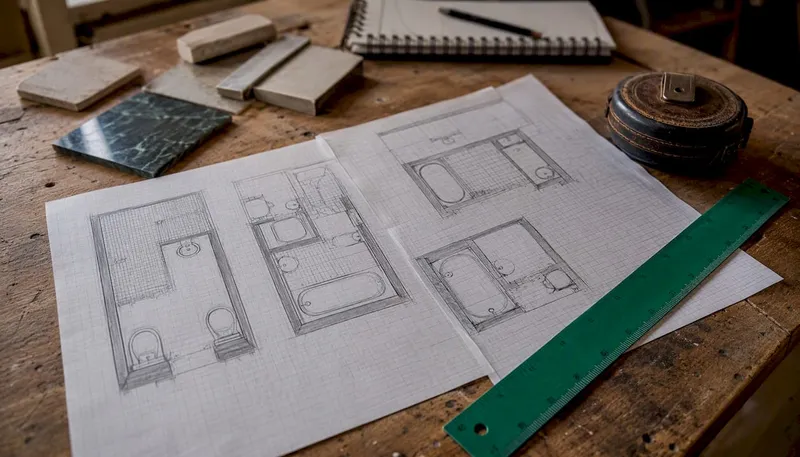
Layout is the highest-leverage decision in any bathroom renovation project plan. Moving the soil stack or relocating a drain can add significant cost and several days to the programme; keeping fixtures on or near their existing positions avoids both. Design guidance consistently recommends measuring the space carefully, testing layouts on paper, and designing around fixed plumbing wherever a full reconfiguration is not justified by the brief.
The decisions below must be settled before rough-in begins, because changing them afterwards means opening walls or floors that have already been closed.
Design decisions that directly affect rough-in cost:
- Soil stack and drain positions: relocating either requires new joist work and potentially structural advice
- Wall-hung vs floor-standing sanitaryware: wall-hung units need a concealed frame fixed to the structure
- Shower type: a wet room with a linear drain needs a sloped screed; a tray shower does not
- Ventilation strategy: intermittent or continuous extract defines fan type, duct routing, and whether background ventilators are needed (see the ventilation section below)
- Door swing and clearances: a door that opens into the room needs 700 mm clear floor space in front of the WC and 600 mm beside the basin as minimum clearances
Essential measurements to record before design sign-off:
- Overall floor dimensions and ceiling height
- Position and size of all windows and doors (including swing arc)
- Location of existing soil pipe, waste outlets, and supply pipes
- Position of existing electrical consumer unit and circuits serving the room
- Any structural walls or beams that limit where fixings can go
For accessibility considerations, particularly for older occupants or those with mobility needs, safety-first remodel guidance recommends specifying grab-rail blocking in the framing stage, wider door openings, and level-access shower thresholds at the design stage rather than retrofitting later.
Pro Tip: Sketch three layout options on squared paper before committing to one. Show each sketch to your plumber and ask for a rough cost difference. The cheapest layout is rarely the one you started with.
What permits and inspections do you need to schedule?
Permit requirements vary by country, region, and the nature of the work. Assuming none are needed is one of the most expensive mistakes a homeowner can make.
- Identify notifiable work early. Plumbing relocations, new electrical circuits, structural changes, and changes to ventilation systems commonly require notification to building control or a licensed inspector. Check with your local authority before demolition.
- Contact building control at the design stage. Submit a building notice or full plans application as soon as the layout is finalised. Processing times vary; in the UK, a building notice can be submitted before work starts, but the inspector must be notified at key stages.
- Record permit references in your project plan. Add the application reference, submission date, and expected decision date as a milestone in your Gantt. If approval is delayed, it becomes a visible hold point rather than a surprise.
- Book inspections in advance. Rough-in inspections and waterproofing sign-offs are common hold points. Add 2–3 buffer days after each expected inspection date in your schedule, because inspectors are not always available on the day you request.
- Do not cover rough-in work before it is inspected. Closing walls or floors before an inspector has signed off can require you to open them again. This is a schedule and cost risk that the project plan should make explicit.
- Keep copies of all approvals. Scan or photograph every permit, approval notice, and inspection certificate and store them with your project documents. They are required when you sell the property.
Country-specific rules belong in your plan as a named reference: in England and Wales, the relevant framework is the Building Regulations (including Approved Document P for electrical work and Approved Document F for ventilation). In other jurisdictions, identify the equivalent primary source and note it in your permit checklist.
How do you select and brief tradespeople effectively?
Hiring the right trades and documenting the agreement properly protects both your budget and your schedule. The process below gives you a structured approach.
Vetting checklist before inviting quotes:
- Verify trade registration or licensing relevant to your jurisdiction (Gas Safe, NICEIC, or equivalent)
- Request two references from comparable bathroom projects completed in the past 12 months
- Confirm public liability insurance and, where applicable, employer's liability insurance
- Check that the contractor carries professional indemnity cover if they are also designing the scheme
Getting comparable quotes:
- Write a brief scope document (one page) listing every item of work, the specification of all fixtures, and the programme dates. Send the same document to all bidders.
- Ask each contractor to price by trade category, not just a single total. This lets you compare labour rates and material mark-ups separately.
- Query any line that differs significantly between quotes. A low price on waterproofing, for example, may mean a thinner or non-compliant membrane.
- Ask each contractor to confirm in writing which items are excluded from their price.
Written contract essentials:
- Full scope of works, referencing your specification document
- Fixed start and completion dates with a delay-notification clause
- Payment schedule tied to milestones (not calendar dates): typically 10–20% on mobilisation, stage payments at rough-in complete and tiling complete, and 5–10% retention held for 2–4 weeks after snagging sign-off
- A change-order clause requiring written approval and a cost and programme impact statement before any variation proceeds
- Dispute resolution procedure
For guidance on structuring payment milestones, the House A-Z construction draw schedule guide explains how to align payments with verified progress rather than elapsed time.
What are the most common pitfalls and how do you avoid them?
Most bathroom remodels that run over time or budget do so for predictable reasons. Knowing them in advance lets you build mitigation into the plan rather than react under pressure.
- Hidden water damage: old leaks behind tiles or under floors are common and only visible after demolition. Mitigate by budgeting contingency specifically for substrate repair and by agreeing a decision deadline (e.g., 24 hours after exposure) so the contractor does not wait for approval.
- Wrong or damaged deliveries: tiles arrive in the wrong shade, a vanity unit is scratched, or a shower tray is the wrong size. Inspect every delivery on arrival and photograph any damage before signing. Keep the original packaging until the item is installed.
- Delayed inspections: building control inspectors are not always available when requested. Add buffer days to your Gantt around every inspection hold point and notify the inspector earlier than you think necessary.
- Mismatched finishes: chrome taps ordered separately from a brushed-nickel towel rail create a visible inconsistency. Specify all metal finishes in a single document and cross-reference before ordering.
- Scope creep via verbal change orders: a contractor adds work based on a conversation; the homeowner disputes the cost. Every change, however small, must go through a written change-order process with an agreed cost and programme impact before work proceeds.
- Cure-time shortcuts: waterproofing or adhesive applied before the previous layer has cured leads to tile failure. Build manufacturer-specified cure times into the Gantt as non-negotiable hold points.
For remodels involving older occupants or accessibility adaptations, regional safety-first guidance highlights the importance of specifying grab-rail blocking and slip-resistant flooring at the design stage, where the cost is minimal, rather than as a retrofit.
Which tools and templates help you manage the plan day to day?
A bathroom renovation checklist and a Gantt chart work best together: the checklist captures every decision and deliverable, and the Gantt shows when each must happen and what it depends on.
Minimum fields for any project-tracking template:
- Milestone or task name
- Earliest start date
- Planned duration
- Dependency (what must be complete first)
- Responsible person (homeowner, contractor, or specific trade)
- Budget line reference
- Delivery or completion status
Recommended starting points:
- Tom's Planner's bathroom remodelling Gantt template is a free, browser-based option you can populate in under an hour
- A simple Google Sheets or Excel spreadsheet with the columns above works well for smaller projects
- House A-Z's platform consolidates budget tracking, milestone management, and shareable exports in one place, removing the need to maintain separate documents
Using the template day to day:
- Run a two-minute weekly check: update completion status, flag any deliveries due in the next seven days, and note any decisions outstanding
- Take a photo of the room at the end of each trade's work. This creates a timestamped record that resolves most disputes about what was done and when.
- At handover, use the snagging column of your checklist as the punch list. Do not release the retention payment until every item is signed off.
What ventilation specification belongs in your project plan?
Ventilation is one of the most frequently under-specified elements in a bathroom remodel project plan, and it has direct consequences for both building compliance and long-term moisture control.
In England and Wales, Approved Document F sets the minimum extract ventilation rates for bathrooms. The intermittent extract rate for a bathroom is set to meet minimum standards outlined in Table 1.1 of the document. Continuous extract systems operate at lower rates but run constantly; the document provides equivalent figures and guidance on when each strategy is appropriate. Other jurisdictions have equivalent national standards; identify and reference yours in the permit section of your plan.
Ventilation strategy is an early decision with construction implications. Whether you choose intermittent or continuous extract defines the fan specification, the duct routing through the ceiling or wall, and whether background ventilators are needed in replacement windows. Specify this before demolition so the duct run can be planned alongside the rough-in.
| Ventilation strategy | Typical extract rate | When to choose it |
|---|---|---|
| Intermittent (boost only) | 15 l/s minimum (ADF Table 1.1) | Standard bathrooms with adequate background ventilation |
| Continuous low-rate with boost | Lower continuous rate + boost to 15 l/s | Airtight rooms or where background ventilators are not practical |
| Mechanical ventilation with heat recovery (MVHR) | System-dependent; ADF provides guidance | Whole-house airtight builds where a single-room fan is not appropriate |
Fields to add to your procurement and rough-in milestones:
- Fan type and model (intermittent timer, humidity-sensing, or continuous)
- Extract rate (l/s or m³/h, confirmed against ADF or local equivalent)
- Duct diameter and routing (ceiling void, external wall, or roof termination)
- External termination location and grille specification
- Whether background ventilators are required in windows
Pro Tip: Specify the duct route on your floor plan before the plasterer arrives. A duct that has to change direction twice loses extract efficiency and may require a higher-rated fan to compensate. Agreeing the route at rough-in stage costs nothing; changing it after plasterboard is fixed costs a day's work.
One thing most bathroom remodel guides get wrong
Most guides treat the project plan as a document you create once and then refer to occasionally. The plans that actually keep remodels on track are living documents: updated weekly, photographed at every stage, and used as the basis for every conversation between homeowner and contractor.
The governance habit that makes the biggest difference is simpler than most people expect. A two-minute weekly check, where you update the Gantt status, photograph the room, and flag any outstanding decisions, creates a shared record that prevents the most common source of delay: a contractor waiting for a homeowner's decision that the homeowner did not realise was urgent. Weekly photo logs and status checks materially reduce misunderstandings and speed up punch-list resolution at handover.
The other thing most guides understate is the value of planning and timeline discipline applied before a single trade is booked. The decisions that cost the most money to change are the ones made under time pressure during demolition, when the walls are open and the contractor is waiting. Lock the layout, specify the ventilation, and confirm every finish before demolition starts. The plan is not a formality; it is the mechanism that keeps those decisions made.
Sources
- Bathroom renovation project planning | Checkatrade blog
- Approved Document F: Ventilation (ADF1_2026.pdf)
- Gantt chart template - Bathroom Remodeling
- How to plan a bathroom renovation | Full guide
- Bathroom Remodel Trade Order | Jaspector
FAQ
How do you plan a bathroom remodelling project?
Start by locking the layout and creating a Gantt-style checklist that sequences design, procurement, demolition, rough-ins, inspections, and finishes. Populate the first three milestones (design sign-off, long-lead orders, trade bookings) before any work begins.
What is a realistic budget for a bathroom renovation?
What is the golden rule for bathroom layouts?
Keep fixtures on or near their existing plumbing positions wherever possible. Relocating a soil stack or drain adds cost and programme time that rarely justifies the layout benefit unless the brief specifically requires it.
In what order should you renovate a bathroom?
The standard sequence is: design and permits, then long-lead procurement, demolition, rough-ins (plumbing, electrical, ventilation), inspection, waterproofing, tiling, finishes and fixtures, and finally snagging. Each phase must be complete and, where required, inspected before the next begins.
How long does a full bathroom remodel typically take?
A full bathroom renovation typically runs 4–8 weeks from demolition to handover, depending on scope, inspection wait times, and whether any structural changes are involved. Build buffer days around inspection hold points from the start.