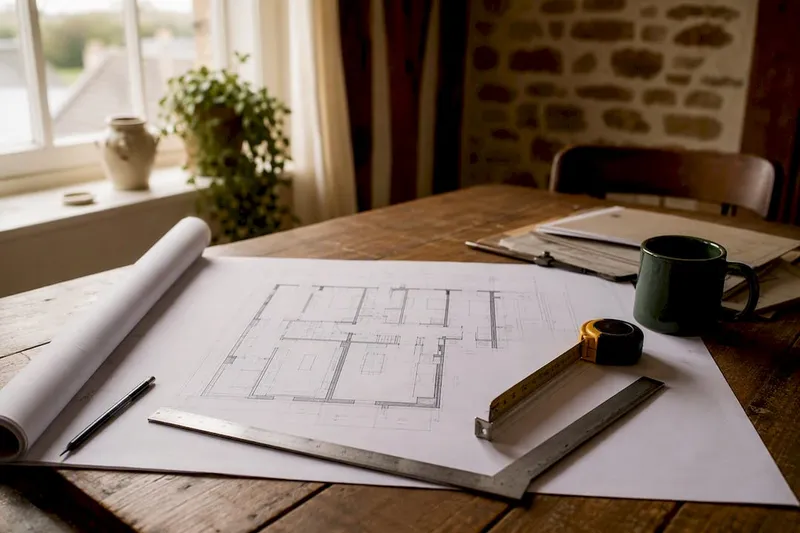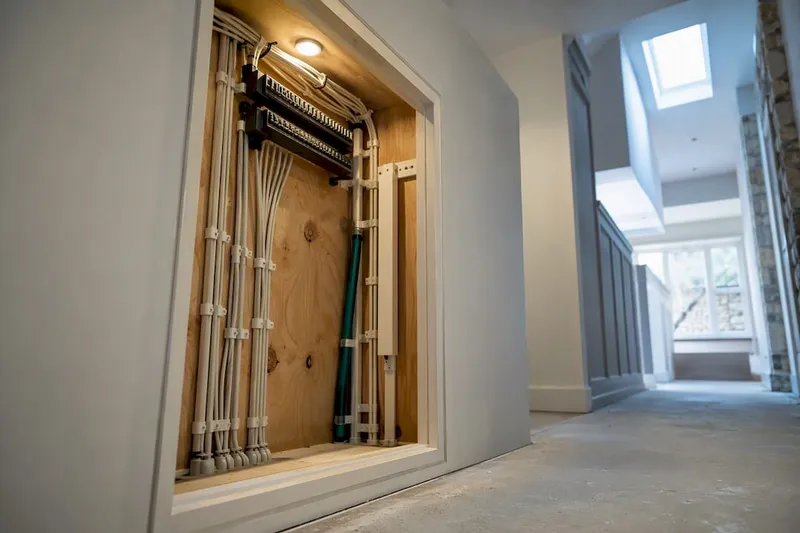
Pick a central network closet, pull a Cat6/Cat6A backbone home-run to every key room, confirm neutral wires at switch boxes, and add spare conduit for future pulls. Do this and you plan smart home wiring the way professionals do it, not the way regretful renovators wish they had. Before framing finishes, mark every device location on your plans and book a framing walk with your electrician and general contractor.
TL;DR:
- Using a central structured media enclosure with dedicated circuits and ventilation ensures reliable smart home wiring and simplifies troubleshooting.
- Planning for Cat6A cables, fiber backbone, and PoE switches optimizes performance and future-proofing, especially in long or detached runs.
- Labeling, testing, and documenting every cable before drywall saves costs and prevents complications during upgrades or repairs.
- Retrofitting older homes may require additional panel assessment, neutral wiring, and replacement of outdated cables to support modern smart devices.
- Coordinating all trades with a shared wiring checklist and project management platform reduces errors and streamlines construction phases.
Table of Contents
- How do you plan smart home wiring around a central hub?
- Which cables and PoE setup should you plan for?
- What should your room-by-room prewire checklist include?
- Do smart switches really need a neutral wire?
- When should each wiring step happen during construction?
- What should you label and test before drywall closes?
- What power backup should smart devices have?
- How do you keep a wired smart home secure?
- How does new wiring integrate with existing electrical systems?
- Lessons from first-time builders: what actually costs more later
- Plan and track your wiring project with House A-Z
- Sources
- FAQ
How do you plan smart home wiring around a central hub?
Every well-wired house has a heart, and it lives in something called a structured media enclosure, or SMC. Think of it as the control room where every cable, camera feed, and network connection reports back to base before doing its job elsewhere in the house.
Choose a location that sits roughly central to the home's footprint, since Ethernet and speaker runs both have practical distance limits, and a closet in the far corner of the basement will strain them unnecessarily. It should sit in a conditioned space, close to where the internet service enters the building and near your electrical panel, so the electrician isn't running extension cords across the property.
The SMC needs its own dedicated 20-amp circuit, several outlets, and ideally a small uninterruptible power supply so a brief outage doesn't reboot your entire network. Ventilation matters too: switches and routers generate heat, and a closed cupboard with no airflow will shorten their working life. A plywood backboard, rather than drywall alone, gives you somewhere solid to mount patch panels and equipment racks.
Pro Tip: Run 1-inch ENT conduit from the SMC up into the attic and down into the basement or crawlspace. It costs very little at rough-in and lets you pull new cable years later without opening a single wall.
This "home-run" approach, where every cable travels directly back to the SMC rather than daisy-chaining room to room, is what CEDIA's smart home wiring guide recommends as standard practice, because it keeps troubleshooting simple and future changes painless.
What the SMC needs from day one:
- A dedicated 20A circuit separate from general household loads
- A patch panel sized generously beyond your current device count
- Ventilation or a small fan to stop equipment overheating
- A UPS sized to ride out short outages without dropping the network
Which cables and PoE setup should you plan for?
Cat6 is the sensible baseline for most drops around the house, but Cat6A earns its higher price to wireless access points, security cameras, and any run longer than about 100 feet, where its tighter shielding pays for itself in reliability. For large properties or detached structures like a garage or guest house, running fibre between a main enclosure and a secondary one avoids the signal degradation copper suffers over distance, according to Data Wire Solutions' rough-in guide.
RG6 coaxial cable still earns its place at television locations for satellite or cable feeds, even in a mostly IP-based household. Speaker wiring uses 16-gauge, 4-conductor cable for in-ceiling pairs, while control wiring for keypads and sensors typically runs on 18/2. Any wall destined for a mounted television benefits from a length of conduit sleeved behind it, so HDMI or power cables can be pulled or replaced without cutting drywall.
Power over Ethernet, or PoE, lets a single cable carry both data and electricity to devices like access points, cameras, and door stations. CEDIA notes that PoE is now the preferred method for powering these fixed devices, since it removes the need for a separate power outlet at every ceiling mount. The catch is your switch's power budget: each PoE port draws from a shared pool, so tally up your planned devices and buy a switch with real headroom, not one that's exactly sized to today's needs.
| Cable type | Typical use | Notes |
|---|---|---|
| Cat6 | General drops, desks, TVs | Baseline for most runs |
| Cat6A | Access points, cameras, long runs | Better shielding, higher cost |
| Fibre | Backbone between enclosures | Best for detached buildings |
| RG6 | Television feeds | Still needed for cable/satellite |
| 16/4 speaker wire | In-ceiling speaker pairs | Two conductors per speaker |
A few habits worth adopting when specifying your material list:
- Buy 10 to 15% more cable than your drop count suggests; offcuts and mistakes happen.
- Label spools by type as you unroll them so nobody confuses Cat6 with Cat6A mid-install.
- Ask your low-voltage installer for their switch's PoE wattage budget in writing before the rack goes in.
What should your room-by-room prewire checklist include?
A workable checklist mirrors how people actually use each room, not a generic formula applied everywhere.
- Television walls. Run two Cat6 cables plus one RG6 to every planned TV location, whether or not you've bought the television yet. CrimpShop's pre-wire guide treats this as the standard combination, since it covers streaming devices, gaming consoles, and legacy cable boxes without a second trip to the wall.
- Bedrooms and home offices. Two Cat6 drops per desk or workstation location cover a computer and a secondary device like a printer or docking station, even if Wi-Fi handles daily browsing.
- Ceiling access points. Plan one Cat6A drop per 1,000 to 1,500 square feet of coverage, positioned centrally in that zone rather than tucked in a hallway corner.
- Security cameras. Run Cat6 to every camera position, favouring PoE models so you avoid a separate power supply at each mount.
- Media rooms. Add 16/4 speaker cable to every in-ceiling or in-wall pair, plus extra Cat6 for a streaming box, receiver, and any future gaming setup.
- Outdoor living and detached buildings. Treat a garage, pool house, or covered patio as its own small network zone, ideally fed by fibre if the run from the main SMC is long.
For premium TV walls where you're mounting the screen flush or hiding all cables, sleeve a length of conduit behind the drywall before it closes. It costs a few pounds now and saves a plasterer's callout later when you decide to add a soundbar or swap the screen.
Pro Tip: Mark every planned drop on your floor plan with a coloured dot before the framing walk, then walk the house with your electrician pointing at each one in person. Verbal instructions get forgotten; marked plans do not.
Do smart switches really need a neutral wire?
Yes, and this single detail derails more smart-home installs than any other wiring decision. Most smart switches and dimmers need a neutral wire present at the switch box to complete their internal circuit, a requirement SparkShark's wiring handbook flags as one of the most common causes of failed installs in older properties. In new construction, this is trivial to specify; in a renovation, it can mean opening walls that were never designed to carry one.
Beyond the neutral itself, box depth matters more than most first-time builders expect. Smart switches and dimmers are bulkier than their standard counterparts, and a shallow box that fits a basic toggle switch may not have room for the electronics behind a smart one. Ask your electrician to install deep boxes wherever a smart switch is planned, even if you haven't bought the exact model yet.
Three-way and four-way switch setups, common on staircases and long hallways, need traveller wires run between switch locations in addition to the neutral. If running a neutral to every leg proves impractical, you have workable alternatives: no-neutral smart switches designed for this exact situation, in-box relay modules that sit behind a standard switch, or smart bulbs that skip the switch wiring question entirely by handling automation at the fixture.
Add these items to your electrical scope document before rough-in:
- Confirm neutral wire present at every switch box, not just primary ones
- Specify deep boxes wherever a smart switch or dimmer is planned
- Label three-way and four-way circuits clearly at both switch legs
- Add one spare conduit run near switch clusters for future low-voltage additions
When should each wiring step happen during construction?
Timing decides whether your smart home wiring plan succeeds or turns into an expensive afterthought. Miss the rough-in window and you're paying retrofit prices for the rest of the build.
- Pre-construction. Finalise device locations on your floor plans: televisions, access points, cameras, speakers, and every smart switch. Bring your electrician and low-voltage installer to a framing walk once studs are up but before insulation, and confirm every drop location together, in person, on site.
- Rough-in. The electrician handles power circuits, switch box neutrals, and panel capacity, while the low-voltage installer sets mud rings, AP boxes, and pulls structured cabling back to the SMC. Leios Consulting's new-construction guide recommends coordinating both trades on the same day so nobody drills through the other's completed work.
- Pre-drywall inspection. Test every cable for continuity and correct length, and photograph each run before insulation goes in. This is your last chance to catch a mispulled cable at a reasonable cost.
- Trim-out. Install plates, terminate cables at the patch panel, and power on equipment to confirm live connections match your documentation.
The financial case for hitting these windows is stark. Adding drops during rough-in typically costs significantly less than retrofitting the same cable after drywall goes up, according to Hammerio's smart home wiring guide. That gap comes from patching, repainting, and the sheer labour of locating a stud bay months after the fact, compared to a few extra minutes with an open wall cavity.
What should you label and test before drywall closes?
Every cable needs a label at both ends stating its type and destination, written clearly enough that someone unfamiliar with your project can read it years from now. "Living room TV, Cat6, run 1 of 2" tells a future electrician everything they need; "Cable 14" tells them nothing.
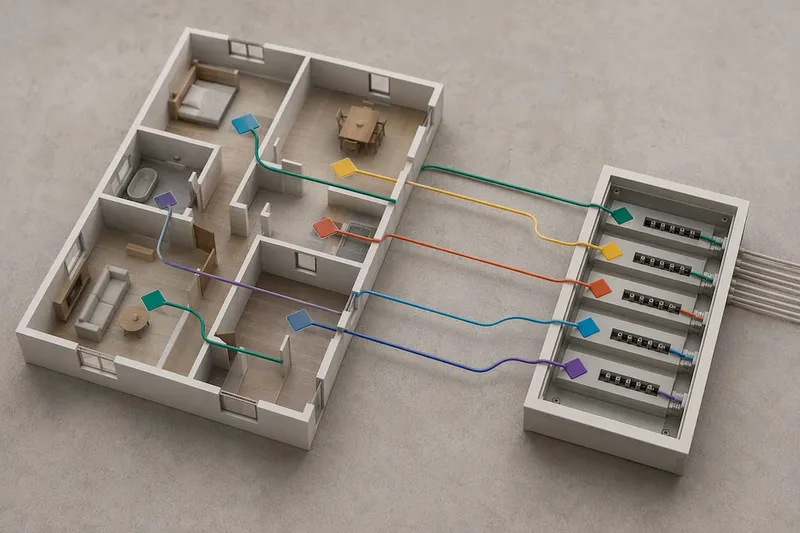
Build a patch panel map alongside the labels, noting which port connects to which room and device. CEDIA's guidance treats this kind of documented infrastructure as the difference between a house that's simple to upgrade and one where every change requires guesswork and wall access.
Before the walls close, request these tests from your installer:
- Continuity testing on every cable run, confirmed against the patch panel map
- Length verification, since runs approaching Cat6A's practical limit need flagging early
- PoE power budget confirmation for the switch feeding cameras and access points
- Photographs of every open wall cavity showing cable routing, taken before insulation
Store the results digitally rather than as a stack of paper that vanishes in a house move. A project file in something like House A-Z keeps labels, photographs, and the patch panel map together in one place, so a contractor five years from now can diagnose an issue in minutes instead of opening walls to find out what's inside them.
What power backup should smart devices have?
A smart lock, thermostat, or security camera that dies the moment the power blips isn't smart at all. Build backup power into your plan rather than treating it as an afterthought once the system is installed.
The SMC itself should sit behind a UPS sized to keep your router, switch, and any critical controllers running through short outages, the kind measured in minutes rather than hours. This matters more than most homeowners assume, since a network dropout doesn't just kill Wi-Fi; it can disconnect cameras, disable smart locks tied to app control, and interrupt any automation routine mid-task.
For longer outages, consider how your broader backup power strategy interacts with the low-voltage system. A whole-home generator or a battery storage setup, covered in more depth in this guide to back up power options, should ideally include the SMC's dedicated circuit in its coverage plan, not just major appliances.
Battery backup at individual devices matters too. Smart locks typically run on internal batteries with a physical key override, worth confirming before you commit to a model. Security cameras and access points benefit from PoE, since a switch on UPS power keeps them running even when the rest of the house has none, an advantage that pays off exactly when you need security systems working most.
How do you keep a wired smart home secure?
A wired backbone is inherently more secure than a house running entirely on wireless mesh, simply because physical cable is harder to intercept than radio signals broadcast through walls. That said, wiring choices still carry security implications worth planning for at rough-in, not patching in afterwards.
Segment your network physically where possible. Running separate home-runs for security cameras versus general household devices lets you isolate camera traffic on its own VLAN later, without needing to rewire anything. This single decision, made during cable planning rather than after move-in, saves considerable reconfiguration work.
Keep the SMC itself under lock where practical, particularly in shared or multi-occupancy buildings, since physical access to the patch panel and switch equipment is one of the simplest ways to compromise a network. A closet with a door that locks costs nothing extra to specify at the plan stage.
Avoid running low-voltage cable directly alongside high-voltage electrical runs for more than short distances, since electromagnetic interference can degrade signal quality on unshielded cable, and shielded Cat6A costs little extra where crossings are unavoidable. Finally, document your network topology as part of your wiring records. Knowing exactly which cable feeds which device makes it far easier to spot an unfamiliar connection later, something a labelled patch panel map makes almost automatic.
How does new wiring integrate with existing electrical systems?
Retrofitting smart wiring into a house with existing electrical infrastructure raises different questions than planning a new build from scratch, and the two situations shouldn't be treated identically.
The first challenge is panel capacity. Adding a dedicated 20A circuit for your SMC, PoE switches drawing meaningful continuous power, and potentially an EV charger or backup battery system can push an older panel past its rated capacity faster than homeowners expect. Have an electrician assess spare capacity before committing to a full smart wiring plan, particularly in a renovation where the panel itself isn't being replaced.
The second challenge is the neutral wire problem covered earlier, which hits existing homes far harder than new construction. Many older properties simply never ran a neutral to switch boxes, since traditional switches never needed one. Retrofitting a neutral means opening walls, hence the popularity of no-neutral smart switches and in-box relays as practical workarounds rather than defaults.
Existing low-voltage wiring, where it exists at all in an older home, is frequently the wrong category of cable entirely: old telephone wiring or early-generation Cat5 rather than Cat6. Test and label anything you find before assuming it's reusable, and budget for replacement rather than counting on salvaging cable that predates modern device demands. Gewiss's design guide for connected electrical systems suggests a hybrid approach for exactly this situation: a wired backbone where it's practical to install, with wireless endpoints filling gaps where opening walls isn't worth the cost.
Lessons from first-time builders: what actually costs more later
The regrets are remarkably consistent: missing Ethernet drops, no spare conduit, and switch boxes with no neutral. Each one is cheap to fix at rough-in and expensive once drywall closes.
A minimum viable pre-wire covers the SMC, home-run Cat6 to key rooms, and neutrals everywhere. A premium version adds Cat6A throughout, fibre to detached structures, and conduit sleeves at every TV wall. Most first-time builders sit somewhere between the two, and that's fine, provided the choice is deliberate rather than accidental.
Shared checklists matter more than people expect. When the electrician, low-voltage installer, and homeowner are all reading from the same document, fewer drops get missed simply because nobody assumed someone else had it covered.
— Azai
Sources
- The ultimate smart home wiring guide (CEDIA)
- Smart home pre‑wire guide (CrimpShop)
- Smart Home Pre‑Wire Guide 2026 (Hammerio)
- Smart home wiring basics (SparkShark)
FAQ
What wiring is required for a smart home?
A smart-ready home needs a central structured media enclosure, Cat6 or Cat6A home-run cabling to key rooms, neutral wires at switch boxes, and spare conduit for future pulls. CrimpShop's guide recommends two Cat6 plus one RG6 at every TV location as a practical baseline.
How do I plan home electrical wiring for smart devices?
Start by marking every planned device location on your floor plans, then walk the house with your electrician before rough-in to confirm drop counts and switch box neutrals. Budget a dedicated 20A circuit for your network closet and check your panel has spare capacity before adding PoE switches or backup batteries.
How do I properly wire a smart switch?
Confirm a neutral wire is present at the switch box, since most smart switches and dimmers need one to function. SparkShark's handbook notes this as the leading cause of failed installs, and where a neutral isn't practical, no-neutral switches or in-box relays are workable alternatives.
What structured wiring should I plan for my new home?
Plan a centrally located structured media enclosure on its own circuit, Cat6A to ceiling access points and cameras, Cat6 to televisions and desks, and conduit running from the enclosure into the attic and basement. Hammerio's guide puts retrofit costs at 60 to 80% higher than pre-wiring during rough-in, which makes this planning stage the cheapest point to get it right.
Can House A-Z help me track my wiring checklist?
Yes. House A-Z lets you build room-by-room checklists, share them with your electrician, and track wiring costs alongside the rest of your renovation budget. Current pricing for the Free, Pro, and Enterprise plans is listed on the House A-Z site.