A usable lighting plan layout consists of a scaled room map, a task-first lighting layer, and a simple spacing rule. Get those three things right and you can hand a working brief to your electrician today. The most reliable spacing formula is generally about 1.2 times your ceiling height between fixtures, or for tighter recessed layouts, roughly half your ceiling height.
Here's the instant checklist:
- Measure and sketch your room to scale, marking windows, doors and fixed furniture.
- Mark your work zones first: prep counter, hob, sink, dining table, reading chair.
- Place task lights over each zone, then fill in with ambient light and finish with accents.
Get this sequence right and every decision after it (fixture type, colour temperature, circuit count) becomes far easier to make.
Key Takeaways
A working lighting plan layout combines a scaled floor plan, task-first three-layer lighting, and a spacing formula of 1.2 times ceiling height (or height divided by two for dense recessed grids).
| Point | Details |
|---|---|
| Scale the plan first | Measure ceiling height, windows, doors and zones before choosing any fixture. |
| Layer in order | Place task lighting first, then ambient fill, then accent last. |
| Use the spacing formula | Space fixtures at 1.2 × ceiling height, or height ÷ 2 for dense recessed grids. |
| Offset over worktops | Shift downlights 15–25cm toward the counter's front edge to kill shadows. |
| Plan circuits and controls together | Group circuits by layer, not room, and confirm dimmer/driver compatibility before first fix. |
| Use House A-Z to export the brief | House A-Z lets you consolidate the floor plan and fixture schedule into one document for your electrician. |
Table of Contents
- How to draw a lighting plan layout that electricians can use
- Layered lighting explained: ambient, task and accent
- Spacing formulas and placement offsets that stop dark patches
- Choosing fixtures and colour temperature for each zone
- Copyable lighting layouts for small kitchens, galleys, islands and open-plan
- Common lighting plan mistakes and what to hand your electrician
- How early planning with House A-Z tools cuts rework and cost
- Electrical load calculation and circuit planning for lighting
- Lighting controls and automation worth building into the plan
- Working with natural light and window placement in your layout
- Safety standards and building codes for lighting installation
- House A-Z turns your lighting plan into a document your electrician can use
- Sources
- FAQ
How to draw a lighting plan layout that electricians can use
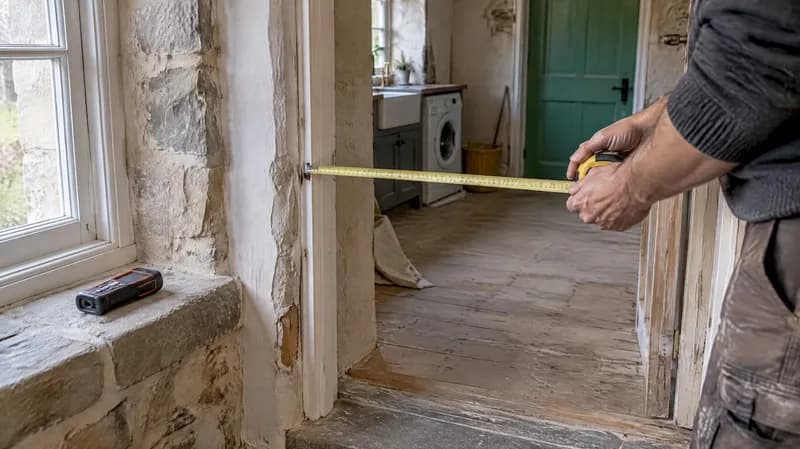
Before you choose a single fixture, you need a floor plan you can actually mark up. Grab graph paper, a free planning template, or a room-planning tool, and draw your room to scale, ideally 1:50. It doesn't need architectural precision. It needs to be accurate enough that spacing calculations mean something.
Record the details that shape every later decision:
- Ceiling height (in every room. It rarely matches the room you assumed).
- Window and door positions, including swing direction.
- Fixed furniture and joinery: kitchen islands, wardrobes, bookcases, sofas.
- Existing power points and any appliances that will sit under a work zone.
- Activity zones marked directly on the plan: prep, cooking, dining, reading, TV, laundry.
A step-by-step recessed lighting guide from RC Lighting recommends this exact sequence: measure length, width and ceiling height, then map the key work zones before you touch a spacing formula. Skipping straight to fixture spacing without this step is the single biggest reason lighting plans need reworking mid-project.
Pro Tip: Do this before first fix, not after plastering. Adding embedded LED runs once walls are finished usually means surface-mounted trunking, which looks like an afterthought because it is one.
Layered lighting explained: ambient, task and accent
A flat, single-source ceiling light is the most common lighting mistake in residential renovations, and the fix is a three-layer approach rather than a single fitting. Effective lighting layouts combine ambient, task and accent light, and skipping any one layer creates the flat, institutional feel that makes a finished room look unfinished.
Each layer has a distinct job:
- Ambient — general room illumination from downlights, track lighting or a flush ceiling fitting.
- Task — focused light where you actually work: under-cabinet strips, pendants over a counter or island, a desk lamp.
- Accent — depth and atmosphere from LED strips, adjustable spotlights or plinth lighting under cabinetry.
Layering isn't decorative polish. It's what stops rooms reading as flat or clinical, because each layer solves a different visual problem that a single ceiling fitting cannot.
The order you design in matters more than most homeowners expect. Place task lighting first, because that's where the eye actually needs light to work safely. Then add the ambient layer to fill the room evenly. Accent lighting comes last, once you know where the shadows and dead corners actually are.
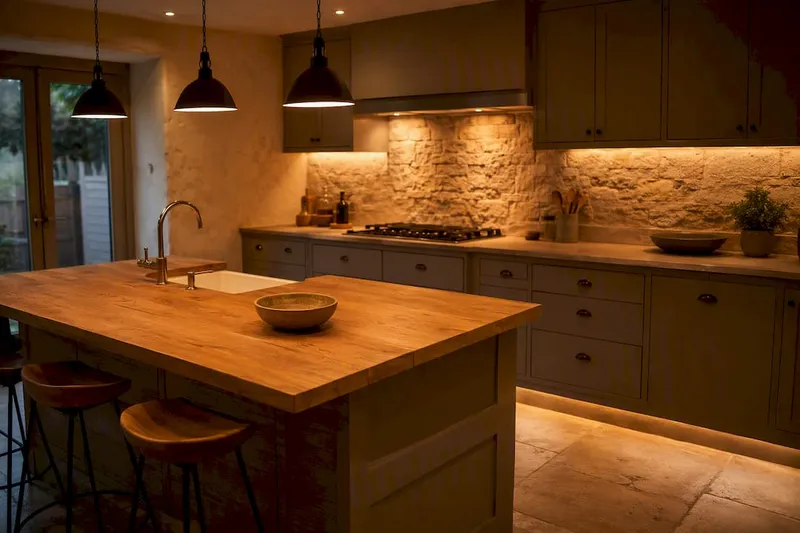
Wire each layer onto its own circuit with independent dimmers where possible. A kitchen with task lights hard-wired to the same switch as the ambient downlights means you can never dim the room for dinner without plunging the worktop into darkness, and that single wiring decision undoes most of the planning you did to get the layers right in the first place.
Spacing formulas and placement offsets that stop dark patches
Two formulas cover most residential lighting plan layouts. For a standard ambient grid, spacing between fixtures should equal 1.2 times your ceiling height. A room with a 2.4m ceiling calls for roughly 2.9m between downlights. For tighter, recessed-heavy layouts, a widely used alternative divides ceiling height by two for maximum spacing, which gives a denser, more even wash of light, better suited to kitchens and bathrooms than the 1.2× rule.
Neither formula accounts for where you actually stand to work, which is why offset matters as much as spacing.
| Placement factor | Guideline |
|---|---|
| General ambient spacing | 1.2 × ceiling height between fixtures |
| Dense recessed grid | Ceiling height ÷ 2 for maximum spacing |
| Downlight offset over counters | Shift 15–25 cm (6–10 in) toward the front edge |
| Beam angle for task zones | Narrower beams for focused work light |
| Beam angle for ambient wash | Wider beams for even general coverage |
Shift downlights toward the front edge of any counter rather than centring them over it, to reduce shadows cast by your body onto the worktop. RC Lighting's guidance makes the same point: shadow is a placement problem, not a wattage problem.
Pro Tip: Before committing to a grid, mark fixture positions with masking tape on the actual ceiling and stand under them. It catches shadow and glare problems no floor plan sketch ever will.
Choosing fixtures and colour temperature for each zone
Fixture choice should follow the layer, not the other way round. Ambient light usually comes from fixed or adjustable downlights, track systems or a flush fitting; task light comes from under-cabinet LED strips, pendants or desk lamps positioned directly over the work surface; accent light comes from strips, small spots or plinth lighting tucked under cabinetry or shelving. Gimbal or adjustable downlights earn their slightly higher cost in rooms with artwork or asymmetric furniture, where a fixed downlight can't be aimed to compensate.
Colour temperature (CCT) influences the space ambiance:
- Task zones usually benefit from cooler temperatures for clarity.
- Dining and relaxed ambience prefer warmer temperatures for softness.
- General rooms often use temperatures in the mid-range for versatility.
- Aim for good colour rendering (CRI 80 or higher), especially in kitchens for accurate food appearance.
Confirm LED driver compatibility before you choose dimmers. Not every LED fixture works with every dimmer switch, and mismatched pairs cause flickering or a limited dimming range that only shows up once everything is installed. Wire each zone onto its own dimmer circuit rather than one master dimmer for the whole room. It's the only way to actually use the layered approach you've just designed.
Copyable lighting layouts for small kitchens, galleys, islands and open-plan
These starting points assume a standard 2.4m ceiling; adjust spacing proportionally for taller rooms.
- Small kitchen: four to six downlights on a 1.2× ceiling-height grid, plus a continuous under-cabinet strip along every run of worktop. Prioritise the strip over extra downlights. It does more for actual task visibility than another ceiling fitting.
- Galley kitchen: two parallel rows of downlights, each row aligned directly over its own work run rather than centred on the room. Space fixtures within each row using the 1.2× formula, and keep the two rows close enough together that the centre aisle isn't left dim.
- Island: pendants hung 75 to 90cm above the worktop, spaced to sit over the island's natural work zones rather than dead centre. Avoid placing a downlight directly above the island's centre; it competes with the pendants and creates double shadows.
- Open-plan kitchen-living: separate circuits for kitchen and living zones, each with its own dimmer, so you can run a bright prep scene in the kitchen while the living side stays low. Scene presets make open-plan spaces genuinely usable, letting you shift from cooking to dining to evening ambience without touching a single fixture.
A practical five-step method for kitchens specifically: light the worktops first, add the ambient grid, layer in accents, assign CCT per zone, then wire it all on separate circuits. That order maps almost exactly onto the general task-first approach, which is no accident. Kitchens are where poor lighting sequencing shows up fastest.
Common lighting plan mistakes and what to hand your electrician
The same handful of mistakes recur across almost every renovation lighting plan House A-Z sees:
- Central ceiling-only lighting, which leaves counters, desks and reading chairs under-lit no matter how bright the middle of the room is.
- Missing task lighting entirely, forcing residents to rely on ambient light for close work it was never designed for.
- One circuit for the whole room, which makes layered lighting impossible to use as intended.
- Dimmers that aren't compatible with your chosen LED driver, causing flicker or a poor dimming range.
- Non-IC-rated fixtures in insulated ceilings, a fire-risk error that's genuinely common in DIY installs.
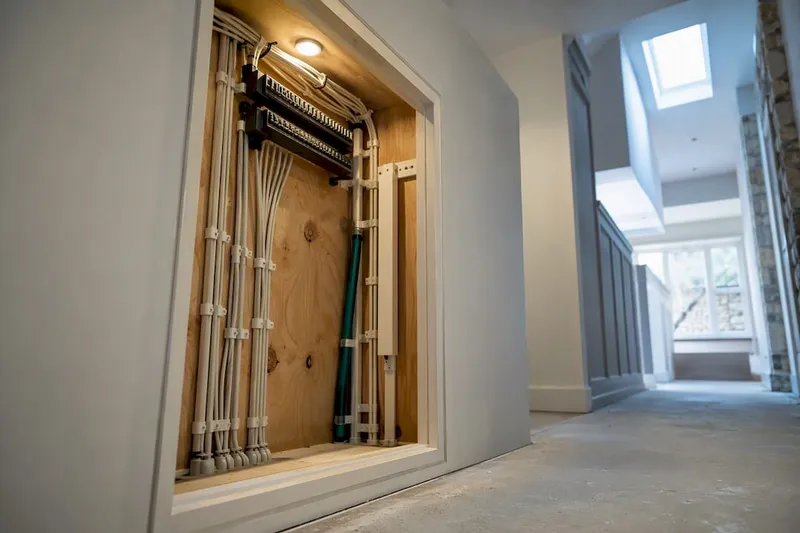
Before first fix, confirm switch positions, clearance around fixtures for maintenance, mounting depth against your actual ceiling void, and IC-rating where insulation is present. A lighting plan needs more than a reflected ceiling plan: give your electrician a fixture schedule (type, CCT, CRI), a circuit list, and your preferred dimmer type, not just a dot on a drawing.
How early planning with House A-Z tools cuts rework and cost
Planning lighting before first fix means embedded runs stay hidden and wiring never needs to be surface-mounted later, a rework cost that Mullan Lighting flags as one of the most avoidable in residential projects.
House A-Z consolidates your floor plan, fixture schedule and budget tracking in one place, with AI agents flagging conflicts (a pendant clashing with a joist, a circuit overloaded) before they become site problems. Some users report catching planning errors worth around €20,000 before work started. The practical next step: export your plan and fixture schedule as a document your electrician can work from directly.
Electrical load calculation and circuit planning for lighting
Every circuit on your plan has a load limit, and lighting circuits are usually rated lower than socket circuits precisely because they're not designed to carry much current. A standard UK lighting circuit typically runs on a 6A or 10A breaker, which comfortably supports LED fixtures given how little current each one draws, but it's still worth totalling wattage per circuit rather than assuming LEDs make overload impossible.
Add up the wattage of every fixture on a proposed circuit, including any transformers or drivers for low-voltage strips, since drivers themselves draw a small additional load beyond the LEDs they power. Leave headroom rather than running a circuit to its rated limit. This matters more once you start layering: a kitchen with ambient downlights, under-cabinet strips, pendant task lights and accent strips can easily need three or four separate lighting circuits rather than one.
Group circuits by zone and by layer, not by room. Ambient and task lighting in the same kitchen often sit on different circuits specifically so you can dim one without touching the other, which is the whole point of the layered approach covered earlier. Accent lighting, especially low-voltage LED strips run through a driver, usually sits on its own circuit too, partly for load reasons and partly because it's often controlled separately via a smart dimmer or timer.
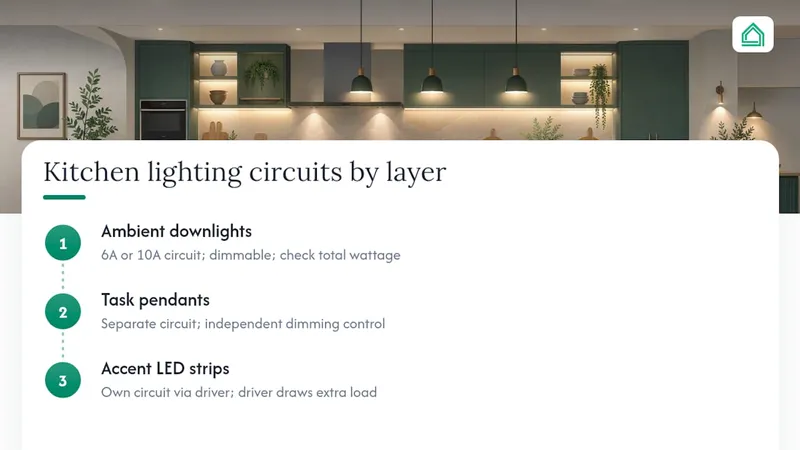
This is exactly the detail that belongs in the fixture schedule you hand your electrician: which fixture sits on which circuit, its wattage, and its control method. Circuit planning done on paper before first fix is dramatically cheaper than circuit planning discovered as a problem once the ceiling is closed.
Lighting controls and automation worth building into the plan
Dimmers are the baseline control layer, but they need to be planned per circuit, not bolted on afterwards. Every circuit you want to dim independently needs a dimmer rated for its specific load type, and LED driver compatibility has to be checked at the planning stage rather than assumed.
Smart lighting controls add a genuinely useful layer on top of that baseline, provided the underlying circuit plan supports them. Smart switches and app-controlled dimmers let you build scene presets, the same prep-to-dining-to-evening transitions mentioned in the open-plan kitchen example, without adding extra physical switches to a wall that's already crowded. Motion sensors suit transitional spaces like hallways, pantries and utility rooms, where task-based switching adds little value but automatic on/off genuinely does.
The decision to go smart or stay with standard dimmers should happen before first fix, not after, because smart switches sometimes need a neutral wire that standard dimmers don't require. Retrofitting that wiring after walls are closed is exactly the costly rework early planning is meant to avoid.
Keep the control plan proportionate to the room. A living room genuinely benefits from three or four scene presets. A utility room usually just needs a switch by the door and, at most, a motion sensor. Overspecifying automation in low-traffic rooms adds cost without adding anything you'll actually use day to day.
Working with natural light and window placement in your layout
Your lighting plan doesn't start with fixtures. It starts with how much daylight the room already gets, because artificial light only needs to compensate for what's missing. A north-facing kitchen with a single small window needs meaningfully more ambient and task light than a south-facing room with a full-width window wall, even if both rooms are identical in size.
Mark window and skylight positions on your scaled floor plan before you calculate spacing, not after. Daylight direction affects which corners of a room fall into shadow at different times of day, and those are often the same corners that need extra accent or task light to stay usable in the evening. A reading chair positioned to use window light during the day still needs its own task lamp for after dark, and that fixture should be planned in from the start rather than added as an afterthought.
Darker finishes compound the issue. Stone and darker surfaces absorb more light than they reflect, so a kitchen with dark stone worktops or matt black cabinetry needs a higher ambient and accent output than an identical layout finished in pale timber or gloss white. If you're finalising cabinet colours alongside your lighting plan, it's worth checking how cabinet finish affects perceived room brightness before locking in your fixture count.
Rooms with generous natural light can also get more from dimmable controls than rooms without it. A bright, south-facing kitchen barely needs its ambient layer switched on before mid-afternoon, so a dimmer that lets you scale output down (rather than a fixed-brightness fitting) avoids the room feeling artificially lit during the day.
Safety standards and building codes for lighting installation
Lighting installation sits under electrical safety regulation in most jurisdictions, and the rules that matter most to a residential lighting plan cluster around a few recurring areas: IC-rating, IP-rating in wet zones, and circuit protection.
Any downlight installed into an insulated ceiling void needs to be IC-rated (insulation contact rated) specifically because non-rated fixtures can overheat when surrounded by insulation, which is a genuine fire risk rather than a theoretical one. This is one of the most common DIY lighting mistakes precisely because it's invisible once the ceiling is closed; nobody checks it again until something goes wrong.
Bathrooms and other wet zones carry their own requirement: fixtures need an IP (ingress protection) rating appropriate to their zone, with higher ratings required closer to water sources like showers and baths. A pendant fitting rated for a dry living room is not automatically safe over a bathroom sink, and mixing up ratings between rooms is a mistake that shows up surprisingly often in lighting plans drawn up without professional input.
None of these standards are optional extras layered onto a design that's otherwise finished. They need to be built into the plan from the start, alongside your fixture schedule and circuit list, because retrofitting a compliant fixture after installation usually means redoing the ceiling work around it. Building regulations vary by country and even by region within some countries, so always confirm current local requirements with a qualified electrician rather than relying on a generic rule of thumb, particularly for anything involving insulated ceilings or wet zones.
Azai's take: the plan is the cheap part
Every renovation I've looked at closely has the same pattern: people spend hours choosing pendant styles and almost no time on spacing or circuits, then wonder why the finished room feels wrong. Draw the plan first. Check dimmer and driver compatibility before you buy a single fixture, not after.
— Azai
Sources
For deeper detail on kitchen-specific spacing and sequencing, Lightguru's five-step kitchen lighting method and RC Lighting's recessed layout guide both work through the maths in more depth than covered here. If you're still deciding on a kitchen layout shape before you plan lighting around it, House A-Z's guide to kitchen layout options is a useful starting point, and reading architectural plans helps if you're coordinating your lighting drawing against an existing floor plan.
- Kitchen lighting layout: Simple 5-step plan — Lightguru
- How to layout recessed kitchen lighting — RC Lighting
- How to layout recessed lighting — Govee blog
- Three layers of lighting explained — Flexfire LEDs
FAQ
What is a lighting layout plan?
A lighting layout plan is a scaled drawing of a room showing every fixture position, its type, and the circuit it sits on, built around the three-layer ambient, task and accent model.
How do I make a lighting layout plan?
Draw your room to scale, mark work zones and fixed furniture, place task lighting over each zone, then add ambient light using the 1.2 × ceiling height spacing rule before layering in accents.
How do I plan my lighting design?
Start with a scaled floor plan and ceiling height, decide your work zones, then design task lighting first, ambient second, and accent last, wiring each layer onto its own dimmer circuit.
Where can I create a free lighting plan online?
Many free room-planning templates and simple drawing tools let you sketch a scaled plan, though a platform like House A-Z lets you build the plan alongside your fixture schedule and budget in one place.
What spacing rule should I use for downlights?
Use 1.2 times your ceiling height for general ambient spacing, or divide ceiling height by two for a denser recessed grid, then shift fixtures 15 to 25cm toward counter edges to avoid shadows.