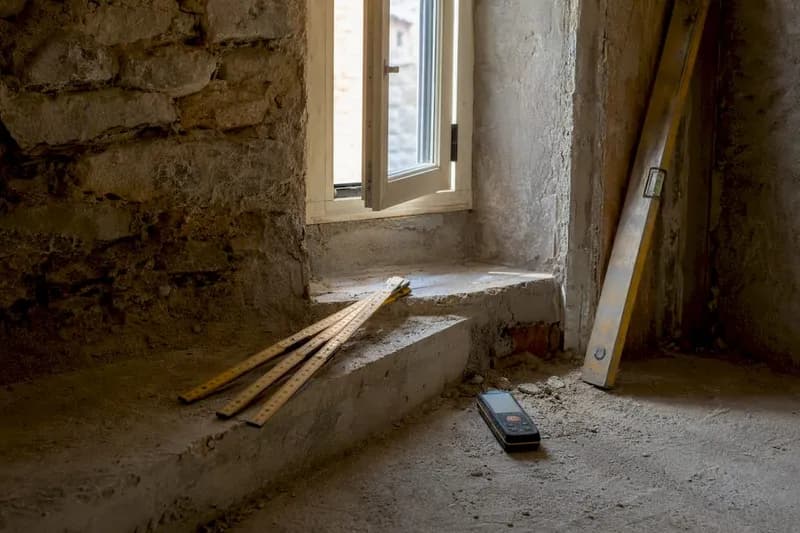
Fix moisture and verify egress before you touch a tape measure for anything else. That order isn't arbitrary. Once framing goes up over an unresolved damp problem or a bedroom is drawn where a code-compliant escape window can't fit, you're paying to undo finished work rather than adjust a sketch. The sequence that actually works is: resolve moisture, confirm egress, measure and map mechanicals, define room uses, then plan permits, only after that does anyone pick up a saw.
Before you go further, run this immediate checklist:
- Measure the space and photograph every wall, post, window, and pipe run.
- Tape a clear plastic sheet to the concrete floor and wall for 24 hours, or leave a hygrometer running for a few days, to check for hidden moisture.
- Sketch the rough locations of your electrical panel, water heater, HVAC trunk lines, and cleanouts.
- Call your local building department or start capturing the plan properly in a basement remodel planning tool so nothing gets lost between now and permit submission.
Two things worth anchoring early: building codes set minimum ceiling heights and egress opening sizes that decide whether a room can legally be a bedroom, and a simple plastic sheet test remains one of the most reliable low-cost ways to catch moisture before it becomes a five-figure repair. Platforms such as House A-Z exist precisely because these decisions, moisture, egress, budget, and permits, need to sit in one place rather than scattered across sticky notes and three different apps.
Key Takeaways
Successful basement remodel planning depends on resolving moisture and egress before layout decisions, and sequencing permits and inspections ahead of framing.
| Point | Details |
|---|---|
| Fix moisture before finishing | Run a plastic sheet test or hygrometer check first; unresolved moisture causes expensive rework later. |
| Confirm egress before layout | Any basement bedroom needs a code-compliant egress window meeting minimum size and sill height rules. |
| Map mechanicals early | Leave clear access to panels, water heaters, and boilers so future service doesn't require demolition. |
| Get three comparable bids | Use identical scope documents so contractor quotes can be fairly compared. |
| Centralise the plan | House A-Z consolidates measurements, budget tracking, and permit-ready exports in one platform. |
Table of Contents
- How do I plan a basement remodel from survey to permits?
- Turning your basement layout into a measured floor plan
- Why moisture assessment has to happen before finishing
- What egress and code rules apply to basement rooms?
- How much does a basement remodel cost, and how long does it take?
- How do I compare contractor bids and avoid change orders?
- Which basement tasks are safe to DIY, and which need a professional?
- How House A-Z helps prevent the top basement planning mistakes
- Author perspective: the mistake pattern nobody talks about
- Ready to start your own basement remodel plan?
- Sources
- FAQ
How do I plan a basement remodel from survey to permits?
A basement finishing plan lives or dies on the order you do things in. Skip a step here and you'll likely repeat it later, at greater cost.
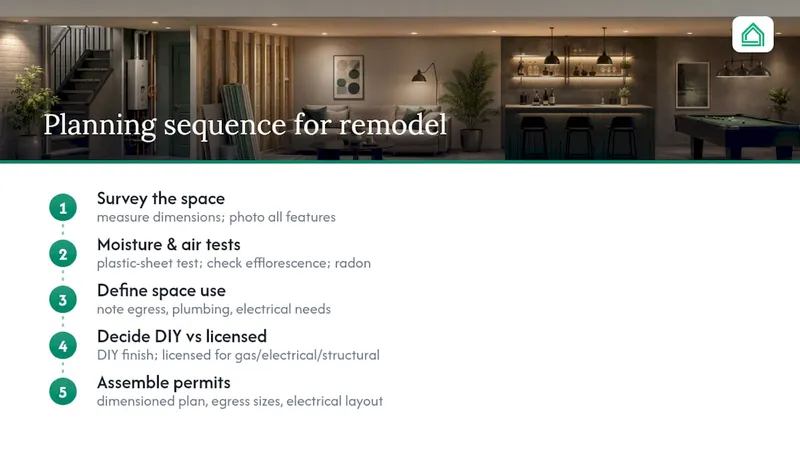
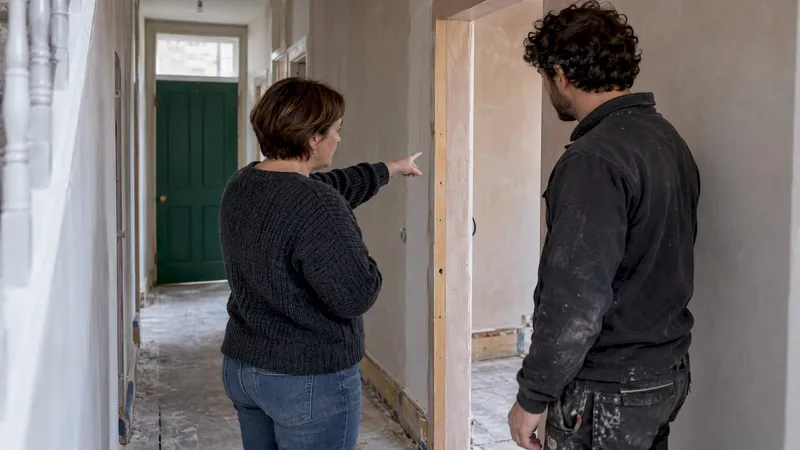
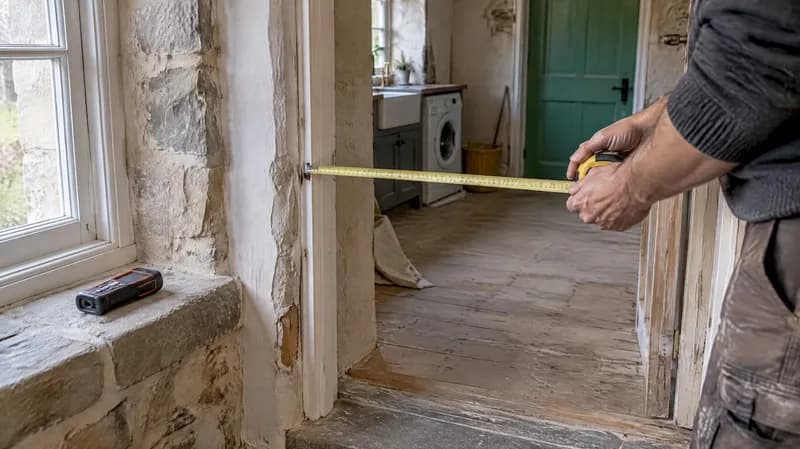
1. Survey the space thoroughly. Measure every dimension: wall lengths, ceiling height at the lowest point, window and door openings, stair location, and the position of structural posts or beams. Note where the electrical panel, water heater, furnace, sump pit, and any water supply or drain lines sit. Photograph everything, including awkward corners and anything embedded in the slab. You'll refer back to these photos more than you expect once framing starts.
2. Investigate moisture and air quality. Run a plastic sheet test: tape an 18 inch square of clear plastic to the concrete, sealed on all four edges, and check it after 24 to 48 hours. Condensation on the underside points to moisture moving through the slab; dampness on top suggests humidity in the room itself. Look for efflorescence, that chalky white residue on block or concrete, and check for musty odours or staining near the floor line. If you're in a region where radon is a known issue, a short-term test kit is worth the modest cost before you finish the space, as radon and moisture checks are recommended early in the process.
3. Define how the space will actually be used. A home gym, a guest bedroom, and a media room each carry different technical requirements. A bedroom needs an egress window. A bathroom needs rough plumbing and ventilation. A home theatre benefits from extra electrical circuits and sound isolation. Write down primary and secondary uses now, because retrofitting plumbing or a window opening after drywall goes up is one of the costliest mistakes in basement renovation planning.
4. Decide what you'll DIY and what needs a licensed trade. Painting, trim, and flooring are reasonable weekend projects. Electrical panel work, gas line alterations, and structural changes to support beams are not, both for safety and because most jurisdictions require licensed sign-off before an inspector will approve the work.
5. Assemble your permit documentation. Most building departments want a dimensioned floor plan, a note of egress window sizes, an electrical layout, and a general scope of work. A homeowner-first sequence confirms permits after the floor plan and moisture check are settled, not before, since permit requirements often shift once you know exactly what's being built.
Pro Tip: Keep a single running file, digital or paper, of every measurement, photo, and test result from day one. When a contractor asks "what's behind that wall?" three months in, you'll have the answer in seconds instead of guessing.
Turning your basement layout into a measured floor plan
Good basement layout planning starts with an accurate footprint, not a Pinterest board. Use a laser distance measure if you can, it's faster and more accurate than a tape measure over long spans, though a steel tape works fine for a careful, methodical survey. Record the position of every support post, duct drop, and exposed pipe run relative to two fixed walls, and photograph each one with a tape measure visible in frame so you can double check dimensions later without another site visit.
Once the shell is on paper, zone the space by function rather than by room name alone:
- Public zones (family room, home office) work best near the stairs and away from mechanical clutter.
- Private zones (a guest bedroom) need a quiet corner with a viable egress window location.
- Wet zones (bathroom, laundry, wet bar) should sit as close as possible to existing drain lines.
- Storage and mechanical zones need clear access paths, not just leftover corners.
Ceiling height drives more design decisions than most first-time renovators expect. If ductwork or a beam drops your usable height below code minimums in a given area, you've generally got three options: build a bulkhead to box in the obstruction, install a suspended ceiling that keeps mechanicals accessible, or leave joists exposed with a painted finish. Suspended ceilings win when you need repeated access to valves or wiring; painted exposed joists work well in a casual rec room where the industrial look fits; bulkheads suit narrow runs where you want a cleaner finish overhead.
Bathroom placement logic comes down to plumbing economics. Positioning a new bathroom near an existing drain stack or cleanout can save thousands compared with saw-cutting the slab to run new lines, and it may avoid the need for an ejector pump system to lift waste up to the main drain. If the only viable spot is far from existing plumbing, budget for that pump and the additional excavation work upfront rather than discovering it mid-project.
Before committing to a layout, test it. A simple paper overlay on your measured footprint, or a basic digital mockup, lets you walk through furniture placement and traffic flow before a single stud is cut. It's a cheap way to catch a doorway that won't clear a sofa or a hallway that's a few inches too tight.
Why moisture assessment has to happen before finishing
Roughly every basement renovation planning guide worth reading says the same thing in different words: moisture problems get dramatically cheaper to fix while the space is empty. Once framing, insulation, and drywall are in place, a leak or a persistent damp patch means tearing out finished work to reach the source, and that's before you've dealt with any mould that's had weeks to establish itself.
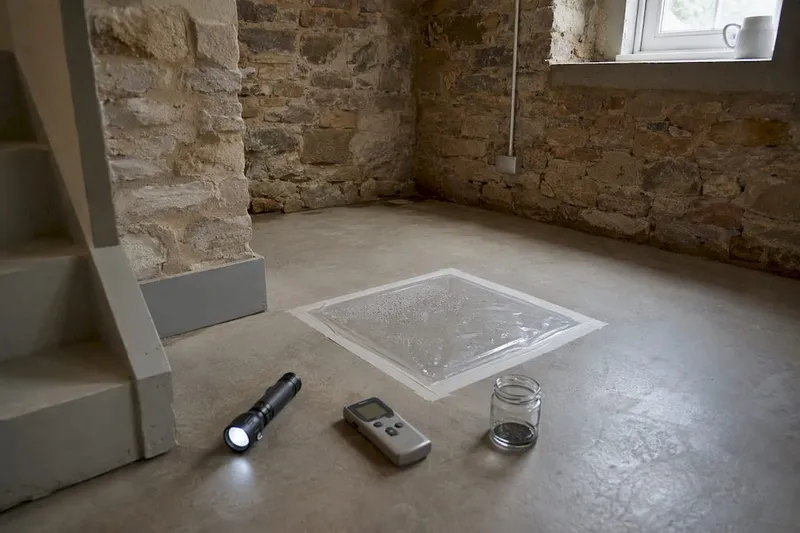
Start with the basics. Look for efflorescence on concrete or block walls, watch for staining that suggests water has tracked across the floor before, and pay attention to any musty smell that lingers even with the space aired out. The plastic sheet test described earlier remains the simplest diagnostic; a hygrometer left running for several days gives you a clearer read on ambient humidity trends than a single spot check.
Not every moisture issue needs the same fix:
- Exterior fixes often solve the problem outright: regrading soil away from the foundation, extending downspouts, and clearing gutters can eliminate seasonal dampness caused by surface water.
- Interior systems become necessary when water is entering through hydrostatic pressure or a high water table, in these cases, a sump pump and interior drainage system, or a French drain along the perimeter, is typically required.
- Drainage systems and membranes are far cheaper to install before finishing begins than after, simply because there's no finished surface in the way.
For insulation strategy below grade, rigid foam board is generally preferred over standard fibreglass batts, because foam doesn't hold moisture against the wall the way batt insulation can if the assembly ever gets damp. A sealed rigid foam assembly against concrete is a more forgiving choice in a below-grade environment where some vapour movement through the wall is close to inevitable.
If you're seeing active water intrusion, cracking that suggests foundation movement, or persistent dampness that basic grading and gutter work hasn't solved, that's the point to bring in a foundation or waterproofing specialist rather than pushing ahead with finishes. A local partner such as Exterior Genie's basement waterproofing service can assess whether the fix needed is exterior excavation, an interior drain tile system, or a combination of both.
Sequencing matters as much as the fix itself: complete waterproofing and drainage remediation, let everything dry and cure fully, and only then move on to framing and insulation. Investigating conditions and correcting the source problem comes before rough-in and insulation in every credible basement finishing plan, and skipping that order is where most expensive rework originates.
What egress and code rules apply to basement rooms?
Understanding a handful of code basics before you finalise a layout will save you from designing a room that can't legally be used the way you intend.
Egress requirements for bedrooms. Any basement room intended as a bedroom typically needs a code-compliant egress window or door, one with a minimum net clear opening, a maximum sill height above the floor, and often a window well if it sits below grade. Egress opening sizes and sill heights are defined in building code and vary by jurisdiction, so check with your local building department before assuming an existing window qualifies.
Permit types you'll likely need. Structural permits cover framing and any changes to load-bearing elements. Electrical permits cover new circuits and outlets. Plumbing permits cover any new fixtures or drain runs. Mechanical permits cover HVAC changes, including new ductwork or a mini-split system. Inspections generally follow a rough-in stage, an insulation stage, and a final stage, in that order, and each must pass before the next phase of work can proceed.
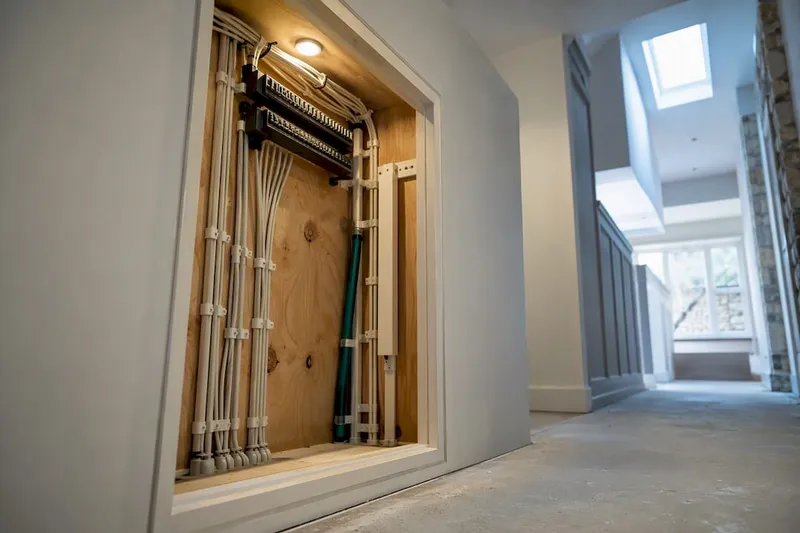
Mechanical clearance requirements. Leave adequate working space in front of electrical panels, water heaters, and boilers, both for code compliance and so a technician can service or replace equipment later without demolishing a finished wall.
Finding your local requirements. Contact your building department directly, most publish permit checklists and fee schedules online, and ask specifically about egress window sizing, ceiling height minimums, and whether a licensed contractor's stamp is required on your drawings.
What a permit-ready submission usually includes. A dimensioned floor plan, an electrical layout showing outlet and fixture locations, material specifications for insulation and fire-rated assemblies where required, and proof of contractor licensing for any trade work being performed. Permits commonly cover framing, electrical, plumbing, and mechanical work, with inspections timed at rough-in and final stages, skipping this step can complicate a future resale or void an insurance claim if something goes wrong later.
If reading drawings and code language feels unfamiliar, a primer on reading architectural plans will make permit conversations with your building department considerably less intimidating.
How much does a basement remodel cost, and how long does it take?
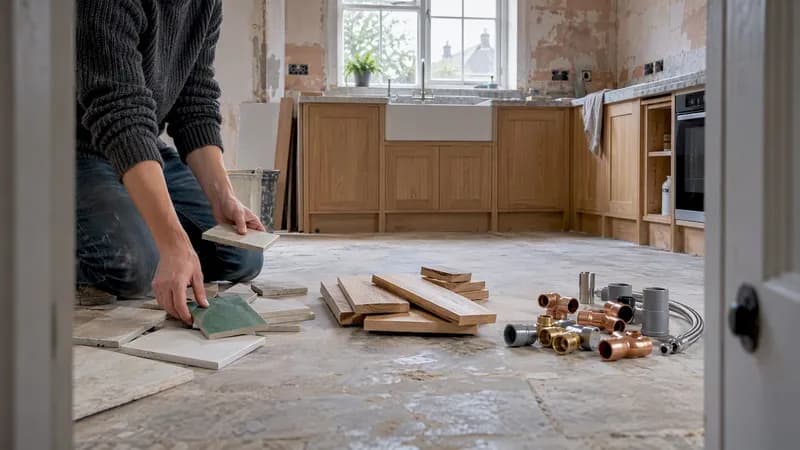
Budgeting for a basement finishing plan works best when you split costs into distinct categories rather than treating the project as one lump figure: remedial moisture or foundation work, mechanical and electrical rough-in, framing and insulation, finishes (flooring, drywall, paint, trim), fixtures, and a contingency fund sitting on top of all of it.
Costs vary considerably by market, labour rates, and material choices, so treat any range as a starting point for your own local quotes rather than a fixed number:
- A basic finish (painted drywall, carpet or LVP flooring, standard lighting, no new plumbing) sits at the lower end of the spectrum.
- A mid-range remodel that adds a bathroom, upgraded flooring, and improved lighting design costs meaningfully more, largely driven by the plumbing and waterproofing work a bathroom demands.
- A premium fit-out with custom cabinetry, a home theatre setup, or a wet bar sits highest, reflecting both material quality and the additional trades involved.
Your contingency should scale with your risk profile, not sit at a flat percentage regardless of conditions. A basement with a clean, dry slab and straightforward mechanicals carries lower risk than one with visible efflorescence, an older foundation, or any history of flooding, budget a larger buffer in the latter case, since demolition frequently uncovers issues that weren't visible during the initial survey.
Sequencing and timeline follow a fairly consistent pattern across most basement renovation projects: moisture remediation and any structural work happen first, followed by rough-in electrical and plumbing, then insulation, then drywall and finishes, with inspections slotted at each major transition rather than saved for the end. Trying to compress inspections into a single visit at project completion is a common cause of delay, since failing one item at that stage can mean reopening finished walls.
A simple Gantt-style checklist, whether hand-drawn or built into a renovation budget and scheduling guide, keeps trades and inspection dates visible in one place. That visibility is exactly what a basement remodel timeline needs to stay realistic rather than aspirational.
How do I compare contractor bids and avoid change orders?
Certain basement remodel tasks legally require a licensed professional, not just for insurance reasons but because inspectors will not sign off otherwise: electrical panel work, plumbing rough-in, structural changes to beams or load-bearing walls, egress window cutting through foundation concrete, and most waterproofing systems that involve excavation or interior drain tile.
The single biggest lever homeowners have for getting a fair price is requesting genuinely comparable bids. Give each contractor the identical scope document, materials list, and drawings, then ask for three written quotes based on that exact scope. Bids that vary wildly usually mean the contractors interpreted vague instructions differently, not that one is simply cheaper.
A solid contract should specify:
- Exact materials and brands, not "equivalent or similar."
- Start and finish dates, with reasonable allowance for weather or supply delays.
- Inspection milestones tied to payment releases, not a lump sum paid upfront.
- A written payment schedule broken into stages.
- Warranty terms covering both labour and materials.
Vet references properly by asking to see a past basement project in person if possible, basement work reveals workmanship issues, like uneven drywall taping near foundation walls or poor sealing around utility penetrations, that are harder to spot in photos. Ask directly whether the contractor has dealt with moisture issues on past jobs and how they resolved them.
Whether you hire a general contractor to manage the whole sequence or coordinate trades yourself depends largely on your available time and comfort with scheduling. A general contractor adds a management fee but removes the burden of chasing subcontractors and lining up inspections; coordinating it yourself saves that fee but demands real attention to sequencing. Requesting three comparable written bids with an identical scope is worth doing either way, since it's the clearest way to catch a lowball quote that's missing scope items.
Pro Tip: Ask every bidding contractor the same question: "What happens if you open a wall and find moisture damage we didn't know about?" Their answer tells you more about how they'll handle surprises than any reference call will.
Which basement tasks are safe to DIY, and which need a professional?
Setting realistic boundaries upfront saves both money and headaches. Home improvements basement projects reward homeowners who know exactly where their skills end.
Reasonably DIY-friendly tasks: painting walls and trim, installing luxury vinyl plank (LVP) flooring, hanging shelving, and fitting basic light fixtures once the electrical rough-in has passed inspection.
Tasks to hand to a licensed trade: electrical panel work and new circuit runs, plumbing rough-in for a new bathroom or wet bar, HVAC ductwork extensions or a mini-split installation, cutting an egress window opening through a foundation wall, and any waterproofing system that involves excavation.
The hybrid approach that saves real money: hire licensed trades for rough-in work and anything requiring an inspection, then handle painting, flooring, and fixture installation yourself once that work has passed. A hybrid approach, professionals for rough-in and DIY for finishes, commonly saves 30 to 40 percent compared with hiring a contractor for the entire project, while keeping the code-critical work in qualified hands.
Site safety basics you shouldn't skip: wear proper PPE when cutting or sanding, have older homes checked for asbestos in floor tile or pipe insulation before demolition, and control dust with plastic sheeting between work areas and the rest of the house.
Documentation habits worth building now: photograph every stage before it's covered by drywall or flooring, and keep every receipt and permit document together. Future buyers, and your own memory in five years, will thank you when a plumbing question comes up during resale.
Practical tools, measurement methods, and planning templates
For measuring, a laser distance measure beats a tape for speed and accuracy over long basement spans, though a steel tape remains perfectly adequate for careful work. Photograph reference points as you go, they're invaluable when you're back at your desk drawing the footprint from memory otherwise.
For visualising the layout, basement design apps let you test 2D and 3D layouts and check furniture fit before committing to a floor plan, and free tiers are usually sufficient for a straightforward rec room or bedroom layout. For tracking the project itself, a simple spreadsheet covering budget categories, a material shopping list, and a short Gantt-style schedule for trade sequencing keeps everyone aligned.
- Use a laser measure or tape plus reference photos for the footprint.
- Test layouts with an app or paper overlay before finalising.
- Track budget, materials, and schedule in one consolidated document, not three separate files.
- Simple measured sketches with dimensions, finished areas, and mechanical locations are often sufficient for permitting, upgrading to fuller software mainly helps when communicating with multiple contractors at once.
House A-Z consolidates exactly this: measurement capture, budget tracking, scheduling, and exportable permit-ready files, so nothing gets lost between a paper sketch and a contractor's inbox.
How House A-Z helps prevent the top basement planning mistakes
The mistakes that cost basement remodels the most money are rarely dramatic. They're a moisture check skipped, a bid comparison done loosely, a mechanical clearance blocked by a finished wall nobody thought to plan around. House A-Z was built around closing exactly those gaps.
- Consolidated planning tools bring budget tracking, room mapping, and product tracking into one interface instead of scattered spreadsheets and apps.
- AI-guided recommendations factor in your stated budget, preferences, and timeline to flag potential conflicts, like a bathroom placement that's expensive to plumb, before you commit.
- Exportable, permit-ready documentation turns your measurements and floor plan into files you can hand straight to a building department or contractor.
- Contractor collaboration tools keep bids, scopes, and inspection milestones visible to everyone involved, reducing the vague-bid problem covered earlier.
Some users have reported avoiding costly errors worth tens of thousands by catching planning conflicts early, the kind of mistake, a blocked mechanical panel or a missed egress requirement, that's cheap to fix on a screen and expensive to fix after drywall goes up.
Author perspective: the mistake pattern nobody talks about
The recurring failure in basement remodel planning isn't ignorance of moisture or egress rules, it's impatience with the planning stage itself. Homeowners rush past the survey because it feels like admin, then accept a vague bid because chasing three detailed quotes feels slow, then finish a wall over a panel because nobody mapped service access on paper first.
Every one of those shortcuts is reversible if caught early and expensive if caught late. Slowing down at the planning stage, mapping mechanicals properly, insisting on comparable written bids, and preserving inspection access before finishes go up, isn't caution for its own sake. It's the difference between a project that finishes on budget and one that doesn't. The hybrid approach, licensed trades for the risky work, a centralised checklist or platform for everything else, consistently outperforms either extreme: full DIY chaos or handing over total control and hoping for the best.
— Azai
Ready to start your own basement remodel plan?
You've now got the sequence: moisture first, egress second, layout third, permits before framing. Doing all of that across a spreadsheet, a design app, and a folder of contractor emails is where most basement renovation ideas get lost or delayed. House A-Z was built for exactly this gap, bringing measurement capture, AI-guided budget and design suggestions, permit-ready exports, and contractor collaboration into one interface, so your moisture test results, your floor plan, and your contractor bids live in the same place instead of three different ones.
It suits first-time renovators who want fewer surprises and more clarity heading into permit submissions, as well as anyone managing multiple trades who needs a single source of truth for scheduling and budget. If you want hands-on planning support alongside the software, House A-Z's agents can help you get started on your basement project today.
Sources
For code-specific questions, IRC2015's building planning chapter covers egress and habitable space requirements referenced throughout this guide. For moisture control and sequencing detail, see the basement moisture and finishing overview and the mechanical access and layout planning guide. Homeowners preparing permit submissions may also find Homedepot Canada's renovation planning steps a useful practical checklist alongside House A-Z's own reading architectural plans guide.
- Basement Remodeling: Planning, Moisture Control, and Below-Grade Finishing
- Basement Finishing Planning: Coordinating Moisture, Mechanical Access, and Room Layout
- How to finish a basement: the complete guide
- How to plan your basement renovation
- IRC2015 — building planning (egress/room definitions)
FAQ
How do I plan the layout of my finished basement?
Start by measuring the space and mapping fixed constraints, posts, mechanicals, and existing plumbing, then zone the layout into public, private, and wet areas before testing furniture placement with a paper overlay or design app.
Do I need planning permission to convert my basement?
Most basement remodels require permits covering structural, electrical, plumbing, and mechanical work, with inspections at rough-in and final stages; check with your local building department for exact requirements before starting demolition.
Is there a free app for basement design?
Yes, several basement design apps offer free tiers for basic 2D layout sketches and furniture fit testing, which is usually enough for straightforward rooms, though paid tiers or a consolidated planning tool like House A-Z add budget tracking and permit-ready exports.
Can I design my own basement floor plans for free?
You can, and a simple measured sketch showing dimensions, finished areas, and mechanical locations is often sufficient for permitting in many jurisdictions, though a licensed contractor's stamp may still be required depending on your local code.
What's the difference between basic and premium basement finishes?
A basic finish typically covers painted drywall, carpet or LVP flooring, and standard lighting with no new plumbing, while a premium fit-out adds custom cabinetry, a bathroom, or a home theatre setup, driving costs considerably higher due to added trades.