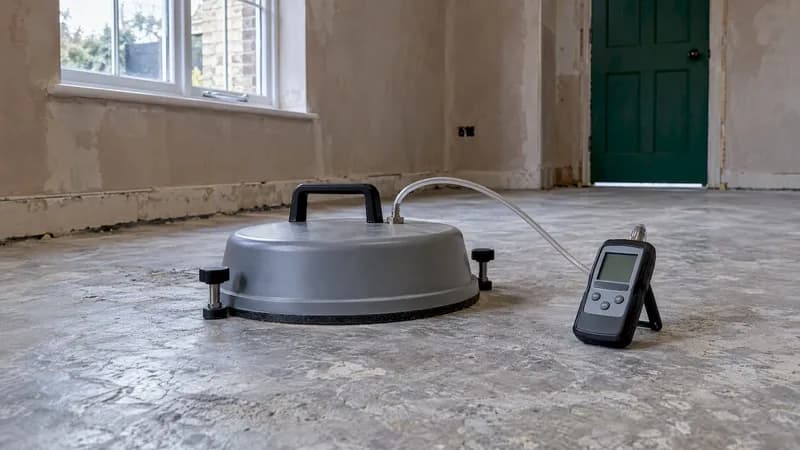
The test to trust for a concrete slab is an in-situ relative humidity (RH) test. In the UK that means the insulated hygrometer procedure in BS 8203. It measures the humidity of the air held in the slab, not just how the surface looks or feels. A handheld electronic meter can help you survey a floor, but it should not decide whether a floor is accepted. Most flooring suppliers want the slab at 75% RH or below before they will let you lay on it.
This guide covers each method, how to prepare and run a test, what the numbers mean, and what to do when a slab fails. It is written for self-builders, renovators and couples about to commit to a floor they cannot easily undo.
TL;DR
- Concrete never stops holding moisture. The question is whether the slab is dry enough for the specific floor going on top, and only a measured reading can tell you.
- The UK's preferred method is the insulated hygrometer test in BS 8203. Many suppliers specify a surface RH of 75% or less.
- Electronic meters give comparative readings only. They cannot pass or fail a slab.
- A failed slab can be given more time, treated with a moisture suppression system, or paired with a less moisture-sensitive floor.
- Keep dated test records. They are your protection if a warranty is ever questioned.
Table of Contents
- Why a slab needs testing before the floor goes down
- The main test methods and what each one measures
- What reading is acceptable?
- How to prepare and run a test
- When to hire a professional
- What if the slab fails?
- Our perspective
- Keep tests, dates and costs in one place
- FAQ
- Sources
Why a slab needs testing before the floor goes down
A new slab starts life holding far more water than it needs to cure. According to the Concrete Centre, a typical concrete floor loses about a quarter to a third of its original water content. For a 150 mm slab that can be 6 to 9 litres per square metre. The same source says it can take many months for the top surface to reach 75% RH, even in a well-ventilated, weathertight building. Drying is slower still where moisture is coming up from the ground below.
That trapped moisture is what damages finishes. It can affect carpets, some adhesives, self-levelling compounds and screeds, and it can raise humidity in the room. Timber lifts, vinyl bubbles and adhesive lets go. The repair usually costs far more than the test would have.
A rough rule of thumb you may hear is one month of drying per 25 mm of slab thickness. Treat it as a planning guide, never a pass mark. Weather, ventilation, heating and any water coming from below can make a slab far slower. Only a reading settles it.
If you are planning a below-ground room, the stakes are higher. Our guide to basement remodel planning explains how floors fit into the wider sequence, and basement waterproofing options covers what to do when the water is coming from outside, not from the pour.
The main test methods and what each one measures
There are several ways to test a slab, and they do not measure the same thing. That is why a number from one method cannot be compared directly with a limit written for another.
| Method | What it measures | Typical use | Weakness |
|---|---|---|---|
| Insulated hygrometer (BS 8203) | RH of the air at the slab surface under an insulated cover | UK standard for resilient floors | Needs several days of equilibrium time |
| In-situ RH probe (ASTM F2170) | RH at a set depth inside a drilled hole | Quantitative depth reading, widely used internationally | Requires drilling and a 72-hour wait |
| Calcium chloride (ASTM F1869) | Moisture vapour emission rate from the surface | Older US standard, still quoted in manufacturer guides | Reads the surface only, over a few days |
| Electronic moisture meter | Comparative electrical reading | Fast survey of a large floor | Not an absolute measure |
Insulated hygrometer test (BS 8203)
This is the method a UK flooring contractor will most likely ask for. The Concrete Centre names it as the preferred test for assessing floor moisture and notes that resistance-type moisture meters are not recommended for the job. A sealed, insulated hood sits on the slab until the air beneath it reaches equilibrium, and the hygrometer records the RH.
In-situ relative humidity probe (ASTM F2170)
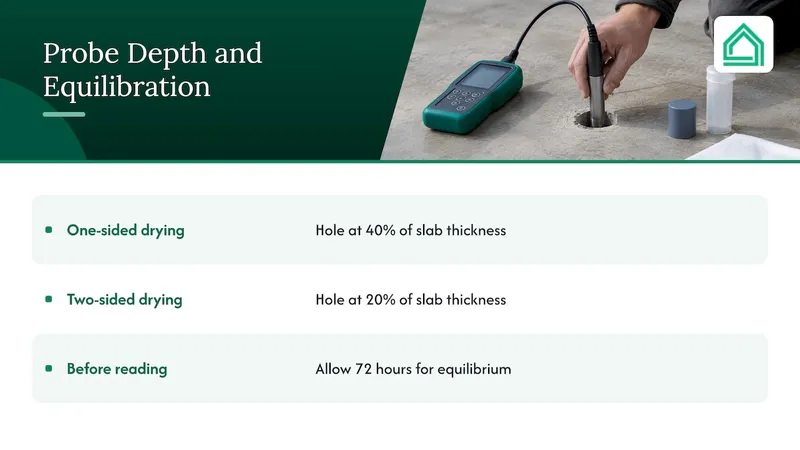
You will see this method in manufacturer paperwork, particularly for imported products. ARFA's technical bulletin describes ASTM F2170 as the primary quantitative method for finding the percentage of RH in a concrete slab. A probe is placed in a drilled hole, and Concrete Answers notes that you allow 72 hours for the moisture to reach equilibrium before reading.
The hole depth matters. According to the NFCA best practice guide, drill to 40% of the slab thickness if it dries from one side only, or 20% if it dries from both sides. A ground-bearing slab dries from the top, so 40% is the usual case.
Calcium chloride test (ASTM F1869)
This test measures moisture vapour emission rate (MVER). A dish of calcium chloride is sealed under a plastic dome on clean concrete, and its weight gain after about three days gives the rate, as a flooring contractor's technical sheet explains. ARFA lists it alongside F2170 as one of the two main methods. It tells you what is leaving the surface, not what is held deeper in the slab.
Electronic moisture meters
Meters are quick, cheap and good for finding the wettest patch of a large floor. But Concrete Answers is clear that they should not be used to accept or reject a floor, because they do not give an absolute measure of moisture inside the slab. Even meter makers admit the limits: FLIR says there is no value that gives a definitive "wet" or "dry" reading, because values vary with the material and location.
So what is a bad reading on a meter? Any figure that is high relative to the rest of the floor is a flag, not a verdict. Use the meter to decide where to place your proper test sites.
What reading is acceptable?
There is no single number for every floor. The limit comes from the flooring or adhesive manufacturer, and it is tied to the method used.
- UK hygrometer test: The Concrete Centre says suppliers often state that materials can only be laid where surface RH measured by the BS 8203 test is 75% or less.
- US-style limits: one manufacturer's click-lock guide says MVER should not exceed 3 to 5 lbs per 1,000 sq ft per 24 hours, with RH no higher than 80% for one product line and 95% for another. That shows how much limits differ between products.
The lesson: read the installation guide for your actual floor before you test. Then ask the tester to record the method, the reading and the product it is judged against. Never apply a limit written for a different method.
Check the surface too
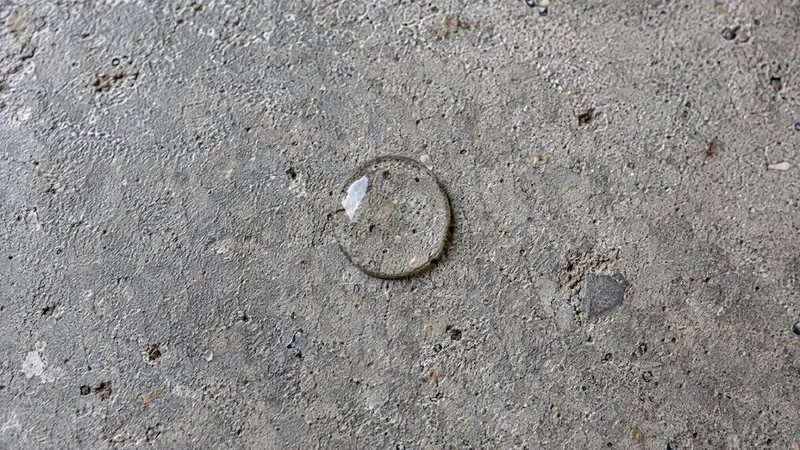
Moisture is not the only slab property that can sink a floor. One adhesive-down vinyl specification asks for surface alkalinity tested to ASTM F710, with a pH between 7.0 and 9.0. The same document describes a simple drop test for porosity: a 1-inch water drop should soak in within 60 to 90 seconds. If it does not, the surface is non-porous and adhesion may be poor. Your installer may use other checks, so ask.
How to prepare and run a test
A test is only as good as the conditions around it. Here is the sequence we would follow.
- Let the slab cure. The slab should be at least 28 days old. IFTI's field guide explains that younger concrete is still hydrating and gives elevated readings that do not reflect long-term performance.
- Get the building to service conditions. The same guide asks for the permanent HVAC to run at occupancy conditions for 48 hours beforehand, with at least 72 hours after any water intrusion. Concrete Answers puts the principle simply: test under the same temperature and humidity the slab will see in use. In a UK home, that means the building closed in and heated as it will be lived in.
- Prepare the surface to its final state. Remove dust, old adhesive and any coatings the test site would otherwise read through.
- Choose enough test locations. The NFCA guide calls for a minimum of three tests for the first 100 square metres, then one extra for each further 100 square metres. Put extra sites near external walls, plumbing, doorways and any spot your meter survey flagged.
- Install and protect the test. Fix the hood or probe as the method requires, and keep it undisturbed. Test sites must be protected from disturbance and damage for the whole period, according to the flooring specification cited above.
- Record everything. Note the date, the room, the position, the temperature, the reading and who took it.
One practical point for couples juggling a build: put the test in your project schedule before the floor order date, not after. A drying delay hits the plan far less hard if you saw it coming three weeks earlier. Our note on how flooring choices affect flow in your home is a good companion when you are deciding what goes on top.
When to hire a professional
DIY hygrometer kits can be hired by the day, and for a simple room that may be all you need. Bring in an independent tester when:
- the floor is expensive, such as engineered timber or wide-plank wood;
- the slab is ground-bearing or has had a leak or flood;
- a warranty is at stake;
- the first result is borderline, or there is any dispute between you, the builder and the floor fitter.
The reasoning is about defensibility. ARFA's bulletin says that for warranty and dispute protection, testing by an independent certified third party is substantially more defensible than testing by a party with a schedule interest. The same bulletin makes a second point worth remembering: results are a snapshot of conditions at the time of testing and do not predict future changes. Documented results show what the slab was like on the day you laid the floor.
That is the same logic buyers apply when they bring in outside inspectors before taking over a property, as in this guide to verifying condominium defects before handover. Independent findings, written down, carry weight that a verbal reassurance never will. Our own guide to keeping home warranty records shows how to file test reports so you can find them years later.
On the professional side, the Concrete Repair community makes a related point: the ICRI guideline says due diligence means finding potential problems through appropriate testing, and that reproducible results from trained, skilled technicians give a sound basis for choosing mitigation systems.
What if the slab fails?
A failed test is information, not a disaster. The usual options, in order of cost:
- Wait and retest. Improve ventilation and heating, fix any water source, and measure again. Drying is slow, so build this buffer into your schedule.
- Find the source. If readings stay high, moisture may be coming from below or from a leak. Fix that first or the next test will fail too.
- Treat the slab. Concrete Answers says that when slab moisture cannot be controlled, you can consider moisture vapour suppression systems such as topical coatings.
- Change the floor. The same source suggests less moisture-sensitive floor coverings. Ceramic or porcelain tile on a suitable system tolerates conditions that would ruin timber. Mind your quantities as you switch; our piece on tile ordering mistakes explains why one extra box matters.
Whichever route you take, confirm it with the flooring manufacturer in writing. A system the manufacturer does not approve can void the warranty.
Our perspective
Moisture testing is the kind of job that looks like a delay and acts like insurance. First-time builders often treat the floor as a finishing detail, then discover that the floor is where the earlier schedule, budget and weather all collide. A slab that is a few weeks short of dry can push a handover back, which in turn pushes back the painter, the kitchen fitter and your move-in date.
That is why we think of testing as a planning task as much as a technical one. Put the test date in the schedule, budget a line for an independent tester on higher-value floors, and store the report with your other build paperwork. A buffer of a couple of weeks costs little when you plan it and a great deal when you do not. And ask early: which floor are you choosing, what does its guide demand, and does the slab get there in time?
The same habit protects you when something goes wrong. Dated readings, photos and the manufacturer's limit in one place turn an argument into a short conversation.
— Azai
Keep tests, dates and costs in one place
A moisture test touches the schedule, the budget and the paperwork all at once. House A-Z gives first-time builders and renovators one place to track the floor budget, set the sequence of trades and keep documents together. You can start on the Free plan, and Pro is 29 € per month. Professional contractors and agencies can look at Enterprise, from 99 € per month. See the plans and pricing or meet our AI agents.
FAQ
How do I check concrete moisture myself?
For a reliable result, hire or buy an insulated hygrometer kit and follow BS 8203, leaving it undisturbed until the reading settles. A handheld meter can show which areas are wetter, but it cannot pass or fail a slab. For a high-value floor, ask an independent tester to do it.
What is the acceptable moisture level for a concrete slab?
It depends on the flooring product. UK suppliers commonly specify 75% RH or below on the BS 8203 test, while other manufacturers set different limits for different methods. Always use the limit in the installation guide for your floor and the method it names.
How long must a new slab dry before flooring?
There is no fixed time. The Concrete Centre says reaching 75% RH can take many months, and ground slabs are often slower. Test instead of counting weeks, and retest if conditions change.
Can I use a cheap moisture meter to decide?
No, not to accept or reject a floor. Meters give comparative readings, and even manufacturers say there is no universal wet or dry value. Use one to find where to place proper test sites.
Sources
- Moisture in new concrete floors, The Concrete Centre
- ARFA Tech Bulletin 001: Moisture Testing
- Concrete Answers: moisture in concrete floors (CIP 28)
- NFCA A11 Best Practice: Moisture Testing for Floor Coverings
- Moisture in Concrete floors, technical sheet
- How to Test a Concrete Floor for Moisture, IFTI
- Wet and Dry Moisture Meter Values, FLIR
- Rigid Max LVT specification and installation guide
- Click Lock Installation Guide for Stabilicor and LVT Click