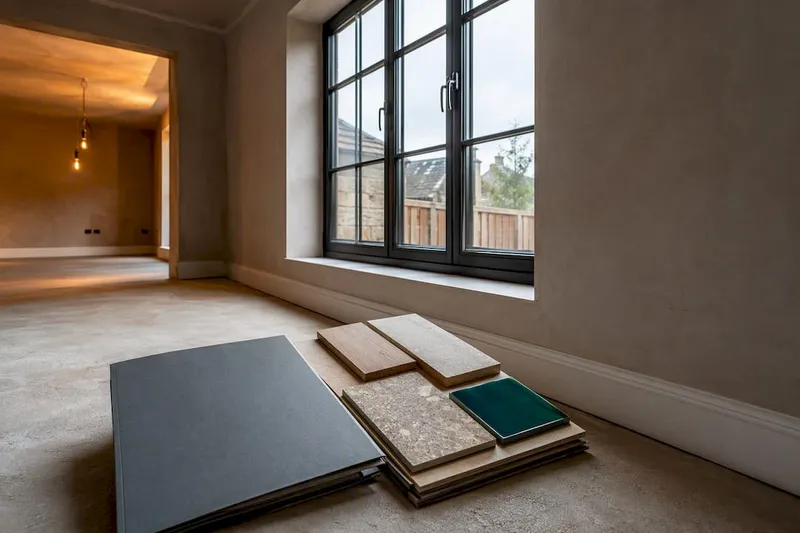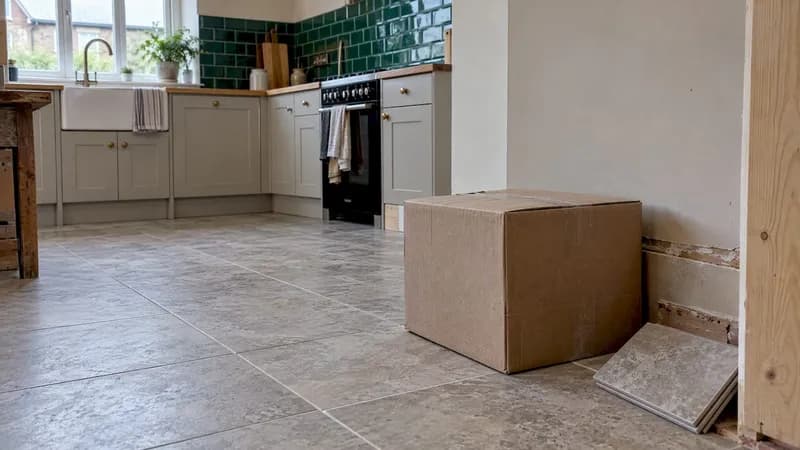
The three steps that prevent most tile disasters are simple: order samples and test them where they will actually live, calculate a sensible overage so you keep one extra box as attic stock, and mock up your layout before you finalise any quantity. Skip any of these and you risk mismatched colours, awkward cuts or a reorder that never quite matches the original batch.
TL;DR:
- Test samples in the room at morning, midday, and evening, then check them with the intended grout and sealer because light and finish can change color.
- Keep one extra box as attic stock, label it with its lot number, and record invoices and delivery details for future repairs.
- For large format tile, check substrate flatness with a straightedge before ordering; the cited baseline is about 1/8 inch over 10 feet.
- Choose porcelain for wet areas and busy floors, ceramic for walls or lighter traffic, and slip resistant finishes for wet surfaces regardless of material.
- Center the pattern on the room’s most visible sightline, and shift the starting point to avoid edge pieces narrower than half a tile.
Table of Contents
- 1. Not ordering samples first
- 2. Ordering too few tiles (misjudging overage)
- 3. Not planning the layout (cuts, pattern runs and focal lines)
- 4. Choosing the wrong tile type or size
- 5. Poor substrate preparation and flatness tolerances
- 6. Using the wrong adhesive, mortar or grout colour
- 7. Using the wrong tools and skipping spacers
- 8. Rushing grouting, sealing and drying times
- 9. Not accounting for delivery times, batch changes and reorder plans
- 10. How our workflow reduces tile waste and reorder risk
- 11. Author checklist: the exact pre-order checks I use
- Try House A-Z to centralise your measurements and records
- FAQ
- Sources
- Key standards and guides to consult
1. Not ordering samples first
Tile colour and sheen shift dramatically under different light, against different grout shades, and once a sealer goes on. A tile that looks warm and sandy in a shop under fluorescent strips can turn cool and grey by a north-facing window at four in the afternoon.
Three checks catch most surprises before they become expensive:
- View the sample tile in the room at morning, midday and evening light.
- Grout a small section with your intended grout colour to see the real contrast.
- Seal a test tile if your chosen material requires sealing, then check how the colour deepens.
Log the results alongside the supplier's lot number so the tiles you finally order match what you tested.
Pro Tip: Photograph your sample under natural light and artificial light separately, then compare both images before you commit.
2. Ordering too few tiles (misjudging overage)
Underordering is the single costliest tile mistake because reordering later rarely produces an exact match. Manufacturers run tiles in batches, and shade or sizing can shift between production runs, as practical installer guidance explains.
- Allow some extra tile for straightforward floor layouts with few cuts.
- Allow more extra for complex patterns, diagonal runs, or wet areas with lots of trimming.
- Add a further allowance for large-format tiles, where a single miscut wastes an entire piece.
One extra box, kept aside as attic stock and labelled with its lot number, is the cheapest insurance against a future repair that never quite matches, according to the same installation standards guidance. Record delivery dates, lot numbers and supplier invoices together so a repair five years from now starts from solid information rather than guesswork. Our renovation procurement log gives you a simple template for exactly this.
3. Not planning the layout (cuts, pattern runs and focal lines)
A mocked-up layout, whether sketched on paper or built digitally, reveals problems no supplier quote ever will: slivers of tile at one wall, a grout line running straight through the middle of a shower niche, a pattern that stops awkwardly short of the skirting board.
- Draw the room to scale and mark doorways, fixtures and any focal wall before placing a single tile.
- Centre the layout on the room's most visible sightline rather than on a wall that nobody notices.
- Avoid slivers under half a tile width at the edges by shifting the starting point rather than trimming at the last minute.
- Reconsider tile size or orientation where the standard layout forces excessive cuts around pipework or cabinetry.
Our tile layout patterns guide walks through how these choices change waste percentages before you order.
4. Choosing the wrong tile type or size
The right material depends on the room, not on what looks best in a showroom display. Porcelain handles moisture and foot traffic better than ceramic, while natural stone brings variation that some homeowners love and others find unpredictable once it is on the floor.
- Porcelain suits wet areas and high-traffic floors thanks to its density and low absorption.
- Ceramic works well on walls and lower-traffic floors, usually at a lower cost per tile.
- Natural stone needs sealing and more careful cutting, which increases both waste and labour time.
- Large-format tiles demand a very flat substrate, since any dip shows up as visible lippage between tiles.
- Wet areas call for a slip-resistant finish rather than a polished surface, whatever the material.
5. Poor substrate preparation and flatness tolerances
Large tiles are unforgiving of an uneven floor. The TCNA handbook sets out flatness tolerances for large-format tile, commonly cited as around 1/8 inch over 10 feet or tighter, and treats this as a baseline rather than an aspiration.
- Check the substrate with a long straightedge before ordering tile, not after it arrives.
- Use self-levelling compound or a new screed where dips or humps exceed the tolerance.
- Add an uncoupling or waterproofing membrane in wet areas or over timber subfloors prone to movement.
- Bring in a contractor once remediation involves structural adjustment or significant levelling.
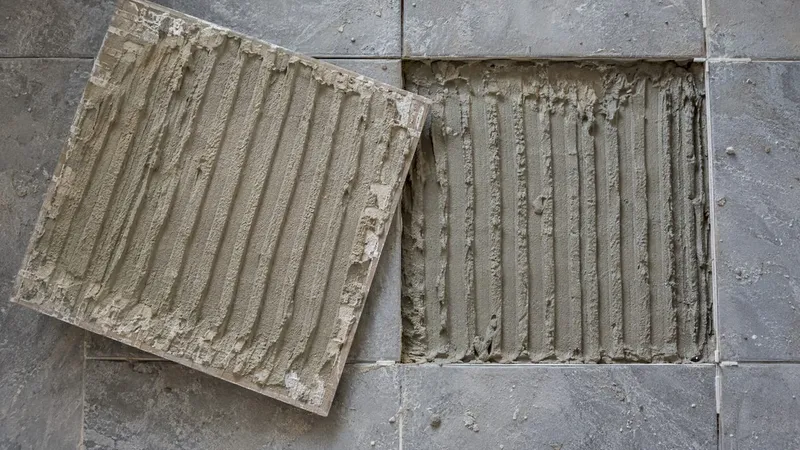
Mortar coverage matters just as much as flatness. The same handbook recommends high mortar coverage in both dry and wet areas to avoid hollow spots that fail under load over time.
Pro Tip: Lift a freshly set tile occasionally during installation and check the mortar coverage on the back before it cures. You cannot fix it afterwards.
6. Using the wrong adhesive, mortar or grout colour
Adhesive choice depends on tile type, size and substrate, and the product datasheet is the only reliable source for compatibility, not habit or what was left over from a previous job.
- Match the adhesive to both the tile material and the substrate, checking the manufacturer's datasheet rather than assuming one product suits every job.
- Lay a sample tile with your chosen grout and photograph it in the room before grouting the whole floor.
- Keep mortar coverage near the targets set out in the TCNA handbook, since wet areas need the higher end of that range to resist moisture ingress.
Grout colour in particular looks different once it has dried and been sealed, so the in-situ test matters more than the swatch card.
7. Using the wrong tools and skipping spacers
Cutting tile with the wrong blade cracks edges and wastes pieces that cannot be reordered individually from most suppliers.
- Use a wet saw with a diamond blade rated for your specific tile material, especially for porcelain or stone.
- Fit spacers consistently across the whole floor so grout lines stay uniform and movement joints line up correctly.
- Choose a wider joint for large-format tile to accommodate natural movement and reduce cracking at the edges.
- Cut the largest offcuts first and save smaller pieces for inconspicuous corners to reduce overall waste.
8. Rushing grouting, sealing and drying times
Cold or humid conditions slow curing well beyond the times printed on a product bag, and walking on tile too soon undoes days of careful work.
- Check the adhesive's open time and cure time on the datasheet rather than assuming a standard 24 hours applies everywhere.
- Allow longer cure times in cold or damp conditions, since both slow the chemical set of cement-based products.
- Seal natural stone once it is fully dry and clean, never immediately after grouting while moisture is still trapped beneath the surface.
- Press a fingernail gently into grout before allowing foot traffic. If it marks easily, it needs more time.
Humidity and temperature directly affect how quickly adhesive and grout cure, which is why the TCNA handbook treats environmental conditions as part of installation planning, not an afterthought.
9. Not accounting for delivery times, batch changes and reorder plans
Tile delivery rarely lines up perfectly with a contractor's schedule, and a late or partial shipment can stall an entire project.
- Photograph lot numbers on every box as soon as delivery arrives and store the images with your order confirmation.
- Keep the attic-stock box somewhere labelled and dry rather than buried in a garage corner where it will be forgotten.
- Order with enough lead time to match your contractor's start date, since suppliers and fitters frequently warn that late deliveries increase on-site waste and disruption, as noted in installer guidance on tile standards.
- If a batch is discontinued, use the attic stock first, match as closely as possible for visible repairs, and consider a feature strip or accent border where an exact match is impossible.
10. How our workflow reduces tile waste and reorder risk
Accurate measurement is where most of these mistakes start, so we built our workflow around combining tape measurements with laser and LiDAR scans, cross-checked against a mock layout before anything is ordered. Our room measurement guide sets out the routine we recommend for homeowners doing this themselves.
- Store sample photographs, lot numbers and supplier invoices together so nothing depends on memory months later.
- Track budget alongside quantities, so an overage calculation and a reorder cost both sit in the same place as the rest of your renovation spend, which our budget tracking workflow covers in more detail.
- Flag attic-stock reminders against the project timeline, so the spare box is never the thing forgotten in the final rush.
Homeowners using this kind of centralised logging have reported avoiding costly errors entirely, including one case where a user credited the approach with preventing roughly €20,000 in mistakes across a wider renovation.
Pro Tip: Keep every tile-related record, sample photo, lot number, invoice, in one project folder rather than split across emails, texts and a notebook.
11. Author checklist: the exact pre-order checks I use
Before ordering any tile, I run through the same short list every time:
- Measure the room twice, once with a tape and once with a laser or app-based tool, and compare the two.
- Build a rough layout mock-up and mark the focal wall before calculating quantity.
- Photograph the sample tile in situ, grouted and sealed if relevant, at two different times of day.
- Write down the lot number, supplier name and delivery date, and order one extra box as attic stock.
- Agree a realistic lead time with both the supplier and the contractor before setting a start date.
— Azai
FAQ
What are common tiling mistakes to avoid?
The most frequent errors are skipping samples, underordering without allowing for overage, and starting work before planning the layout. Poor substrate preparation and rushing cure times also cause lasting problems, as set out in the TCNA handbook.
What is the 3/4/5 rule for tiling?
The 3/4/5 rule is a method for checking that a corner is truly square before laying tile: measure 3 units along one wall, 4 along the adjoining wall, and if the diagonal between those points measures 5 units, the corner is square. It is a quick way to catch out-of-square walls before a layout mistake shows up in the finished floor.
What to do when tiles don't match?
Use attic stock first for any visible repair, since it comes from the original batch and lot number. When attic stock runs out, match as closely as possible from current stock, or consider an accent strip or border where an exact match cannot be found, as installer guidance on batch variation recommends.
What is the 1/3 rule for tiles?
The 1/3 rule is a layout guideline suggesting that staggered joints, such as in a brick-bond pattern, should offset by no more than a third of the tile's length for larger formats, rather than the traditional half offset. This reduces the risk of lippage and uneven edges that come with larger, less perfectly uniform tiles.
How much extra tile should I order?
Keep one additional box beyond that as attic stock, labelled with its lot number, for future repairs.
Sources
- Guide to TCNA tile installation standards | MosaicEnter
- TCNA installation guidance (excerpt) — substrate, mortar coverage and flatness
Key standards and guides to consult
For deeper reference, see the 2026 TCNA handbook and our measurement and layout guides.