
Before a contractor lifts a tool, secure the essentials: a verified licence and current insurance, three checked references, a written contract with material specs and milestone payments, a clear owner for permits, and lien waivers before final payment. Check them against guidance from NAHB and your state contractors board. We built House A-Z to help you plan your renovation or construction project.
TL;DR:
- California caps contractor down payments at the lesser of $1,000 or 10% of the contract price, excluding finance charges; check local limits before signing.
- Require every change order to state its scope, cost, and schedule impact, and obtain signatures from both sides before any changed work begins.
- Have the contract name the permit holder, verify status with the issuing agency, and collect inspection certificates before releasing the next payment.
- For homes built before 1978, ask the local permitting office whether lead safe renovation rules apply when work disturbs regulated surfaces.
- Walk the completed job with the contractor, document unfinished or faulty work, and sign acceptance only after every listed defect is fixed.
Table of Contents
- What belongs in the written contract?
- Who obtains permits, and how do you check inspections?
- How should you structure payments and change orders?
- Which insurance documents should you collect, and what about site safety?
- What should a pre-start meeting cover?
- What should the final walkthrough and handover include?
- How do you orient a contractor on project tools and communication rules?
- What does the House A-Z platform offer for collaboration?
- What security and privacy checks should contractors pass on digital platforms?
- What training do contractors need to use integrated tools well?
- How do you onboard subcontractors and coordinate them?
- How do you monitor compliance and quality during the project?
- Why does being organised protect you most?
- Ready to keep your onboarding paperwork in one place?
- FAQ
- Sources
What belongs in the written contract?
The contract is your main legal protection, and Connecticut's consumer protection department says as much. The California contractors board requires written, signed contracts for home improvement work, and its consumer guide sets out what each one should contain. Make sure yours covers:
- The contractor's contact details and licence number
- The full scope of work, in plain language
- Materials listed by brand, model and colour
- Start and completion dates
- A payment schedule tied to milestones
- Warranty terms
- A change-order procedure
Down payments deserve special attention. Rules differ by place: in California, the cap is the lesser of $1,000 or 10% of the contract price, excluding finance charges, according to the state contractors board. Large upfront sums that are not linked to milestones are a red flag, so check your own jurisdiction's limit.
Follow this order when you sign:
- Read every page, including the small print.
- Ask the contractor to explain anything vague.
- Sign only when the scope, materials and dates are filled in.
- Keep a complete copy of every signed page.
- Never allow work on a change until its order is signed.
Our guide to comparing renovation quotes helps you read estimates before they become contracts.
Who obtains permits, and how do you check inspections?
In practice, contractors usually apply for permits and coordinate inspections. Montgomery County's Office of Consumer Protection advises homeowners to confirm the contract assigns that duty, so it never lands on you by accident. New York City's model contract goes further and includes a permit disclosure for exactly this reason.
Put these steps into your routine:
- Name the permit holder in writing in the contract.
- Ask to see the permit and have a copy posted on site.
- Check permit status with your local issuing agency.
- Book inspections before you release the next payment.
- Collect every certificate of inspection for your job file.
Older homes can bring extra rules. In the US, Montgomery County's guidance notes that for pre-1978 houses, contractors must verify compliance with lead-safe renovation requirements if work disturbs specified surface areas. Local rules vary, so ask your permitting office what applies to you.
How should you structure payments and change orders?
Tie money to proof. Progress payments should follow completed, verifiable stages rather than calendar dates, as the Connecticut guidance recommends. A fair plan might release funds after the slab is poured, after framing passes inspection, and so on. Our construction payment schedule templates show how to lay that out.
Change orders are where budgets quietly collapse. Verbal agreements lead to runaway costs, so insist on these habits:
- Every change is written down, stating scope, cost and schedule impact, and signed before work starts.
- Subcontractors and suppliers provide lien waivers before you make the final payment, because unpaid trades can place a mechanic's lien on your home.
- You pay by traceable methods such as cheque or card, never cash, and you keep every receipt.
The Iowa Attorney General also recommends written change orders and lien waivers to reduce risk.
Pro Tip: Photograph the completed stage before approving each payment. A dated picture settles disagreements fast.
Which insurance documents should you collect, and what about site safety?
Ask for certificates of insurance covering general liability and workers' compensation, and verify them directly with the insurer. This matters because homeowners can be held liable for job-site injuries when a worker is uninsured, as NAHB explains.
Add these points to your checklist:
- Confirm that coverage extends to subcontractors where required.
- Ask your own insurer whether the contractor should name you as additional insured, and request it only when advised.
- Agree working hours, dust control and hazardous material handling in writing.
- Require regular site housekeeping, so walkways and storage areas stay clear.
Clear safety rules protect your family, your neighbours and your schedule.
What should a pre-start meeting cover?
A short meeting before work begins prevents a surprising number of arguments later. Builders' groups such as the Pennsylvania Builders Association recommend a pre-construction meeting to align expectations and communication. Use this agenda:
- Confirm the scope of work and the final drawings.
- Walk through milestones and the payment schedule.
- Restate who holds the permits.
- Agree delivery and storage arrangements. For bulky deliveries, this HIAB offload checklist is a useful model.
- Set daily contact times and an emergency procedure.
- Name one primary contact and one escalation contact on each side.
Log every decision in a job file, ideally digital. Our contractor meeting agenda gives you a copyable version.
What should the final walkthrough and handover include?
Walk the finished work with the contractor and write a punch list of anything unfinished or faulty. Sign acceptance only after defects are fixed. Then gather the documents that protect you long after the vans have gone:
- Manufacturer warranties and operating instructions
- Certificates of inspection
- Lien waivers from the contractor and every subcontractor
- Proof that suppliers and subcontractors have been paid
The Iowa Attorney General advises written protections against liens, and the sample California contract carries lien warnings for good reason. Hold the final payment until every item is in your hands. Our renovation handover checklist lists the four documents worth protecting.
How do you orient a contractor on project tools and communication rules?
A contractor who knows how you communicate causes fewer surprises. Plan an orientation early in the project, either on site or by video call, and treat it as part of onboarding, not a favour.
Cover these points:
- Where information lives: one shared folder or platform for the contract, drawings, permits, photos and receipts. Nothing important should live only in a text thread.
- How questions are asked: decide whether quick questions go by message and decisions go in writing. A good rule is that anything affecting cost or schedule gets written down promptly.
- Who answers what: your primary contact handles day-to-day items, and the escalation contact handles disputes or delays.
- Rhythm of updates: a short weekly summary of progress, upcoming deliveries and open decisions keeps everyone aligned.
Show the contractor how to use the platform to coordinate project tasks. Ask them to repeat the steps back to you. If they need help, a short demonstration now can save confusion later.
Finally, agree what happens when someone is unreachable. A backup number and a clearly stated response time can stop small gaps from stalling the whole site.
What security and privacy checks should contractors pass on digital platforms?
Putting contracts, plans and payment records online is convenient, but only if everyone treats the data carefully. Run through this checklist with each contractor before inviting them in:
- Separate logins: every person gets their own account. Shared passwords make it impossible to know who changed what.
- Strong passwords and two-step sign-in: ask contractors to switch these on where available.
- Role-based access: share only what each person needs. A tiler does not need your insurance paperwork or bank details.
- Device hygiene: work phones and laptops should have screen locks and current updates.
- Careful sharing: share documents only with the people who need them.
- Photo awareness: site photos can reveal your address, alarm panel or valuables, so share them only within the project space.
- End-of-job clean-up: remove access for contractors and subcontractors when their work finishes.
Also ask what a contractor does with your information. Reasonable answers are simple: they use it for the job, they do not pass it on, and they delete or return it afterwards.
Keep your own originals. A digital job file should back up your paper copies, not replace them, particularly for signed contracts and lien waivers.
What training do contractors need to use integrated tools well?
Most contractors need very little formal training, but they do need a clear first run. Think of it as a short induction, not a course.
Start with the basics, each of which takes minutes:
- Logging in and finding the current drawings and schedule
- Uploading progress photos with a short note
- Raising a change request with a cost and time estimate
- Marking a milestone as ready for review
Then match the effort to the person. A site lead who will update the schedule daily needs a proper walkthrough. A specialist who visits twice, such as an electrician or glazier, needs a one-page instruction sheet.
Useful resources are usually simple: a short screen recording you make yourself, a printed checklist taped inside the site office, and a named person to call when something does not work. Our blog also hosts templates such as the renovation procurement log, which shows how to track ordering and lead times in one shared sheet.
Be patient and be specific. Telling a contractor "use the app" produces patchy results, while "upload one photo per room by Friday" produces a usable record. If a contractor still resists the tools after a fair introduction, that tells you something about how they will handle the rest of the paperwork too.
How do you onboard subcontractors and coordinate them?
Subcontractors are often where small problems become expensive ones, because they arrive in sequence and rarely meet each other. The Canadian Home Builders' Association lists subcontractor use among the questions to ask any renovator, and the answer shapes everything below.
Follow these steps:
- Get the list early: the sample California contract includes a subcontractor list, so ask for names before work begins.
- Check each trade: repeat the licence and insurance checks for subcontractors. Their coverage should be confirmed, not assumed.
- Brief them on the rules: share site hours, safety expectations, the change-order process and your communication routine.
- Agree the sequence: a simple schedule showing who works when, and what must be finished before the next trade arrives, prevents clashes.
- Confirm deliveries: decide who orders materials and who receives them. Our procurement log helps you track lead times so nothing stalls the site.
- Collect lien waivers as you go: ask for them at each stage, not only at the end.
Your contractor should manage their own subcontractors, but you should still see the plan. Ask for a weekly look-ahead of who is on site and what is arriving. When something slips, the look-ahead tells you which trades are affected before they turn up to an unfinished room.
How do you monitor compliance and quality during the project?
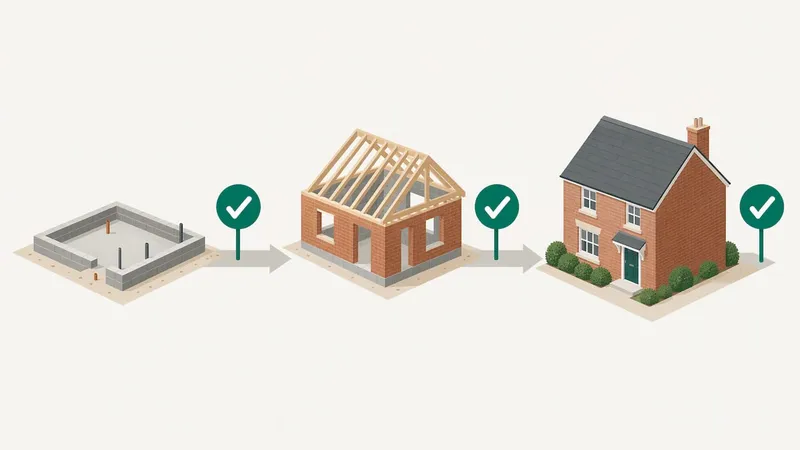
Onboarding does not end on day one. The best protection is a steady routine of small checks that catch problems while they are cheap to fix.
Use these methods:
- Milestone sign-offs: inspect each stage against the contract before paying. If the work does not match the written scope, say so in writing.
- Inspection records: confirm that required inspections are booked and passed, and file the certificates.
- Photo log: ask for dated photos of hidden work, such as wiring and plumbing, before walls are closed.
- Weekly site visits: walk the site with your primary contact and note anything that looks off.
- Material checks: compare deliveries with the brand, model and colour written in the contract. Michigan's consumer guide also recommends keeping a job file with contracts, permits and photos.
- Contingency tracking: the same guide advises planning budget contingencies, 10% for large projects and 5% for small ones, so watch how much you are drawing down.
Keep notes factual and dated. If a disagreement ever arises, a clean record of what was agreed, what was delivered and when you raised concerns is worth more than any memory. Should a serious dispute emerge, state programmes such as the Massachusetts Home Improvement Contractor Program describe complaint processes and guaranty funds, so check what your region offers.
Why does being organised protect you most?
Most renovation stress comes from missing paperwork and unclear promises, not from bad luck. In my work with House A-Z, I see first-time builders relax once the contract, permits and payments sit in one tidy file. Being organised does not remove every risk, but it shrinks the ones you can control.
— Azai
Ready to keep your onboarding paperwork in one place?
We built House A-Z to help you plan your home renovation or construction project. Start with our Free plan, or see Pro and Enterprise pricing when you need contractor collaboration and property management tools. Open the platform at A-z and set up your first project today.
FAQ
What is the first thing to check when onboarding a contractor?
Start with their licence or registration and proof of insurance. Check the licence with your local or state licensing board and confirm insurance certificates directly with the insurer, as NAHB advises.
Who is responsible for getting building permits?
Usually the contractor applies for permits, but the contract should say so explicitly. Montgomery County's consumer protection office recommends confirming this in writing so responsibility does not fall on you.
How should I pay a contractor?
Pay in stages tied to completed, verifiable work, not to calendar dates. Connecticut's consumer protection guidance treats large upfront payments that are not milestone-linked as a red flag.
Why do I need lien waivers?
Lien waivers show that subcontractors and suppliers have been paid, which protects you from mechanic's liens on your property. Collect them from everyone before you make the final payment.
Can I handle contractor onboarding paperwork digitally?
Yes. A shared digital job folder for contracts, change orders, permits, photos and receipts keeps everything findable. We built House A-Z to help with home renovation and construction planning.
Sources
Treat verification as paperwork you collect, not a feeling you get from a friendly handshake. NARI is blunt on this point: likability is not competence. Credentials, detailed plans and a willingness to explain technical choices are the real signals.
Work through these checks in order:
- Cslb
- How to Hire a Home Improvement Contractor - Office of Consumer Protection - Montgomery County, MD
- Contracting and Working With a Home Improvement Contractor
Pro Tip: Ask each reference what went wrong and how it was fixed. How a contractor handles problems tells you more than a spotless story.