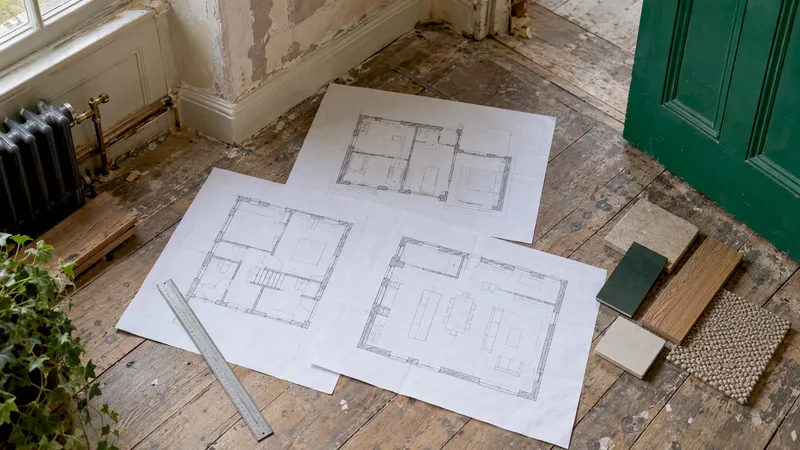
A material takeoff is a list of every material your project needs, with a measured quantity for each, taken straight from the plans. You do it before you price anything, because every quote, order and budget line rests on those quantities. For a first-time builder or renovator, it is the step that turns "we want a new kitchen" into "we need 14 m² of floor tile, 38 m of skirting and 22 sockets". With House A-Z you can keep those numbers, your budget and your contractor conversations in one place instead of scattered across spreadsheets.
This guide explains the idea in plain words, walks through the method step by step, and shows where beginners most often go wrong.
TL;DR
- A material takeoff lists each material and its measured quantity from your drawings. It is not a price list, and it comes before the estimate.
- Measure in three ways: area (m²), length (m) and count (each). Convert to the unit the supplier sells.
- Add a waste allowance by material, not one blanket percentage. Cofer Brothers gives a general range of 5 to 15%.
- Check every line: scale, missed sheets, duplicates, units and conflicts between drawings and schedules.
- Keep takeoff, prices and orders linked so a change on one page updates the budget.
Table of Contents
- What a material takeoff is
- Takeoff versus estimate: where the money comes in
- What you need before you start
- Step by step: how to do a material takeoff
- The mistakes that cost beginners most
- From takeoff to budget and orders
- Where House A-Z fits
- FAQ
- Sources
What a material takeoff is
The name is literal. You "take off" measurements from a set of drawings and turn them into a list of materials. You will also see it called a quantity takeoff, QTO or MTO. In everyday use the terms overlap. Strictly, a quantity takeoff measures the work (square metres of wall, cubic metres of concrete), while a material takeoff turns that into the products you must buy: plasterboard sheets, bags of adhesive, lengths of timber.
What it gives you:
- A shopping list with numbers. Each item has a description, a unit and a quantity.
- A basis for supplier quotes. Merchants and tradespeople can only price fairly when everyone is quoting against the same quantities.
- A budget foundation. If the quantity is wrong, the cost is wrong, however good the unit price.
Professionals in the UK often go one step further and produce a bill of quantities, a formal list of items with firm quantities for a contract. RICS, the chartered body for surveyors, publishes the NRM 2 rules for detailed measurement of building works, which set out how a bill of quantities is described and measured. Homeowners do not need to master those rules, but our NRM2 bill of quantities guide for homeowners shows how the same thinking cuts hidden costs.
Takeoff versus estimate: where the money comes in
People mix these up all the time, and it causes real budget trouble.
| Material takeoff | Estimate | |
|---|---|---|
| Question answered | How much of each thing do I need? | How much will it all cost? |
| Main content | Items, units, quantities | Takeoff plus prices, labour, equipment, overheads |
| Comes | First | Second |
| Typical mistake | Missed items, wrong units | Using a price on the wrong quantity |
Some takeoffs include supplier rates and some do not, so when someone hands you one, ask whether it is quantities only or quantities with prices. The safest habit is to keep the two layers separate in your own records: quantities in one column, prices in another. Then when a tile price changes, you change one cell and the quantity stays trustworthy.
If you want a worked view of how quantities become a budget on a new home, see our practical UK guide to new build material cost estimating.
What you need before you start
Gather these first. A takeoff is only as good as the documents behind it.
- Drawings. Floor plans, elevations, sections and any structural drawings. Check each sheet carries a revision date, and use only the latest.
- Specification or schedule of finishes. It tells you which product goes where. A single "floor area" is not enough if the bathroom has porcelain tile, the hall has engineered oak and the utility has vinyl.
- Existing site dimensions. For renovation, the drawings may be old or missing, so measure the rooms yourself. Our guide to measuring a room accurately with tape, laser or LiDAR covers the checks that stop a 2 cm slip becoming a wasted pack of flooring.
- A way to record. A spreadsheet works for a tiny job. For anything with several rooms, trades and revisions, a single planning tool saves you from version chaos.
- Your selections. Decide products early. Our materials selections schedule for first-time builders lays out when choices need locking so quantities do not keep shifting.
Step by step: how to do a material takeoff
1. Read the whole drawing set before you measure
Skim every sheet, notes and legends included. Look for repeated rooms, standard details, what is existing and what is new, and any note that changes a finish or thickness. Five minutes here prevents rework later. If a drawing has revision clouds or a changed date in the title block, find out what changed.

2. Check the scale
Never trust a printed scale blindly, because drawings get resized when printed or exported to PDF. Find one dimension you know, such as a door width or a written room dimension, and confirm your measurement matches. Do this for each sheet.
3. Break the job into trades and rooms
Work trade by trade (groundworks, structure, first fix, plastering, flooring, decoration) and room by room inside each trade. This gives every line a home and makes it easy to spot a gap. If the kitchen has no line for plaster or paint, you have just found an omission.
4. Measure in the three basic ways
Almost every line falls into one of these:
- Area (m²): floors, walls, ceilings, tiling, plasterboard, insulation. Length multiplied by width, minus openings where they matter.
- Linear (m): skirting, architrave, pipework, cables, edge trim, guttering. Add up lengths or measure a perimeter.
- Count (each): sockets, doors, radiators, taps, light fittings. Count and cross-check against any schedule on the drawings.
For volumes such as concrete or screed, multiply length by width by depth, keeping all three in the same unit (metres) before you convert to cubic metres. This area, length and volume approach is also how Cofer Brothers' renovation material guide lays out the calculations.
Worked example. A bathroom floor is 2.4 m by 1.9 m: 4.56 m². The wall tiling runs 1.2 m high around a 2.4 + 1.9 + 2.4 + 1.9 = 8.6 m perimeter, less a 0.8 m door opening, so 7.8 m × 1.2 m = 9.36 m². Skirting or edge trim is the 7.8 m of wall length. Taps, basin, toilet and radiator are counted as items. Four measurements, three units, one tidy list.
Some quantities depend on system sizing rather than simple geometry. Heating and ventilation are the classic case, because the equipment you need follows a heat-loss calculation, not a floor area alone. HVAC load calculation explained for homeowners shows how that sizing works, so you can count the right units rather than guessing.
5. Convert to the unit you buy
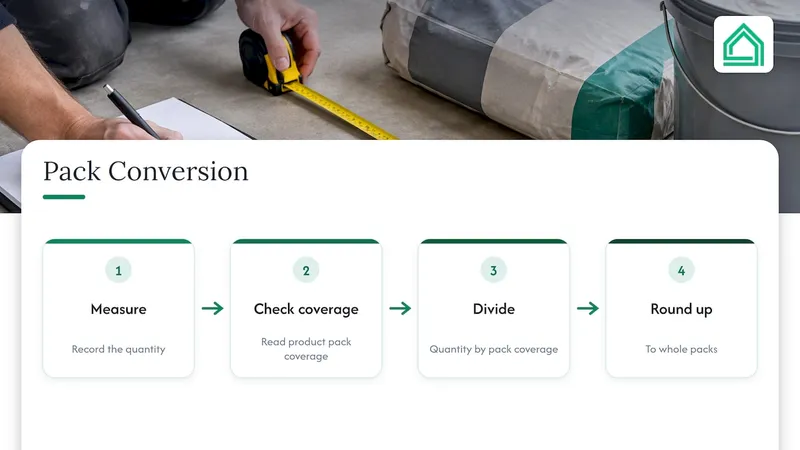
You measure floor in m², but tile is sold in boxes, plasterboard in sheets, adhesive in bags and timber in lengths. Divide your quantity by the coverage per pack and round up to whole packs. Always check the pack coverage printed on the product page, as it differs between ranges.
Fittings need the same care. A count of "one basin" is not finished until you know which waste, trap and connection sizes go with it. A UK retailer's guide to basin waste sizes and limits is a good example of the small specification details that turn into returned parts when they are missed.
6. Add a waste allowance
Cutting, breakage and pattern matching mean you never use exactly what you measure. Cofer Brothers gives a general allowance of 5 to 15%, with tile at 10% and drywall at 5% as examples. The key point is that the percentage belongs to the material and the layout, not to the whole job.
| Material | Why waste varies | Allowance approach |
|---|---|---|
| Floor tile | Cuts at edges, breakage | Around 10% as a starting point; more for diagonal layouts |
| Plasterboard | Offcuts around openings | Around 5% as a starting point |
| Patterned wallpaper or flooring | Pattern matching | Higher; check the pattern repeat |
| Concrete | Spillage, uneven ground | Allow a small margin and confirm with the supplier |
Show the allowance as its own column, not buried inside the quantity. Then you can see what was measured and what was added, and you can trim it when the layout is settled.
7. Record where each number came from
Next to every line, note the drawing sheet or the room measurement it came from. When someone queries a number three weeks later, you can find it in a minute. This is also why good document habits matter: see our guide to construction document control.
The mistakes that cost beginners most
Most takeoff errors are boring. That is good news, because boring errors are catchable.
- Wrong scale. Calibrate every sheet against a known dimension.
- Missed sheets. Tick off each drawing as you finish it.
- Double counting. A room shown on two plans, or a wall measured from both sides, gets counted twice.
- Unit slips. Millimetres treated as metres, m² treated as m, or boxes confused with m².
- Ignored revisions or addenda. A later drawing changes the wall build-up and your list is already out of date.
- Schedule mismatch. The drawing shows 12 sockets and the electrical schedule says 14. Do not pick one silently: ask the designer or contractor to confirm in writing.
- One waste figure for everything. Set it per material.
- Forgetting the small stuff. Fixings, sealant, primer, trims, adhesive and levelling compound are easy to miss and add up.
A simple final review catches most of this. Go trade by trade, compare each quantity with a similar past job or a rule of thumb, investigate anything that looks odd, and look for duplicates. When quotes arrive, line them up against your takeoff; our bid leveling guide shows how to compare like for like.
From takeoff to budget and orders
A takeoff that sits in a drawer helps nobody. Its value shows when you connect it to three things:
- Prices. Apply real product prices to each line to get a costed budget. Our four-step budget workflow shows how to keep that budget honest as the job runs.
- Orders. Lead times matter as much as quantities. A procurement log tells you what to order, when and from whom: see our renovation procurement log and 2 to 4 week rules.
- People. Contractors, partners and suppliers should all work from the same current version. Our contractor onboarding checklist helps you set that up from day one.
FAQ
What is a material takeoff in simple terms?
It is a measured list of every material a job needs, taken from the drawings. Each line has an item, a unit and a quantity. It tells you how much to buy, and it comes before the cost estimate.
Why is it called a takeoff?
Because you take off, or lift, the measurements from the plans and turn them into a list. The word describes the action of pulling dimensions from drawings. Quantity takeoff and material takeoff are used almost interchangeably in everyday building talk.
How much extra material should I order?
It depends on the material. A general range is 5 to 15%, with tile at around 10% and plasterboard at around 5%, and patterns or diagonal layouts need more. Set the allowance per material and confirm with your supplier.
Do I need a takeoff for a small renovation?
Yes, but a small one. Even a single bathroom benefits from a line-by-line list of tiles, adhesive, fittings and trims, because small omissions are the ones that delay a job. It also gives each tradesperson the same numbers to quote against.
Sources
- Cofer Brothers: The Steps to Accurate Material Estimation for Renovation
- RICS: NRM 2 detailed measurement for building works